Router Configuration
Teltonika RUTM51 — Configuration Guide
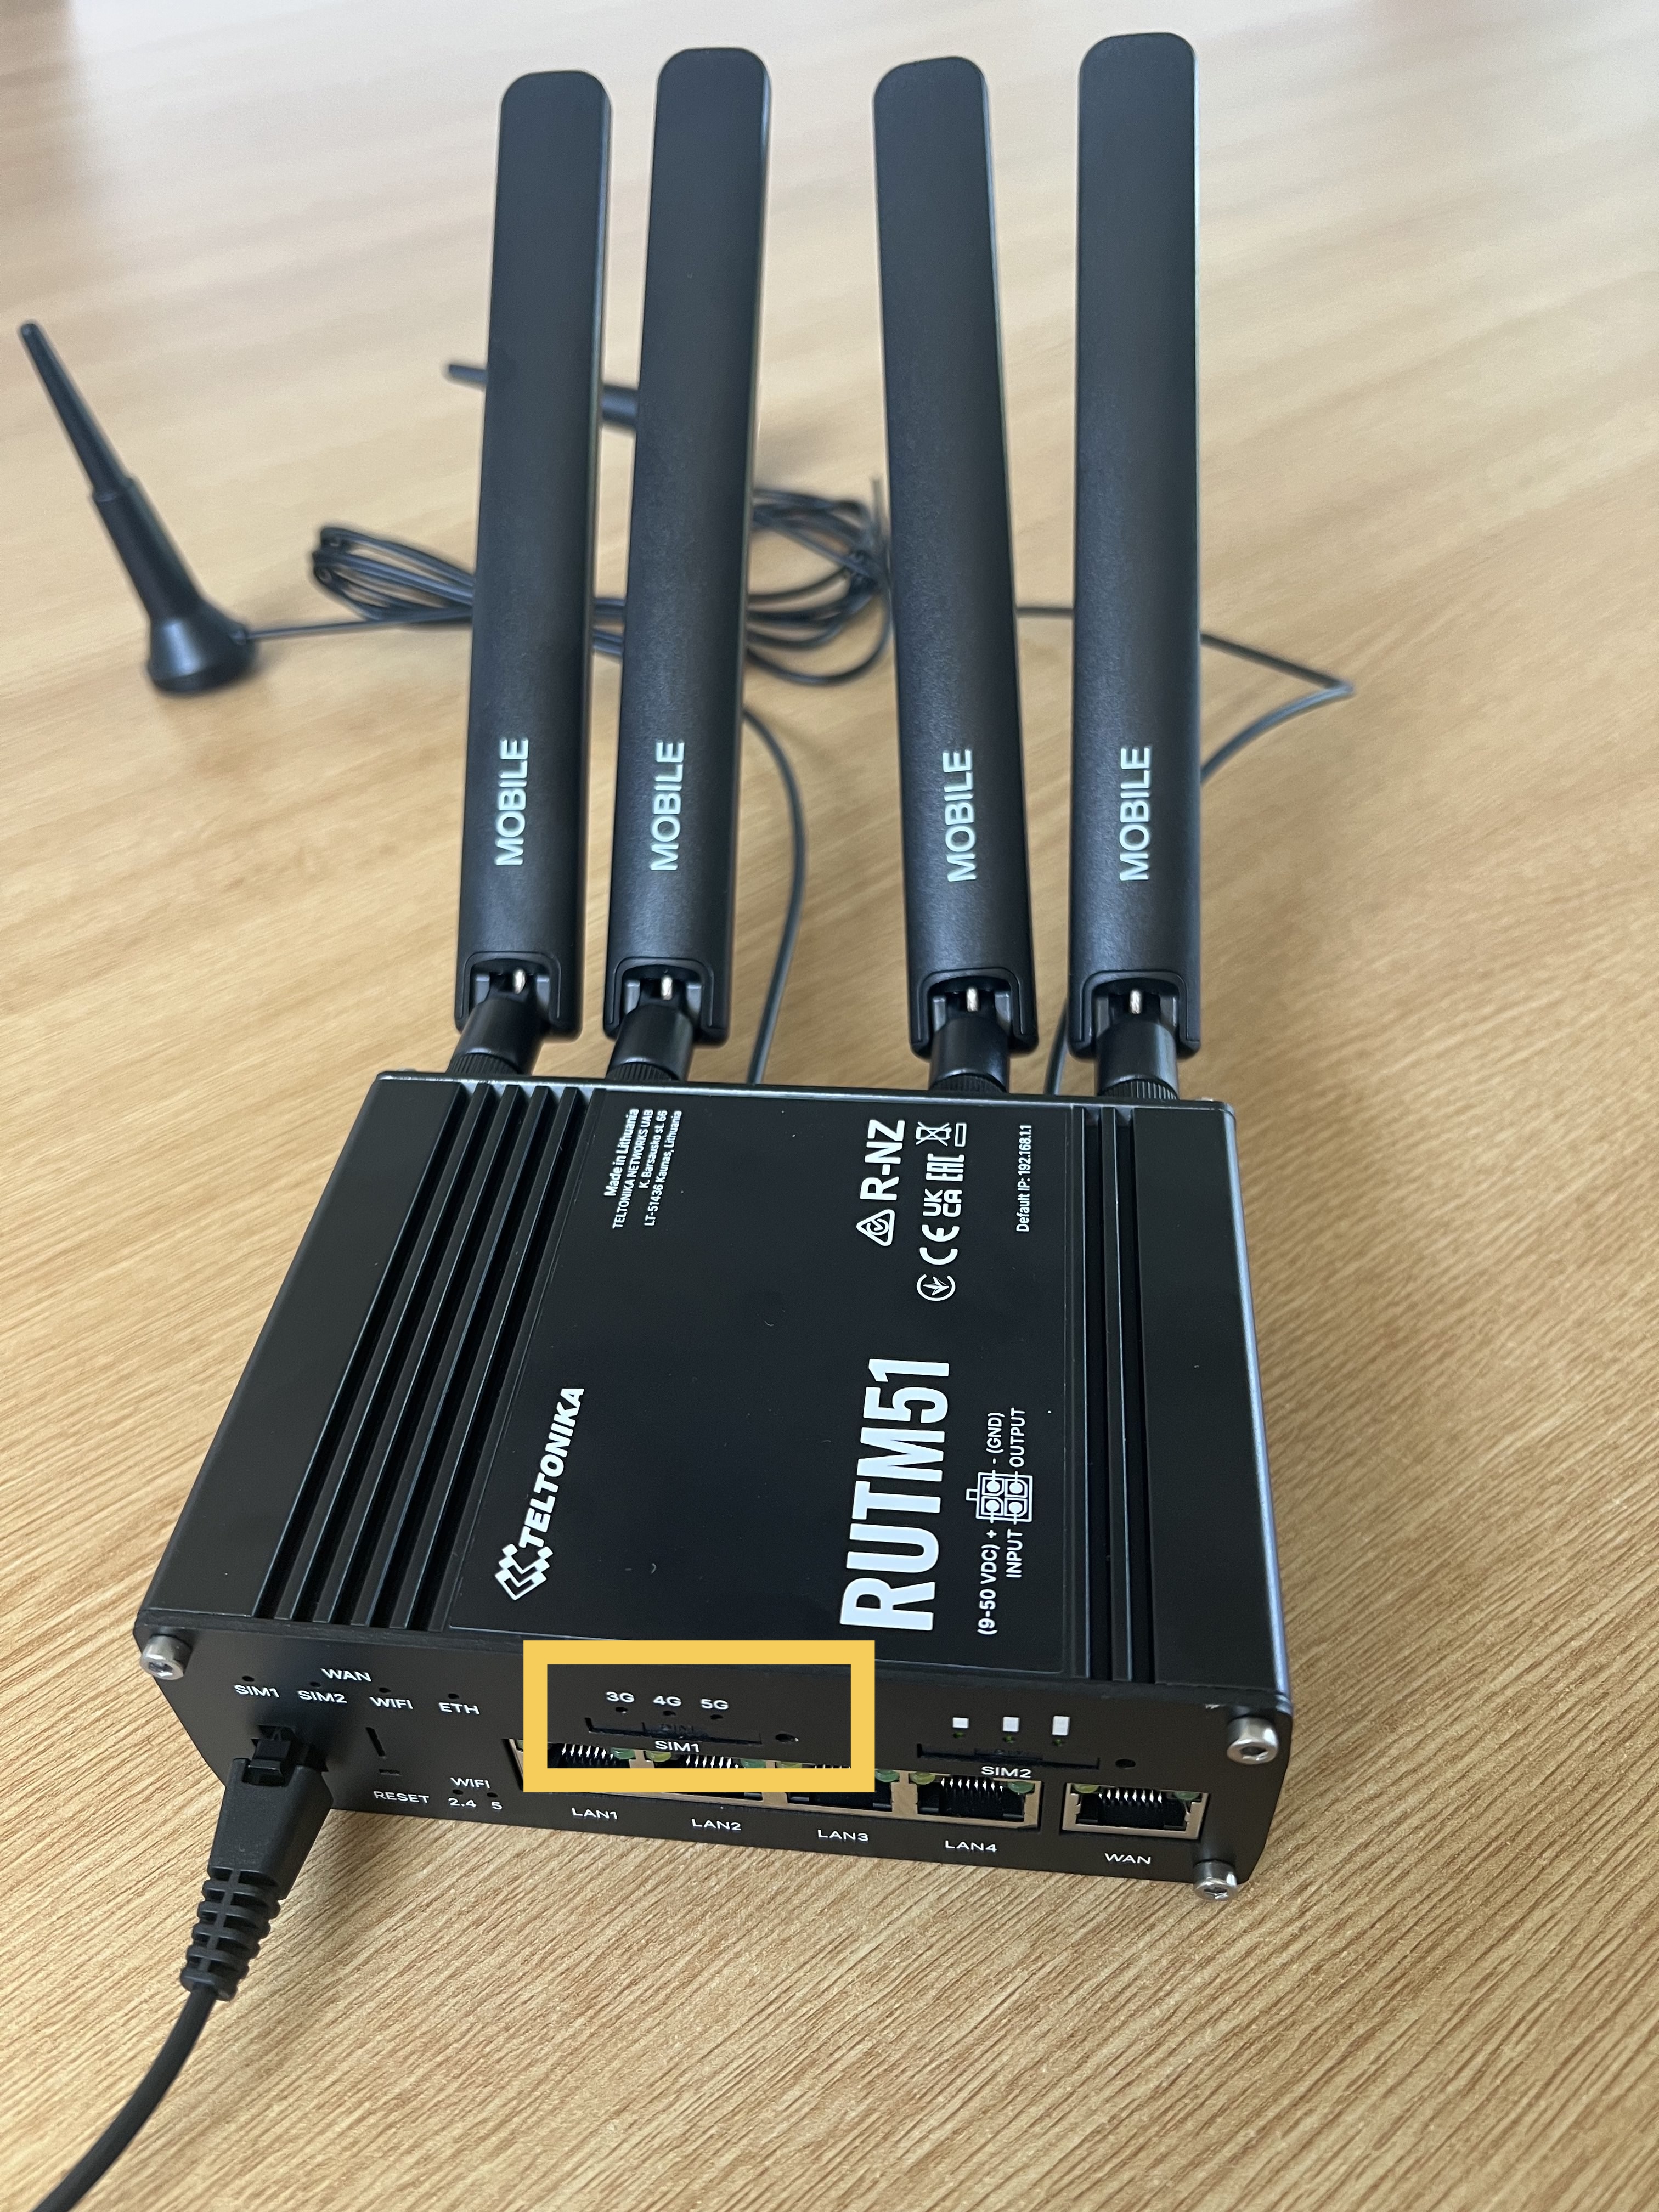
Step 1: Unbox and Insert SIM
Unpack the router, verify all components (router, power cable, and SIM trays), and install the SIM card. The device requires a NANO SIM — the smallest cut from the SIM's original housing. The SIM tray fits only one way.
Step 2: Reassemble and Note Key Information
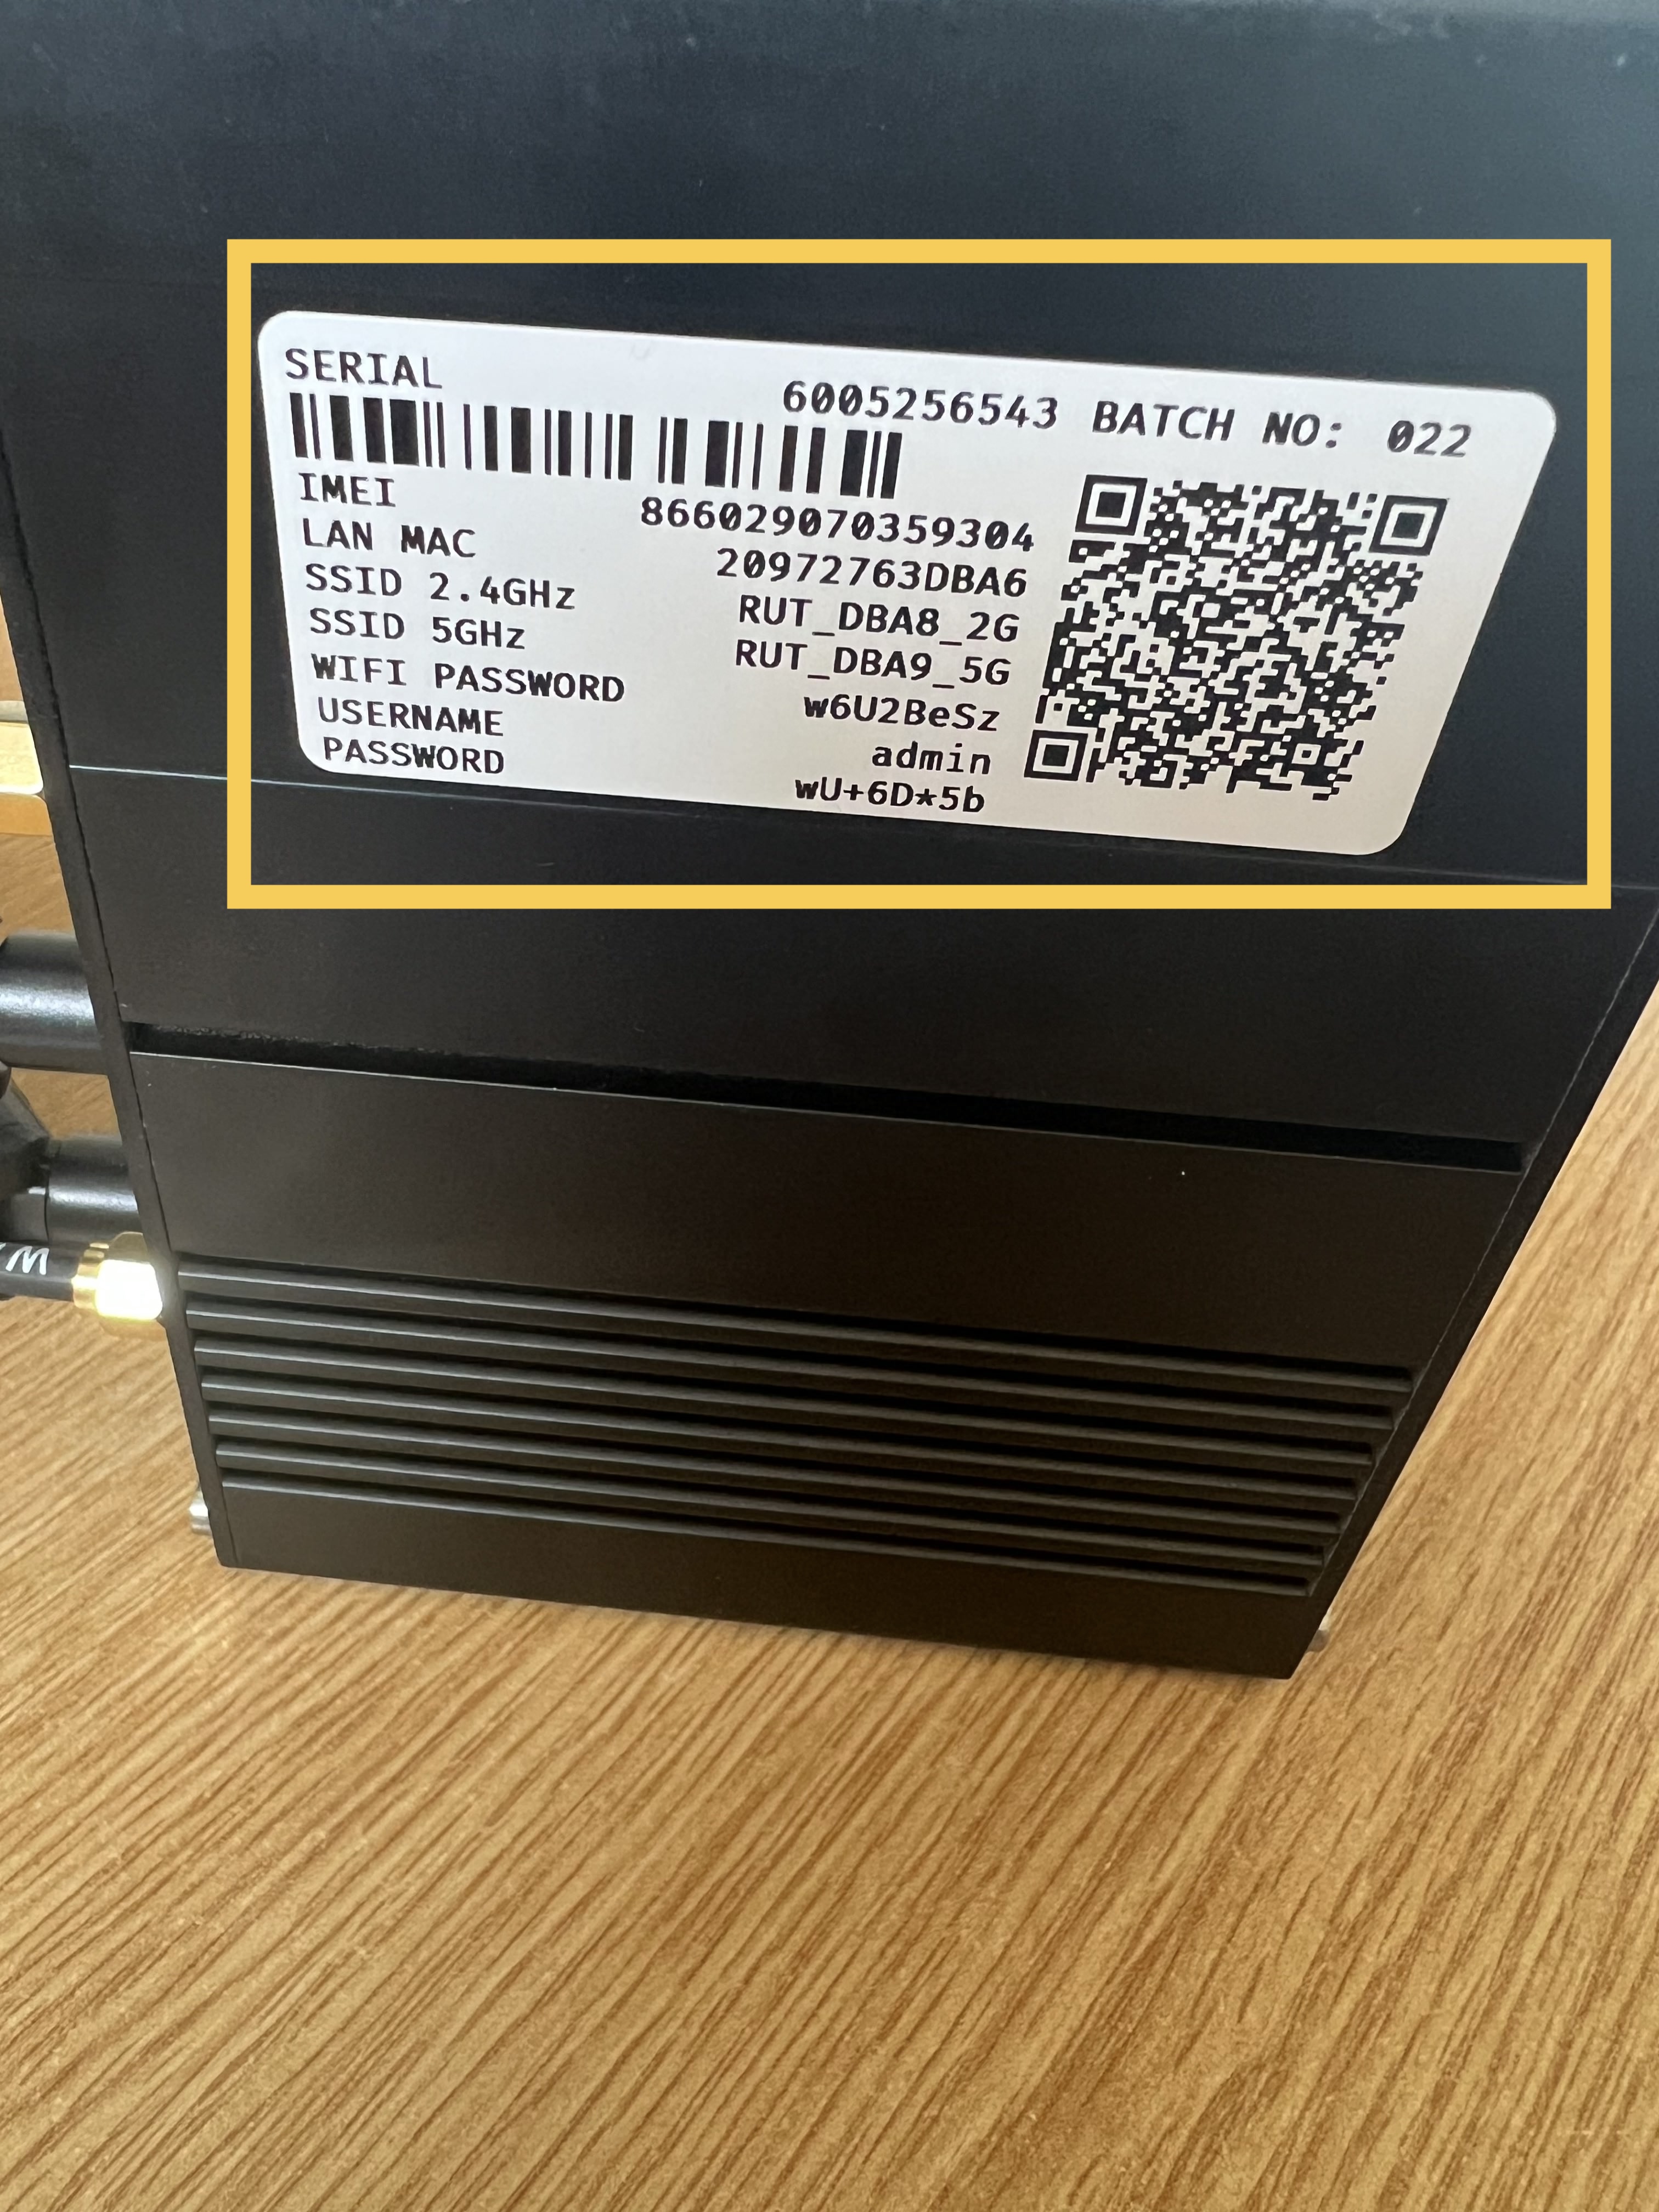
After inserting the SIM, push the tray back into place and record the information from the device sticker (typically on the back).
| Item | Description | Example |
|---|---|---|
| SSID (2.4GHz + 5GHz) | Wi-Fi network name | RUT_DBA8_2G |
| WiFi Password | Required for device connection | w6U2BeSz |
| WebUI IP | Access address for configuration portal | http://192.168.1.1 |
| Admin Password | Login credential (case-sensitive) | wU+6D*5b |
Step 3: Power On and Connect to WiFi
- Power on the device.
- Locate the Teltonika Wi-Fi network on your device.
- Enter the WiFi password from the sticker.
You must connect to the router's WiFi before you can log in and access its settings.
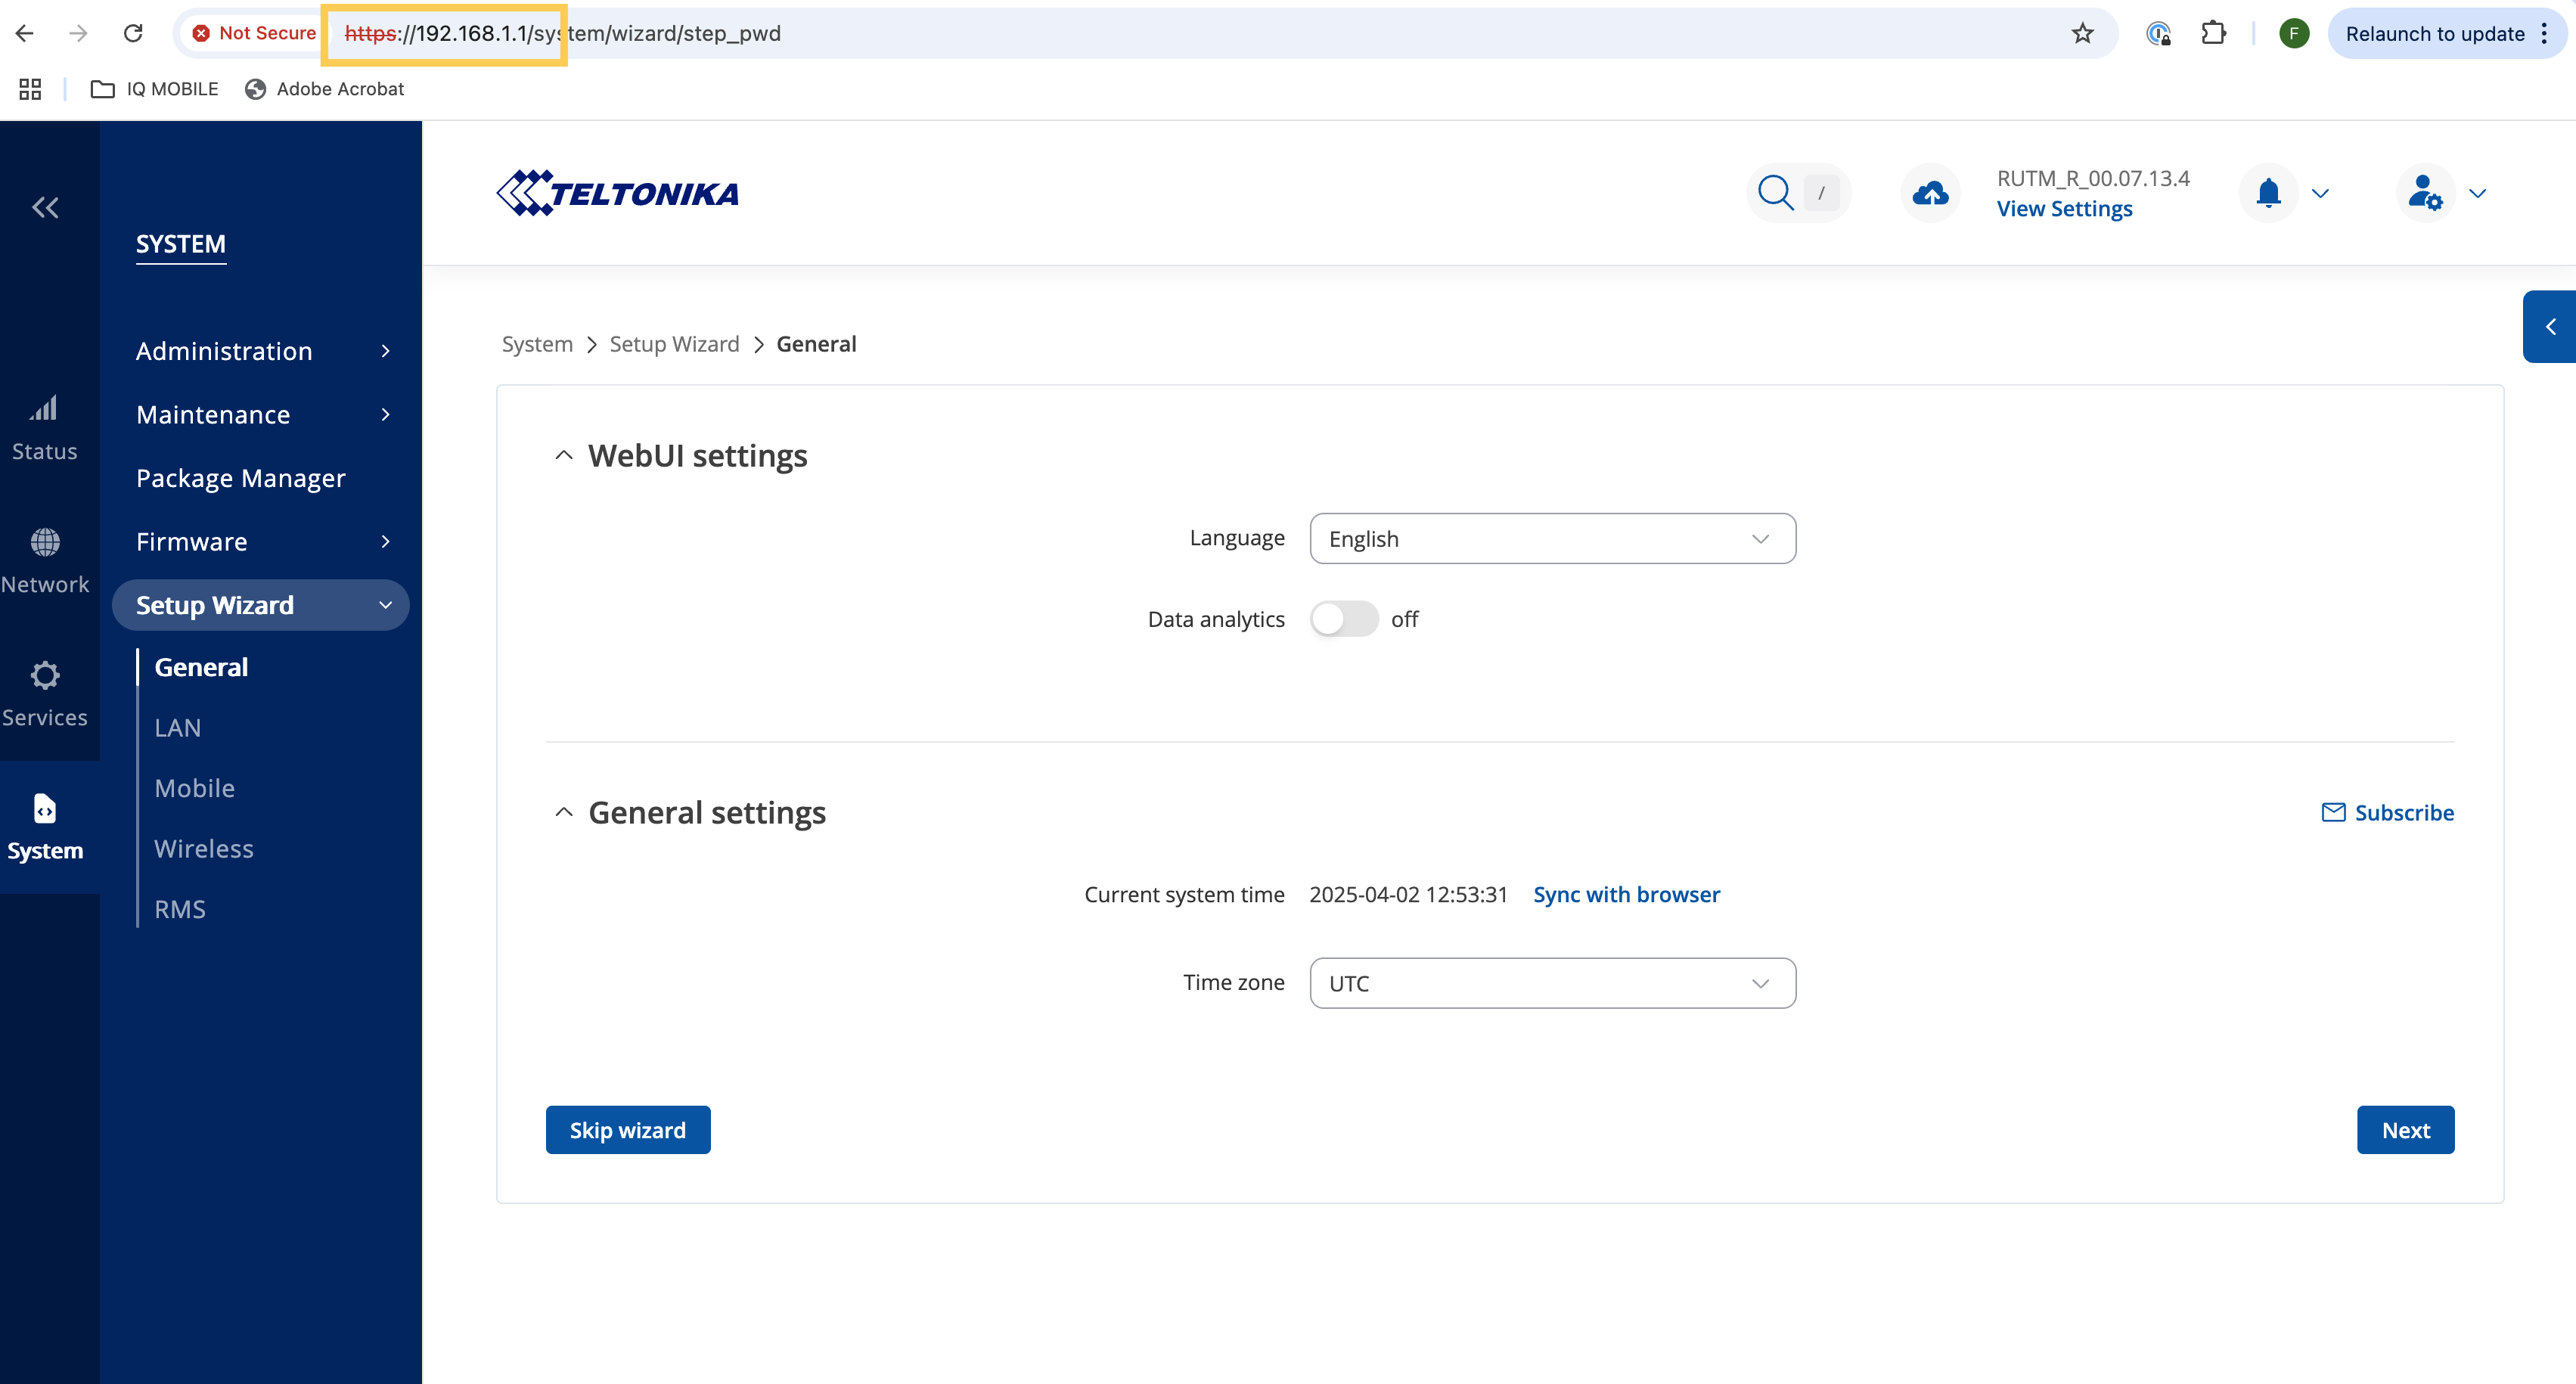
Step 4: Access Web Interface
- Enter
http://192.168.1.1in the address bar of any web browser (not a search query). - Log in with the admin password from the sticker.
- Change the password upon first login.
- Complete the setup wizard.
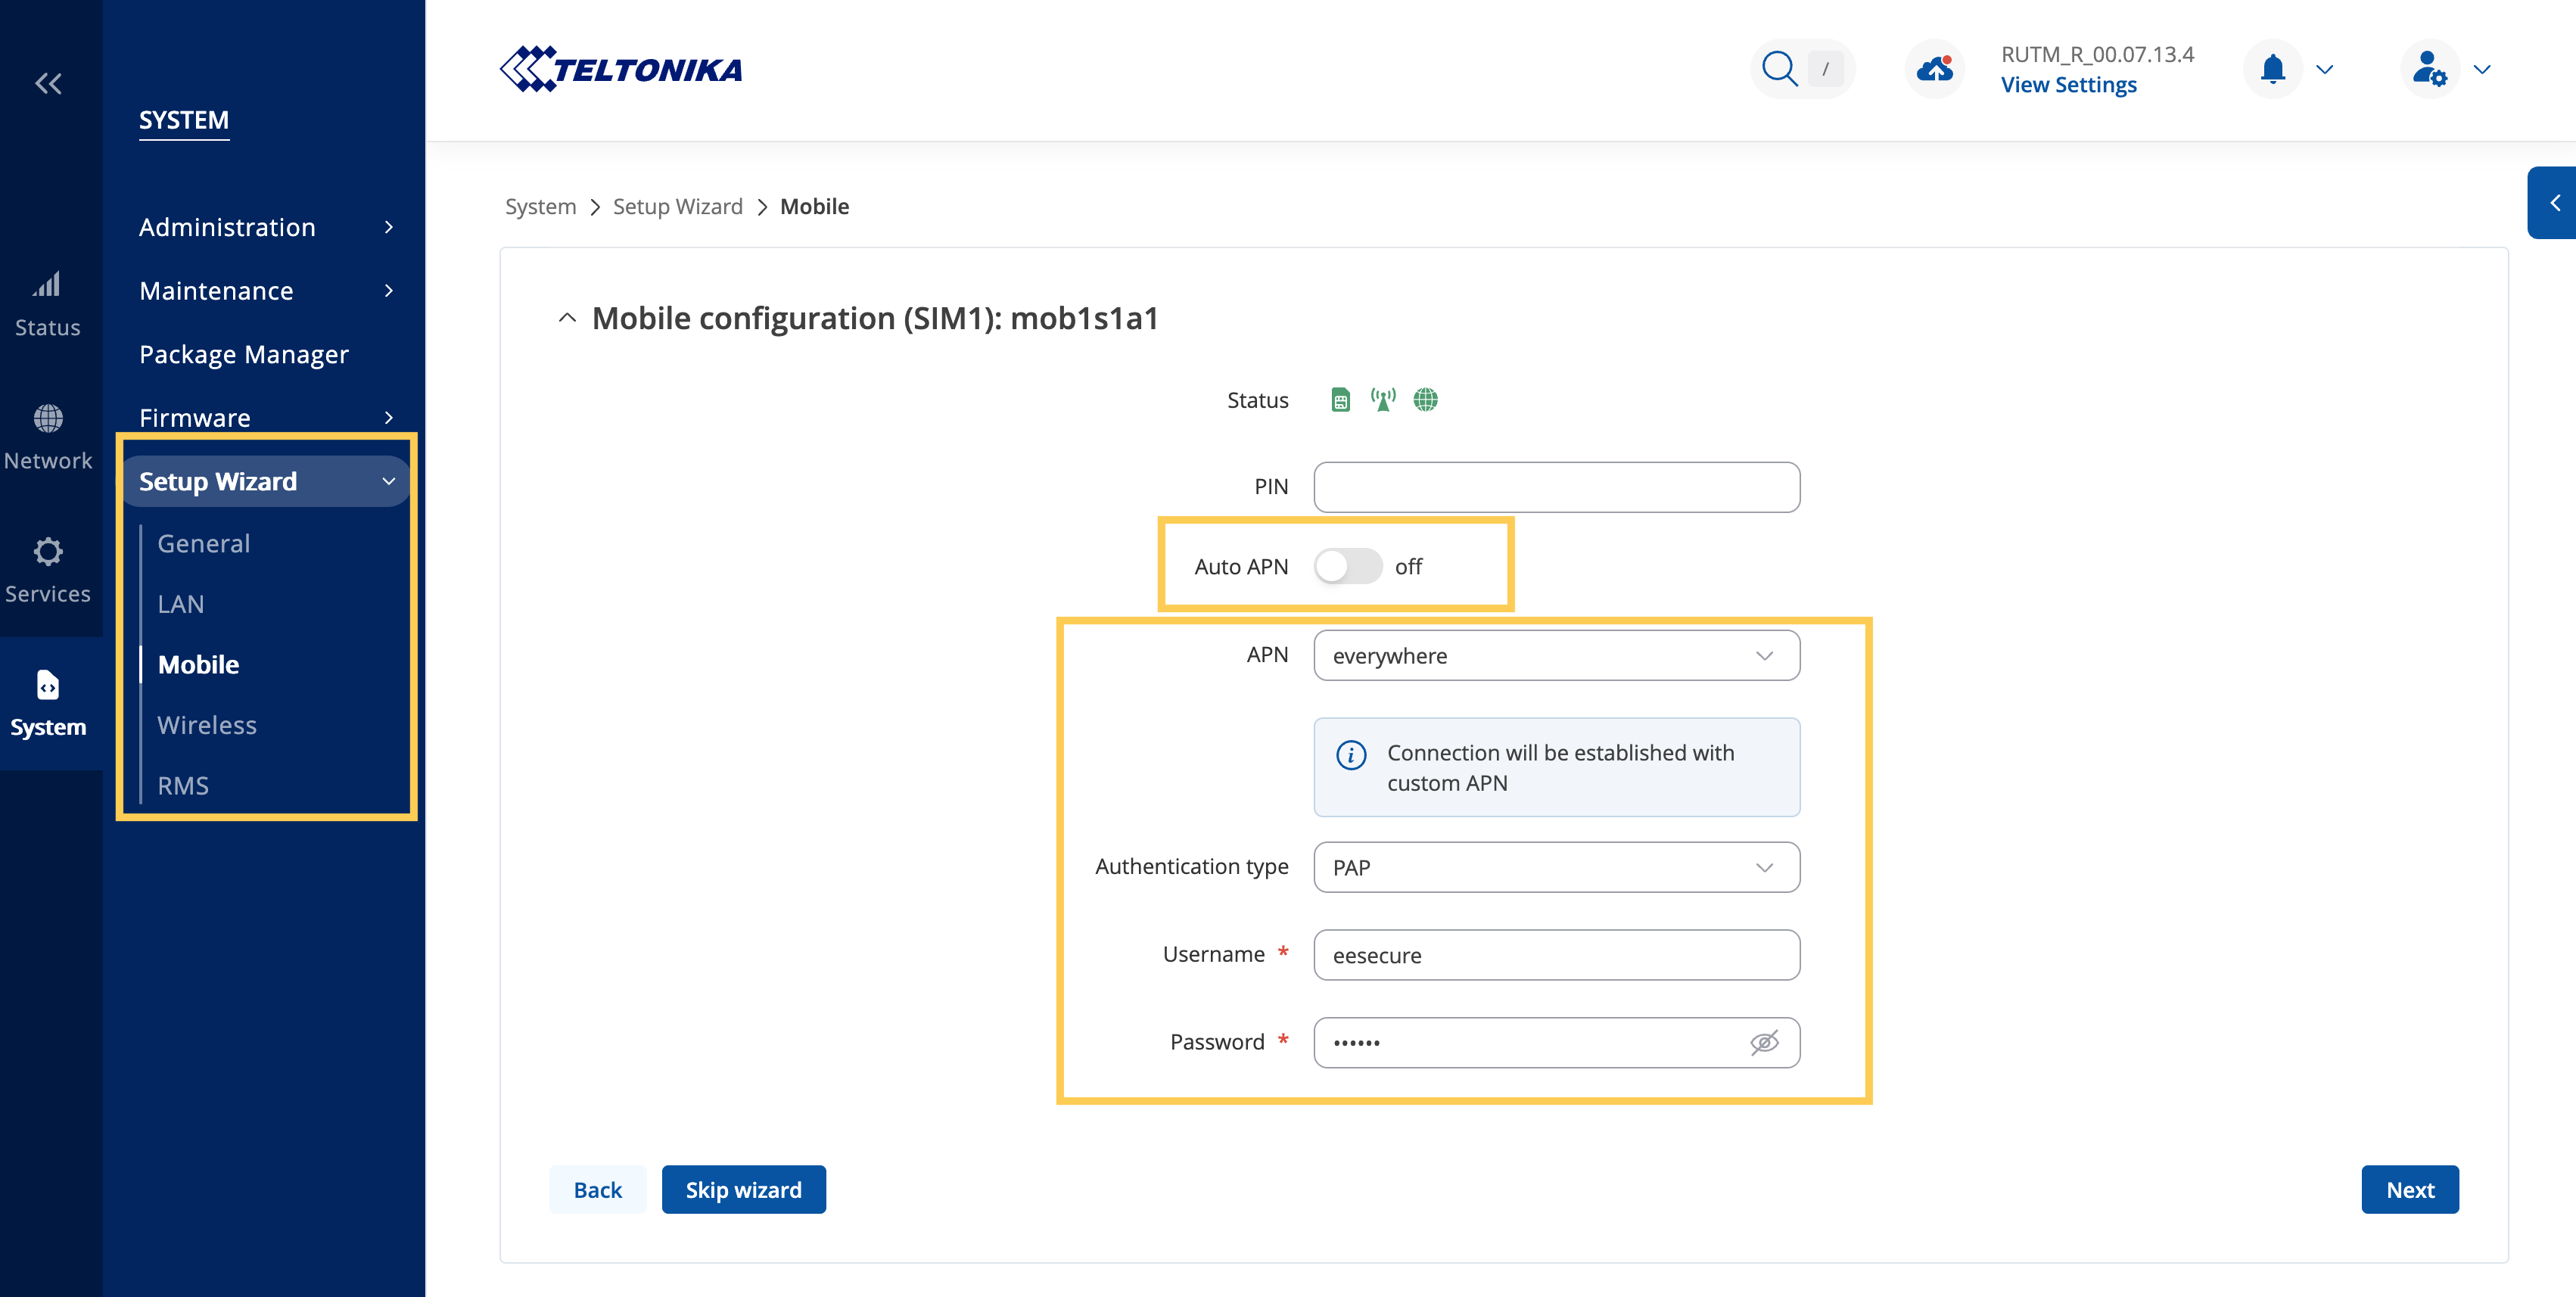
Navigate to System > Setup wizard > Mobile in the main menu.
The router features auto-APN detection, which typically works automatically. Disable auto-detection if manual configuration or multiple SIM profiles are needed.
APN Settings for IQ Mobile Services
IQ Travel / IQ Mobile SIMs:
| Field | Value |
|---|---|
| APN | everywhere |
| Username | eesecure |
| Password | secure |
| Authentication | PAP |
Still need help?
Our UK-based team is here for you