Router Configuration
NETGEAR AirCard Router — Configuration Guide
IQ Mobile has never officially sold the NETGEAR AirCard and cannot guarantee this guide remains 100% accurate — recent firmware updates may have changed the interface. IQ Mobile cannot offer support on this device.
Step 1: Unbox and Insert SIM
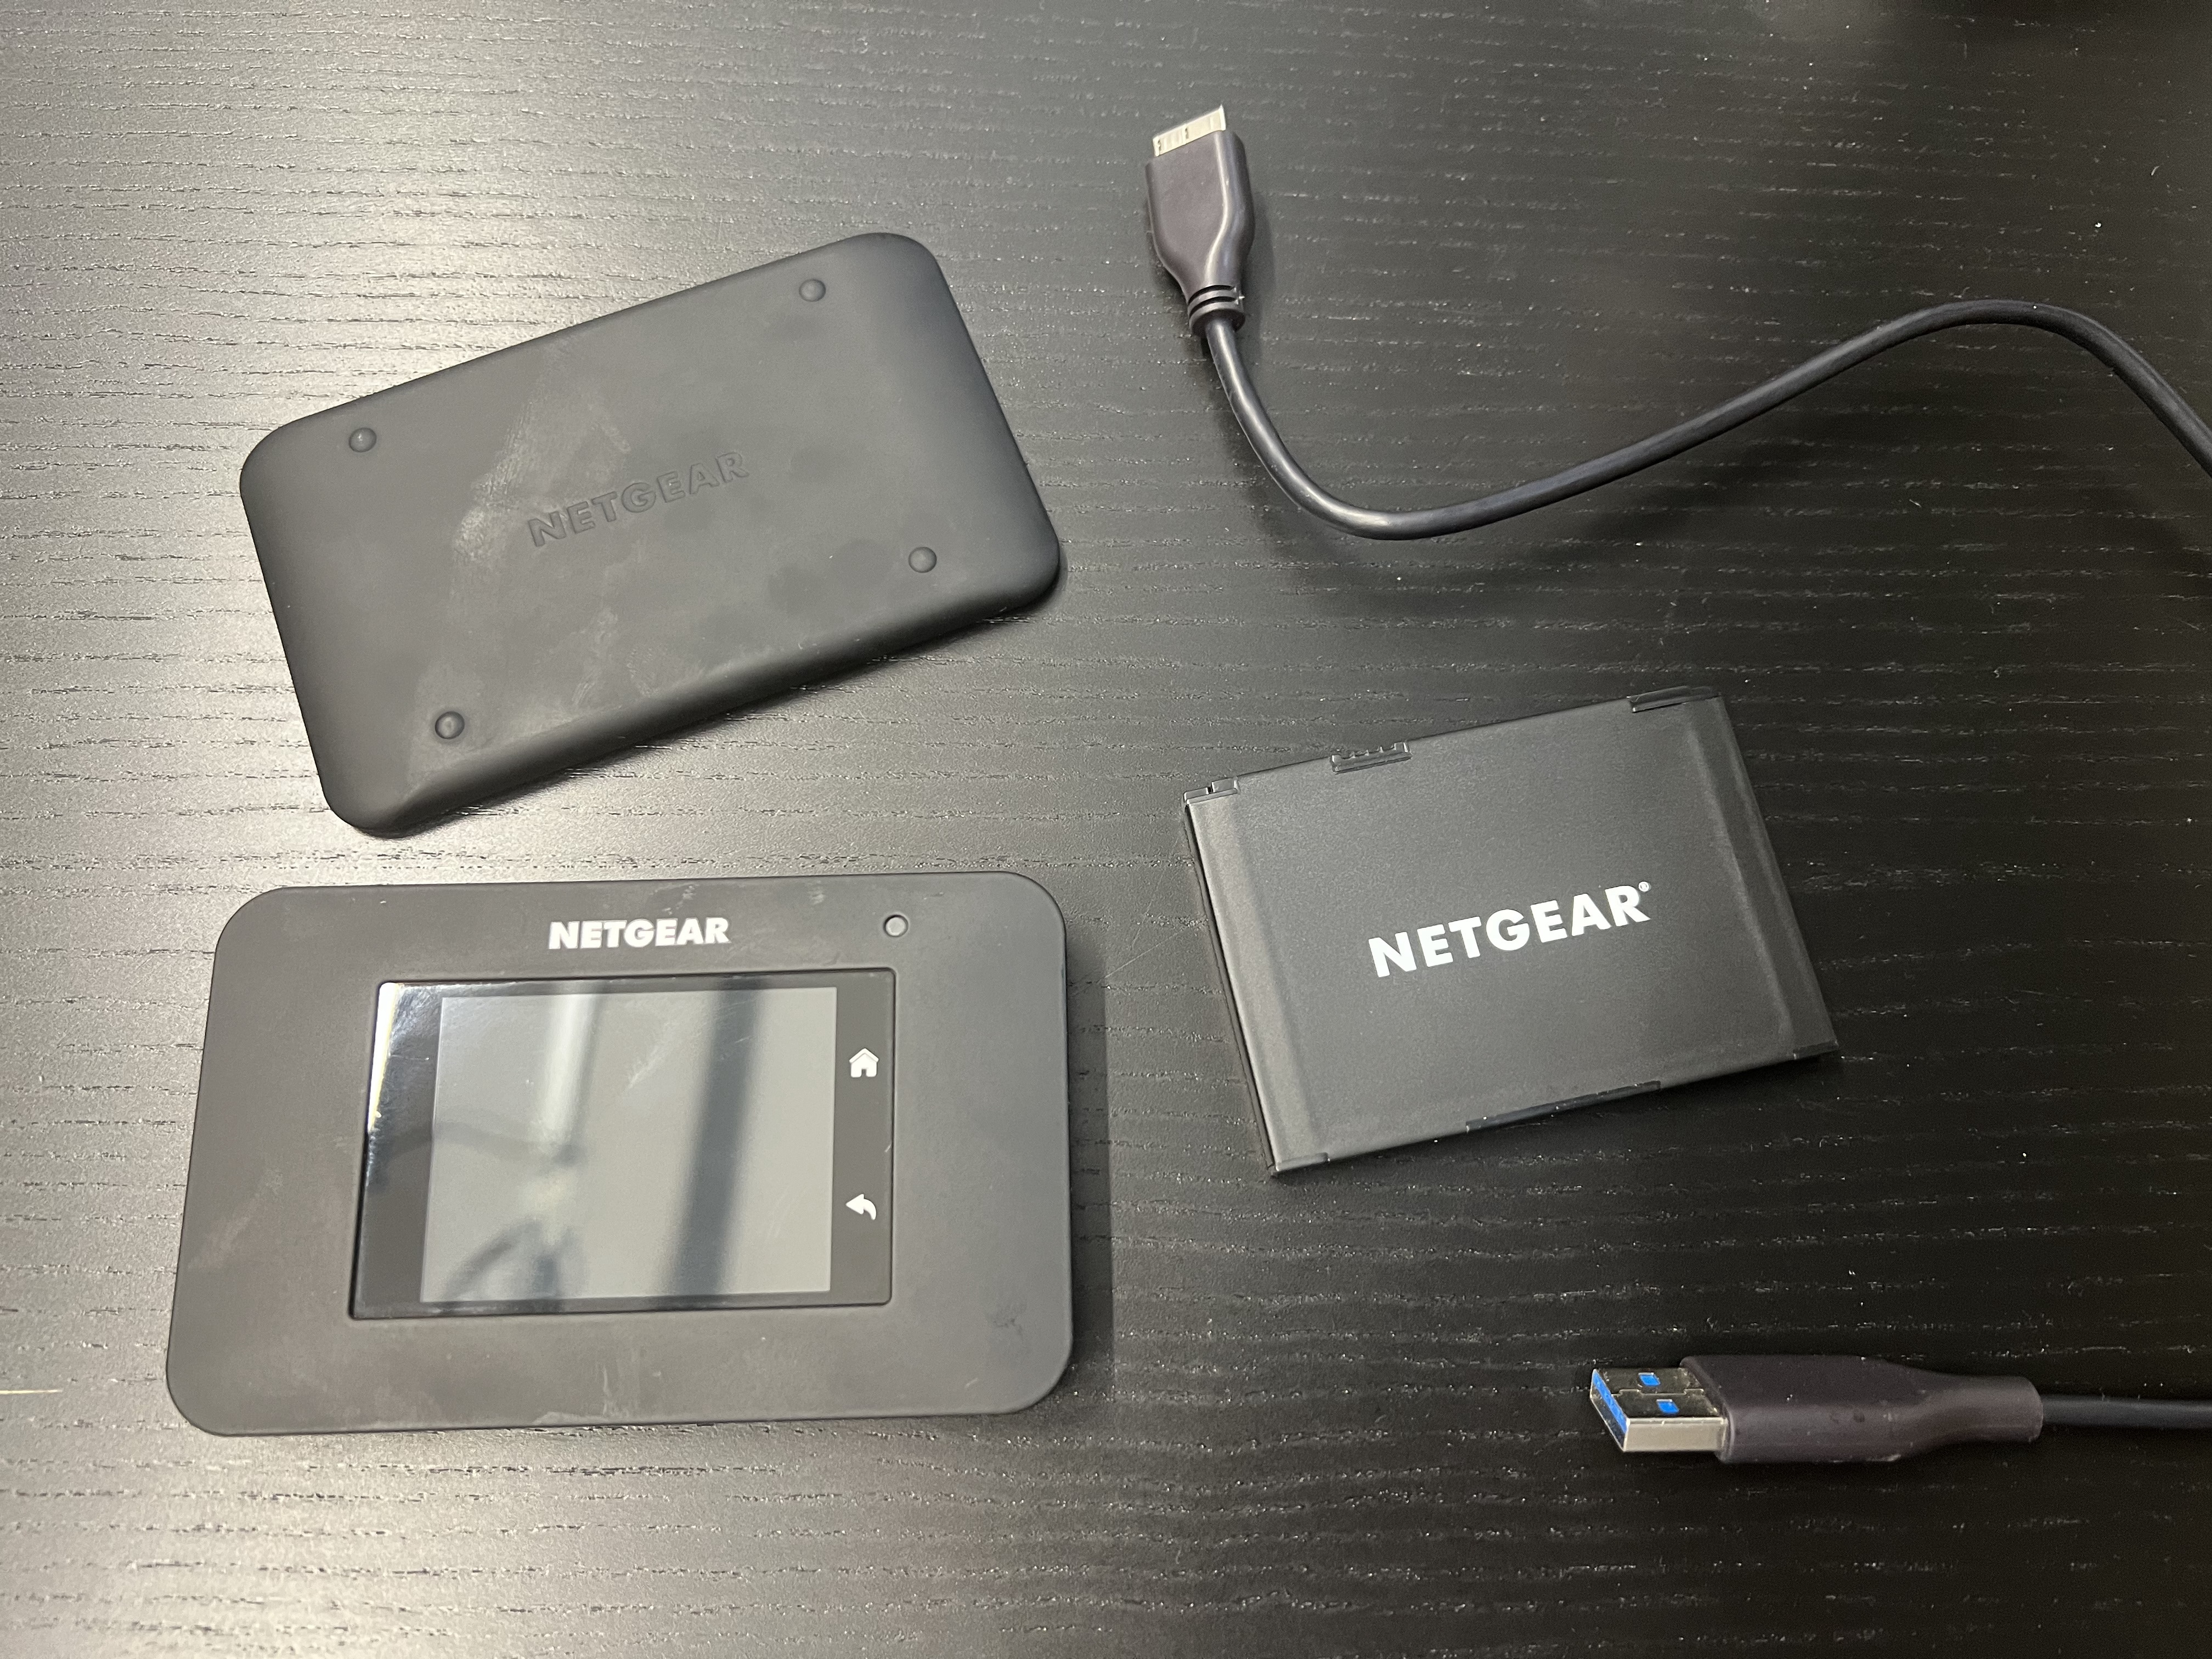
Verify all components are present: Router, Battery, Charge cable and back cover, Quick start guide.
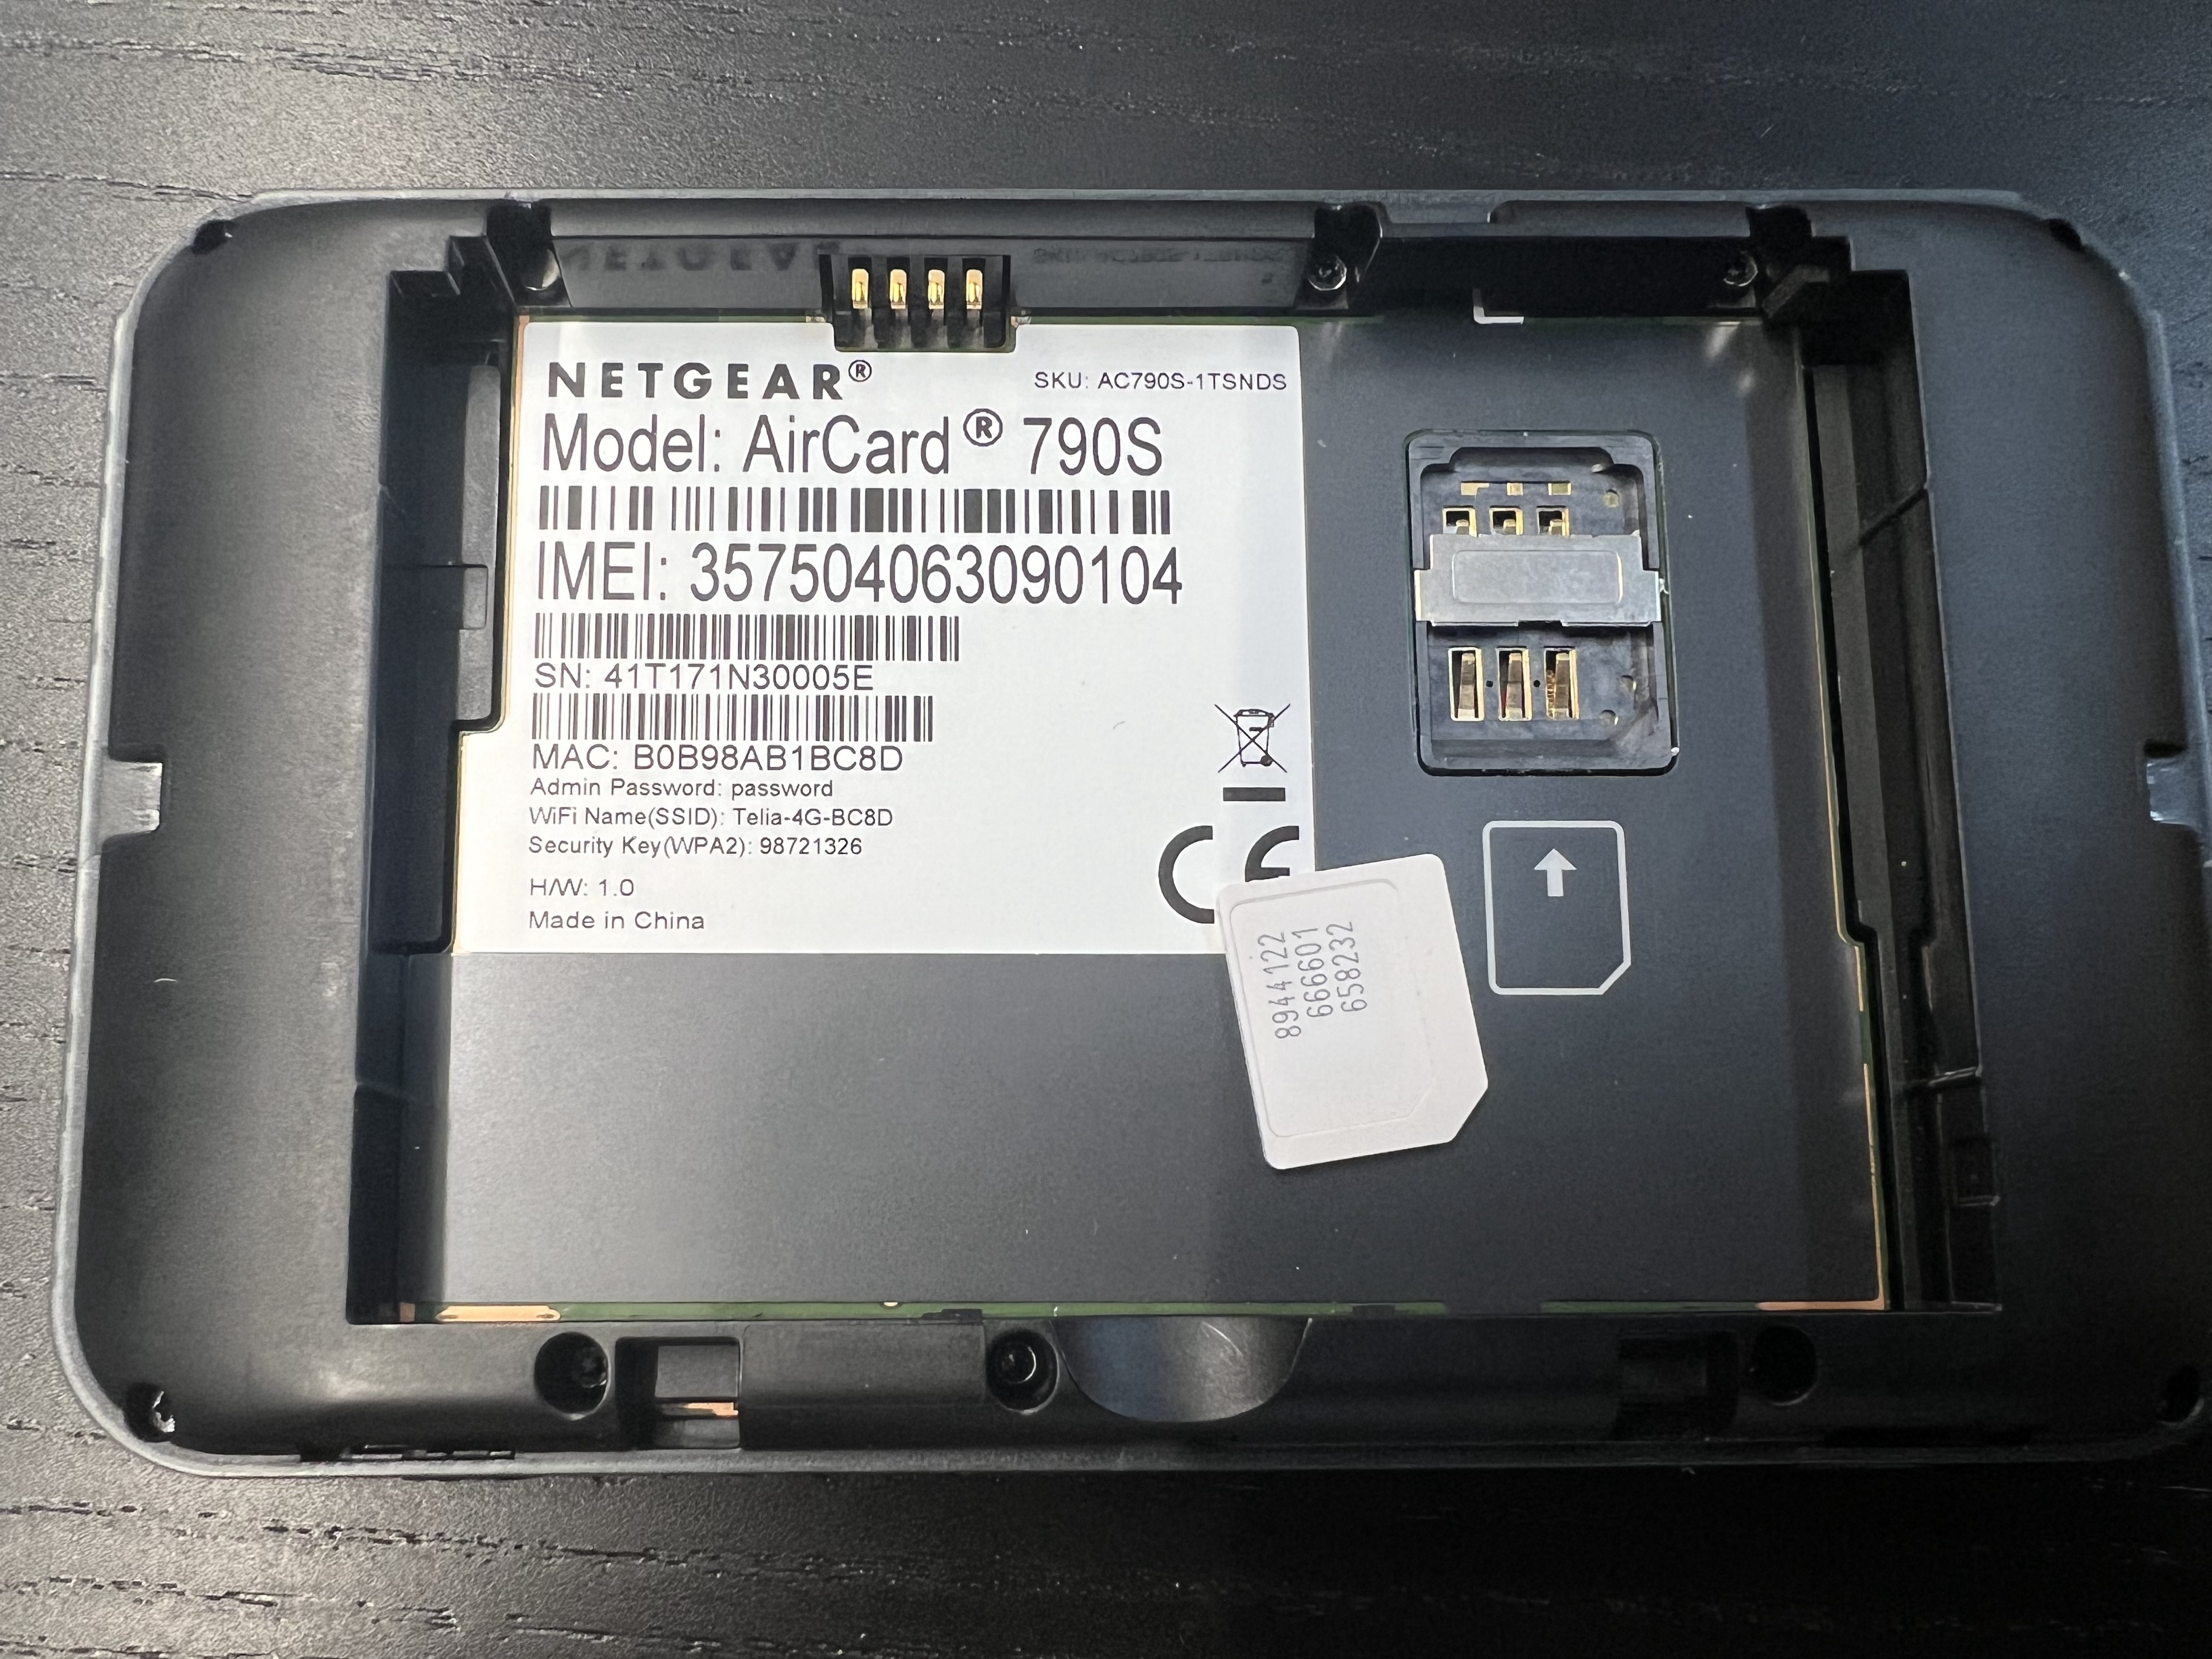
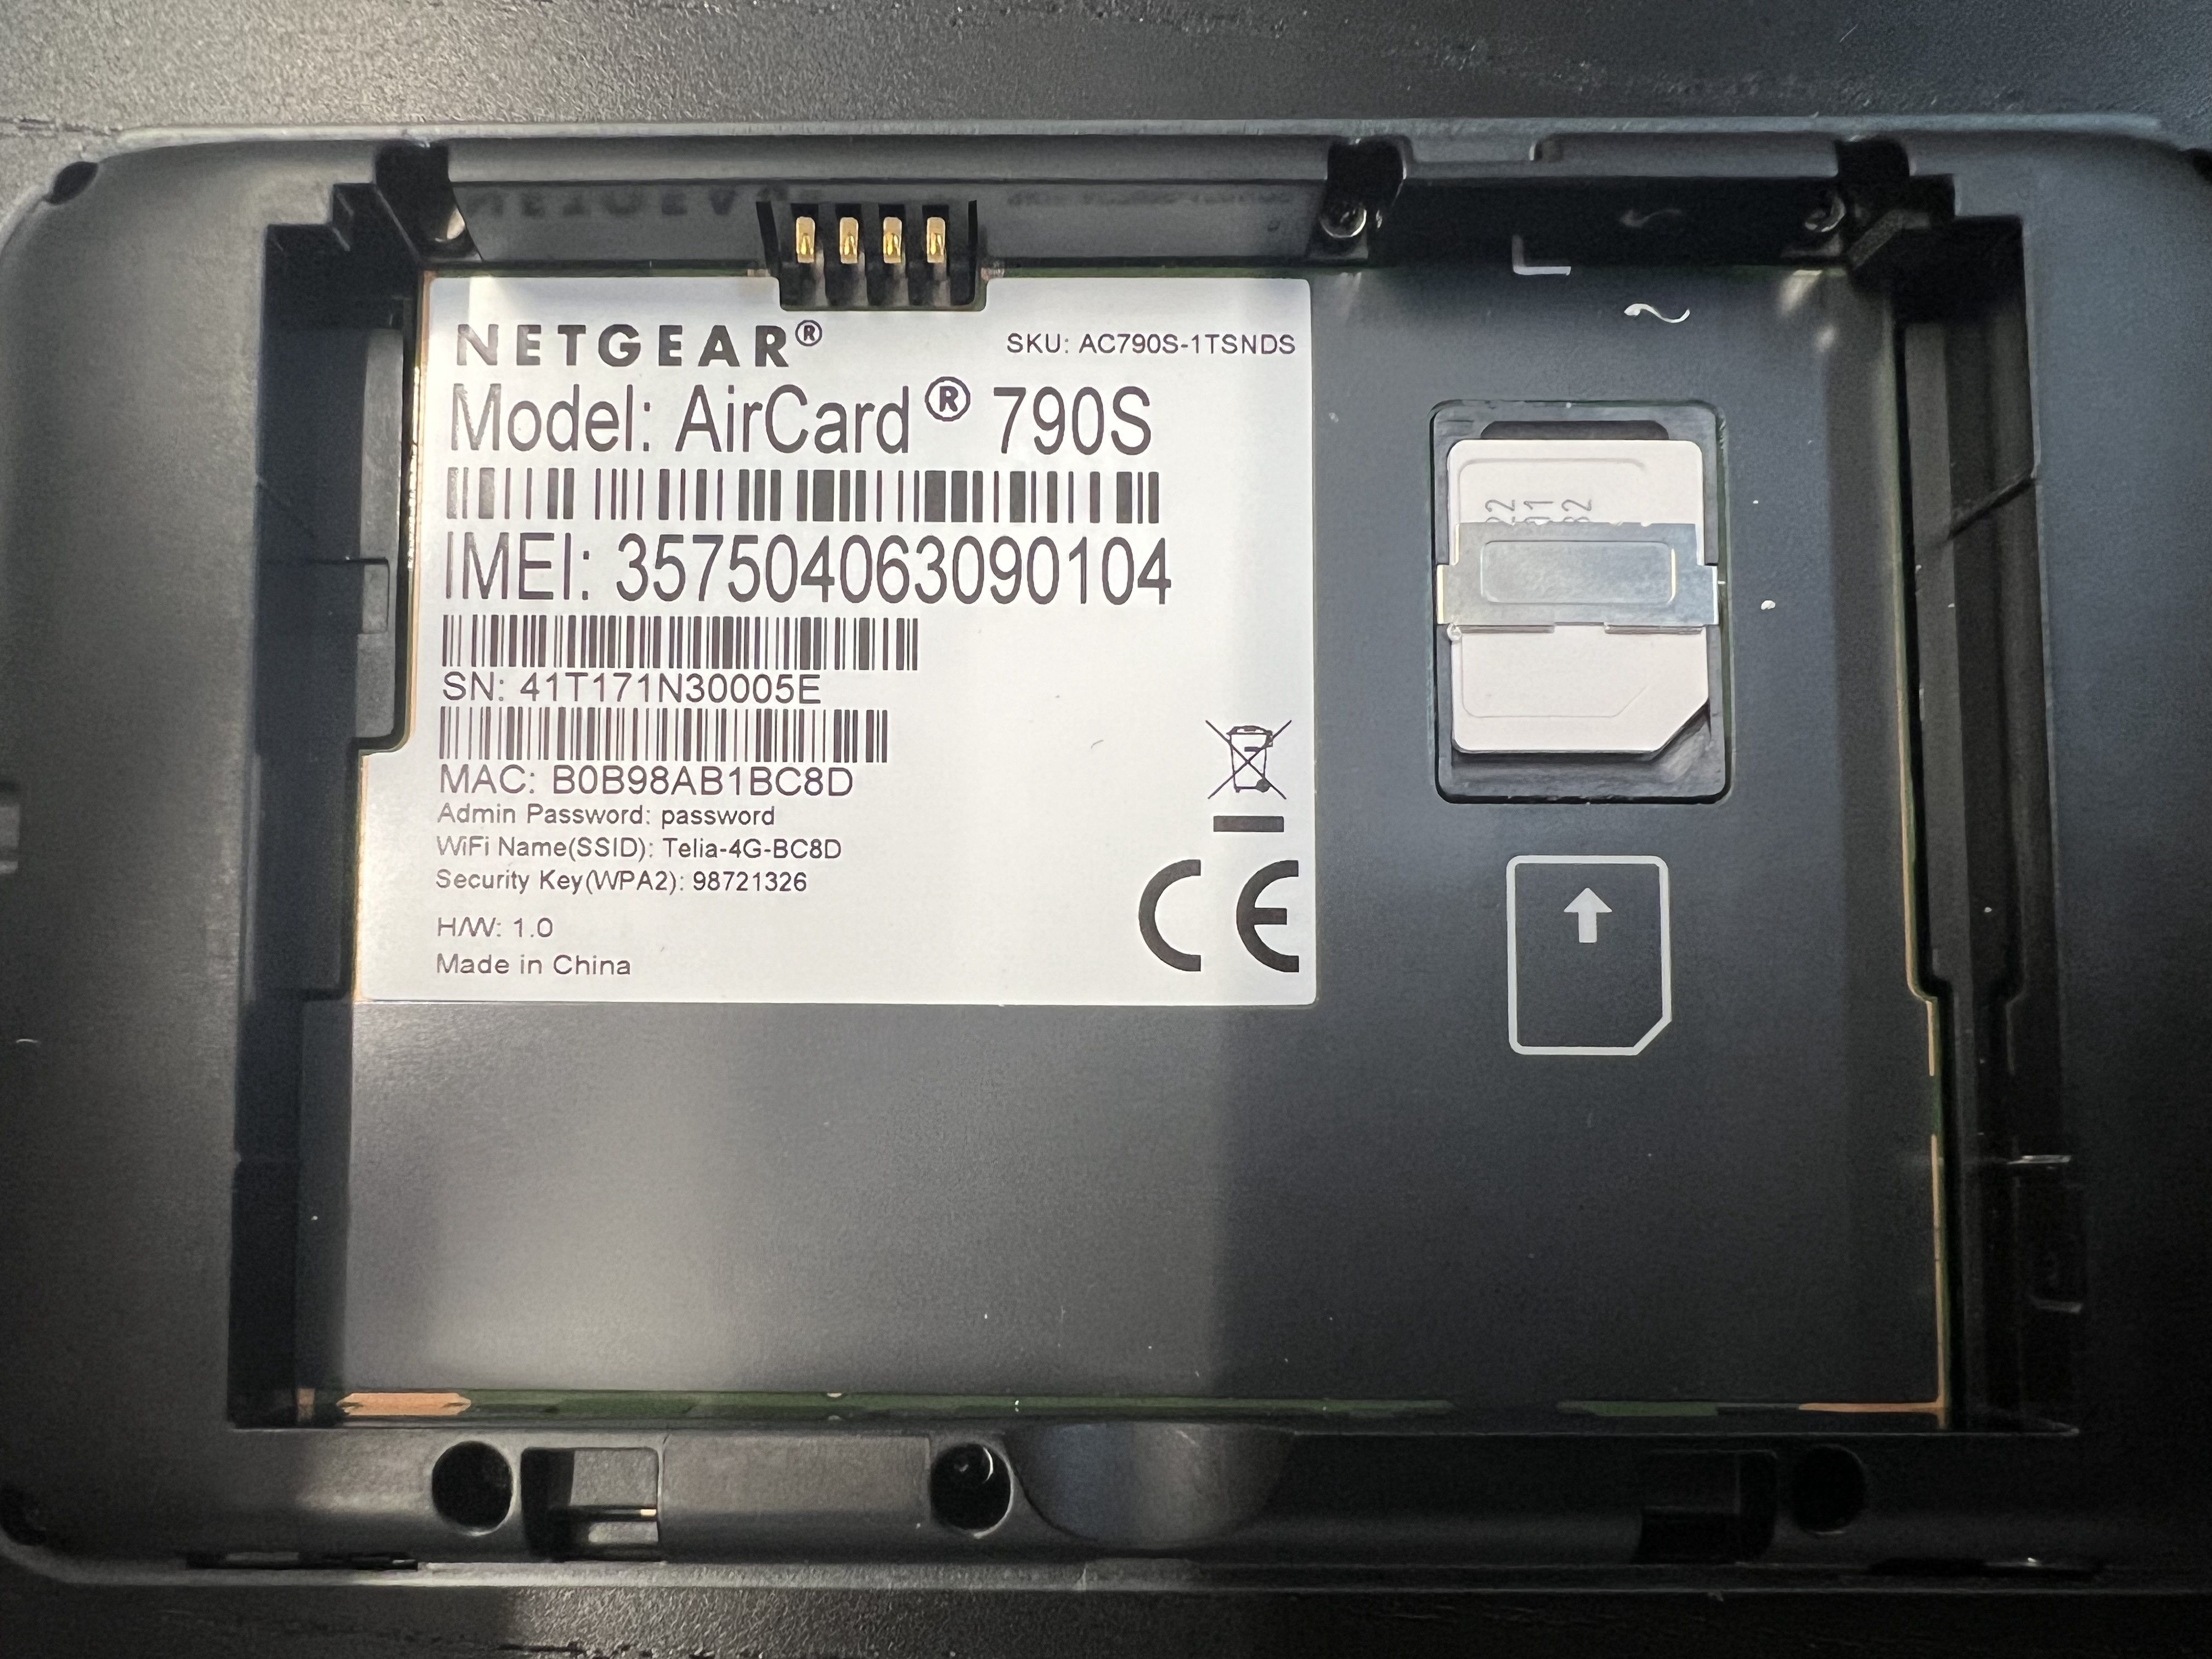
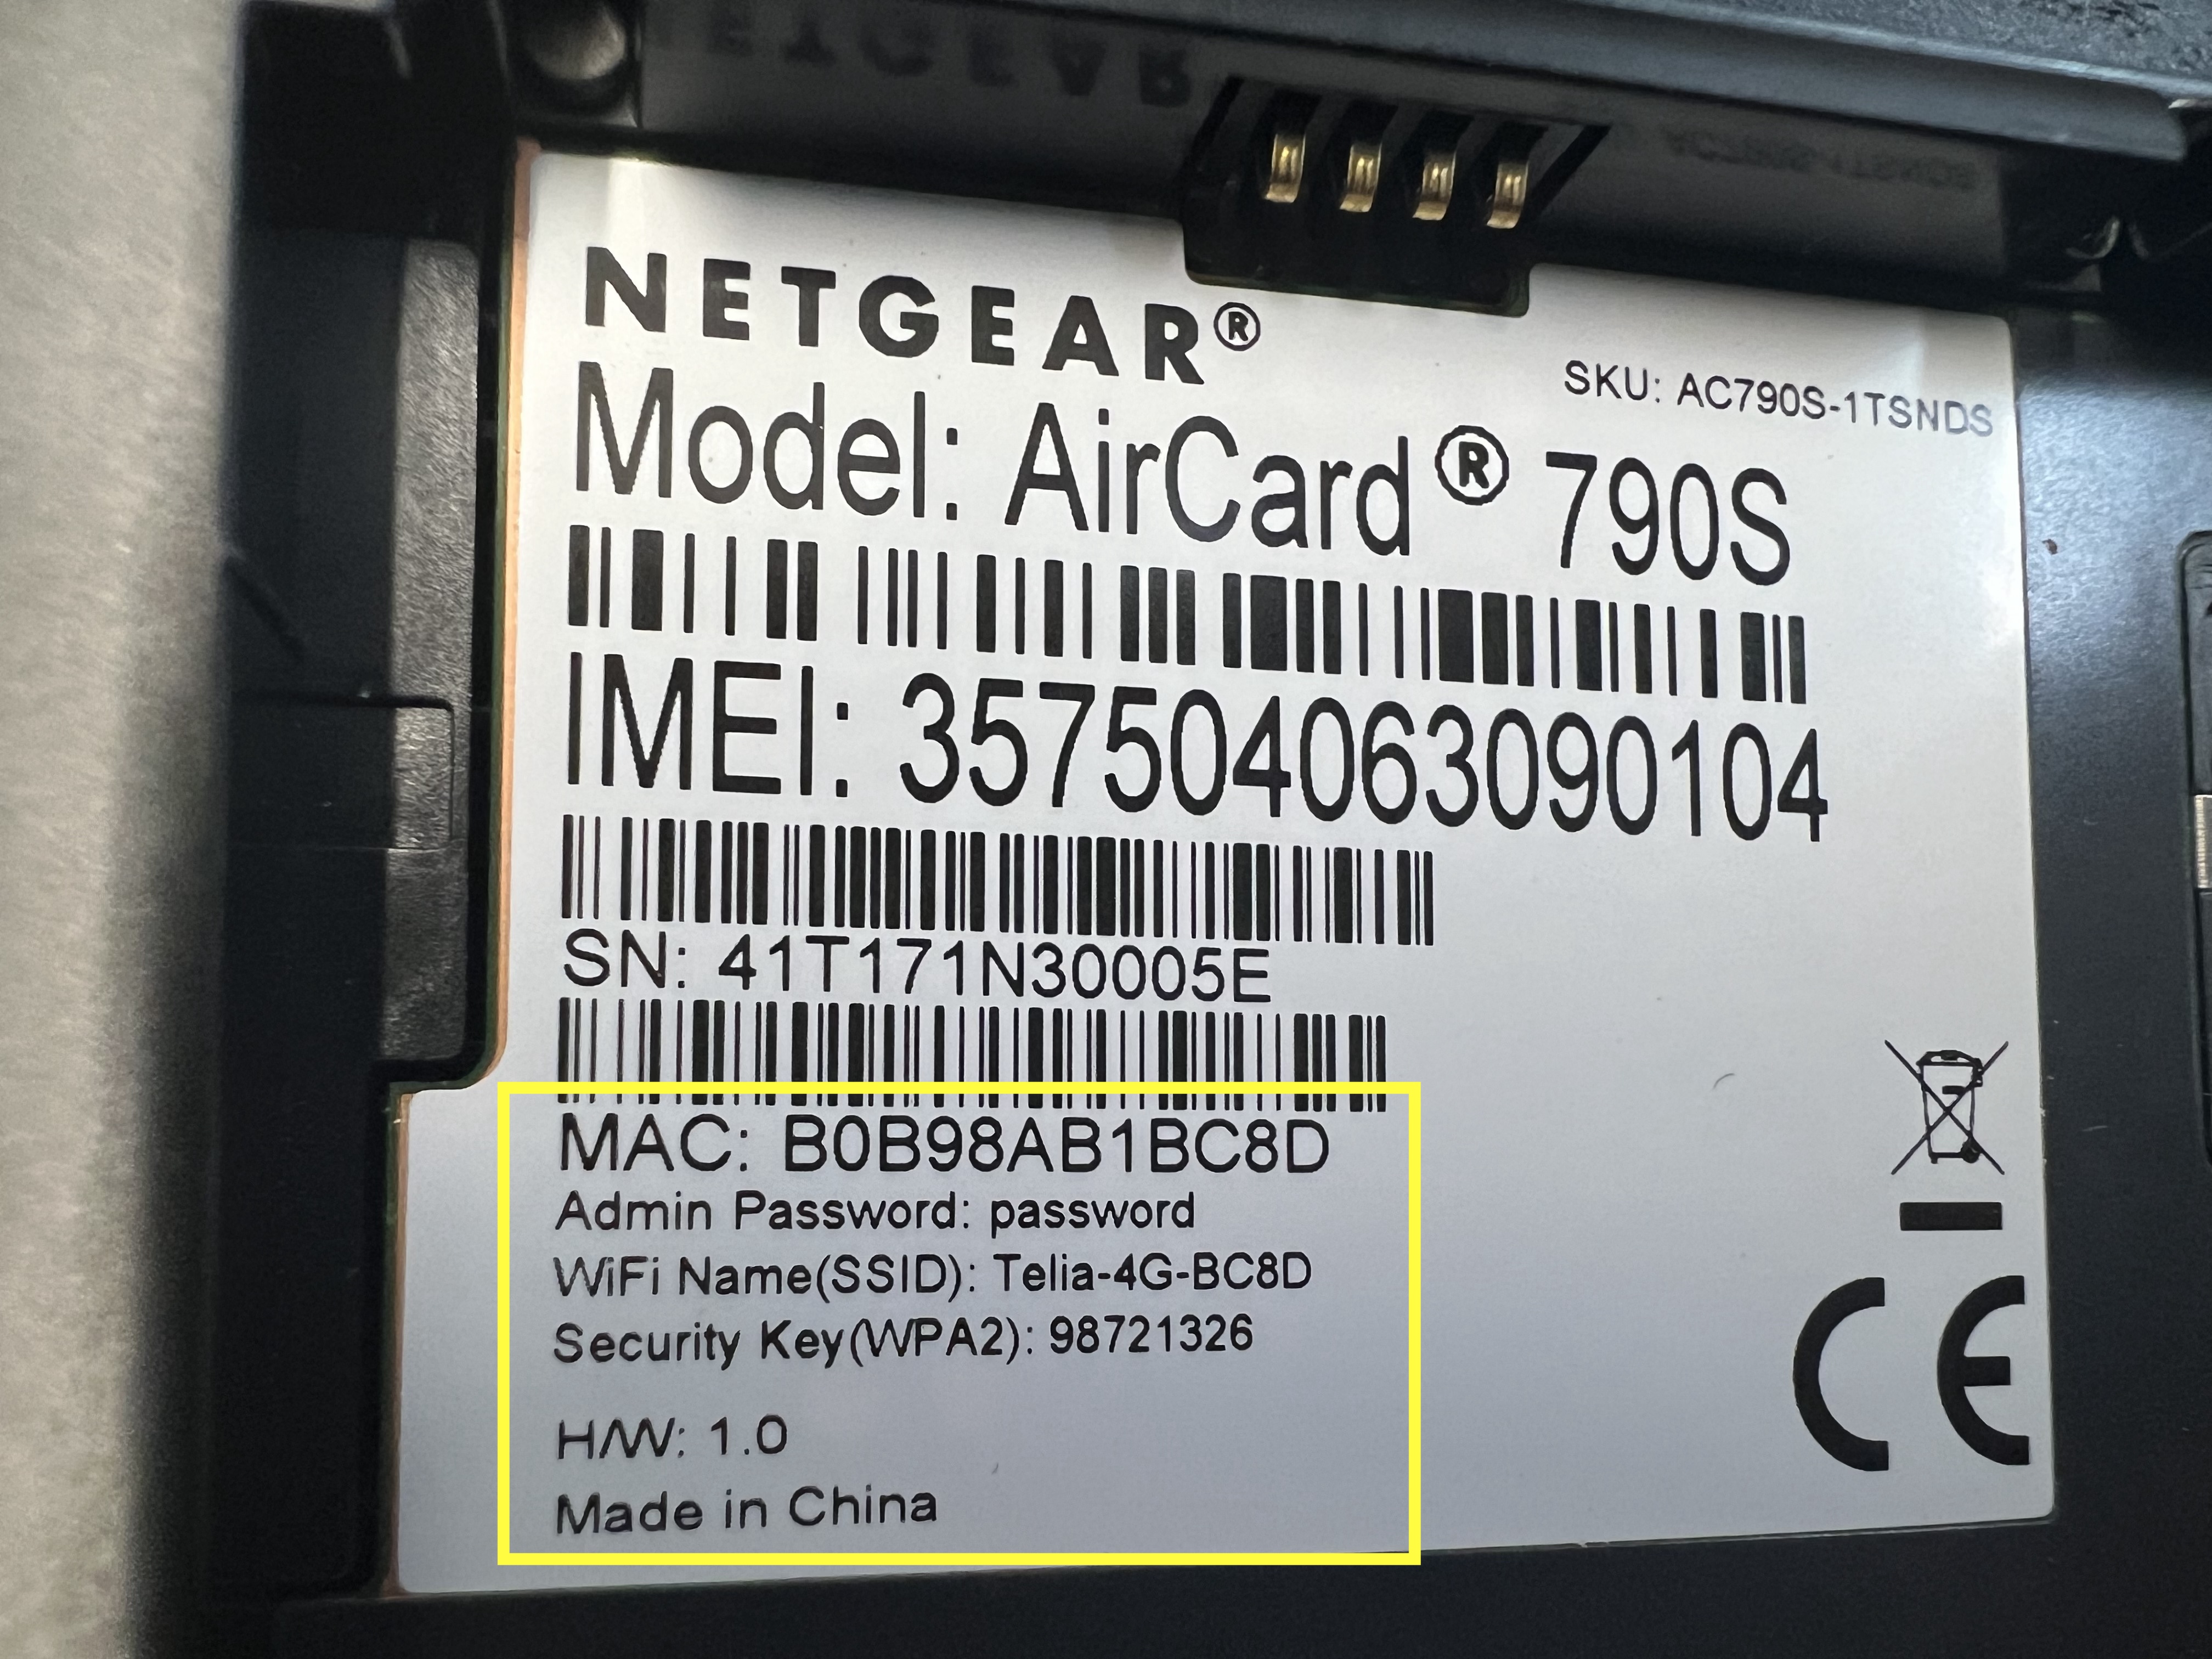
The device requires a Micro SIM card. Extract the middle-sized SIM from its original housing. Note the corner cutoff that allows the SIM to fit into the metal housing with proper alignment.
Step 2: Reassemble the Device
- Insert the battery, ensuring gold pins align with router pins.
- Note the information on the interior sticker.
- Replace the back cover.
| Item | Description | Example |
|---|---|---|
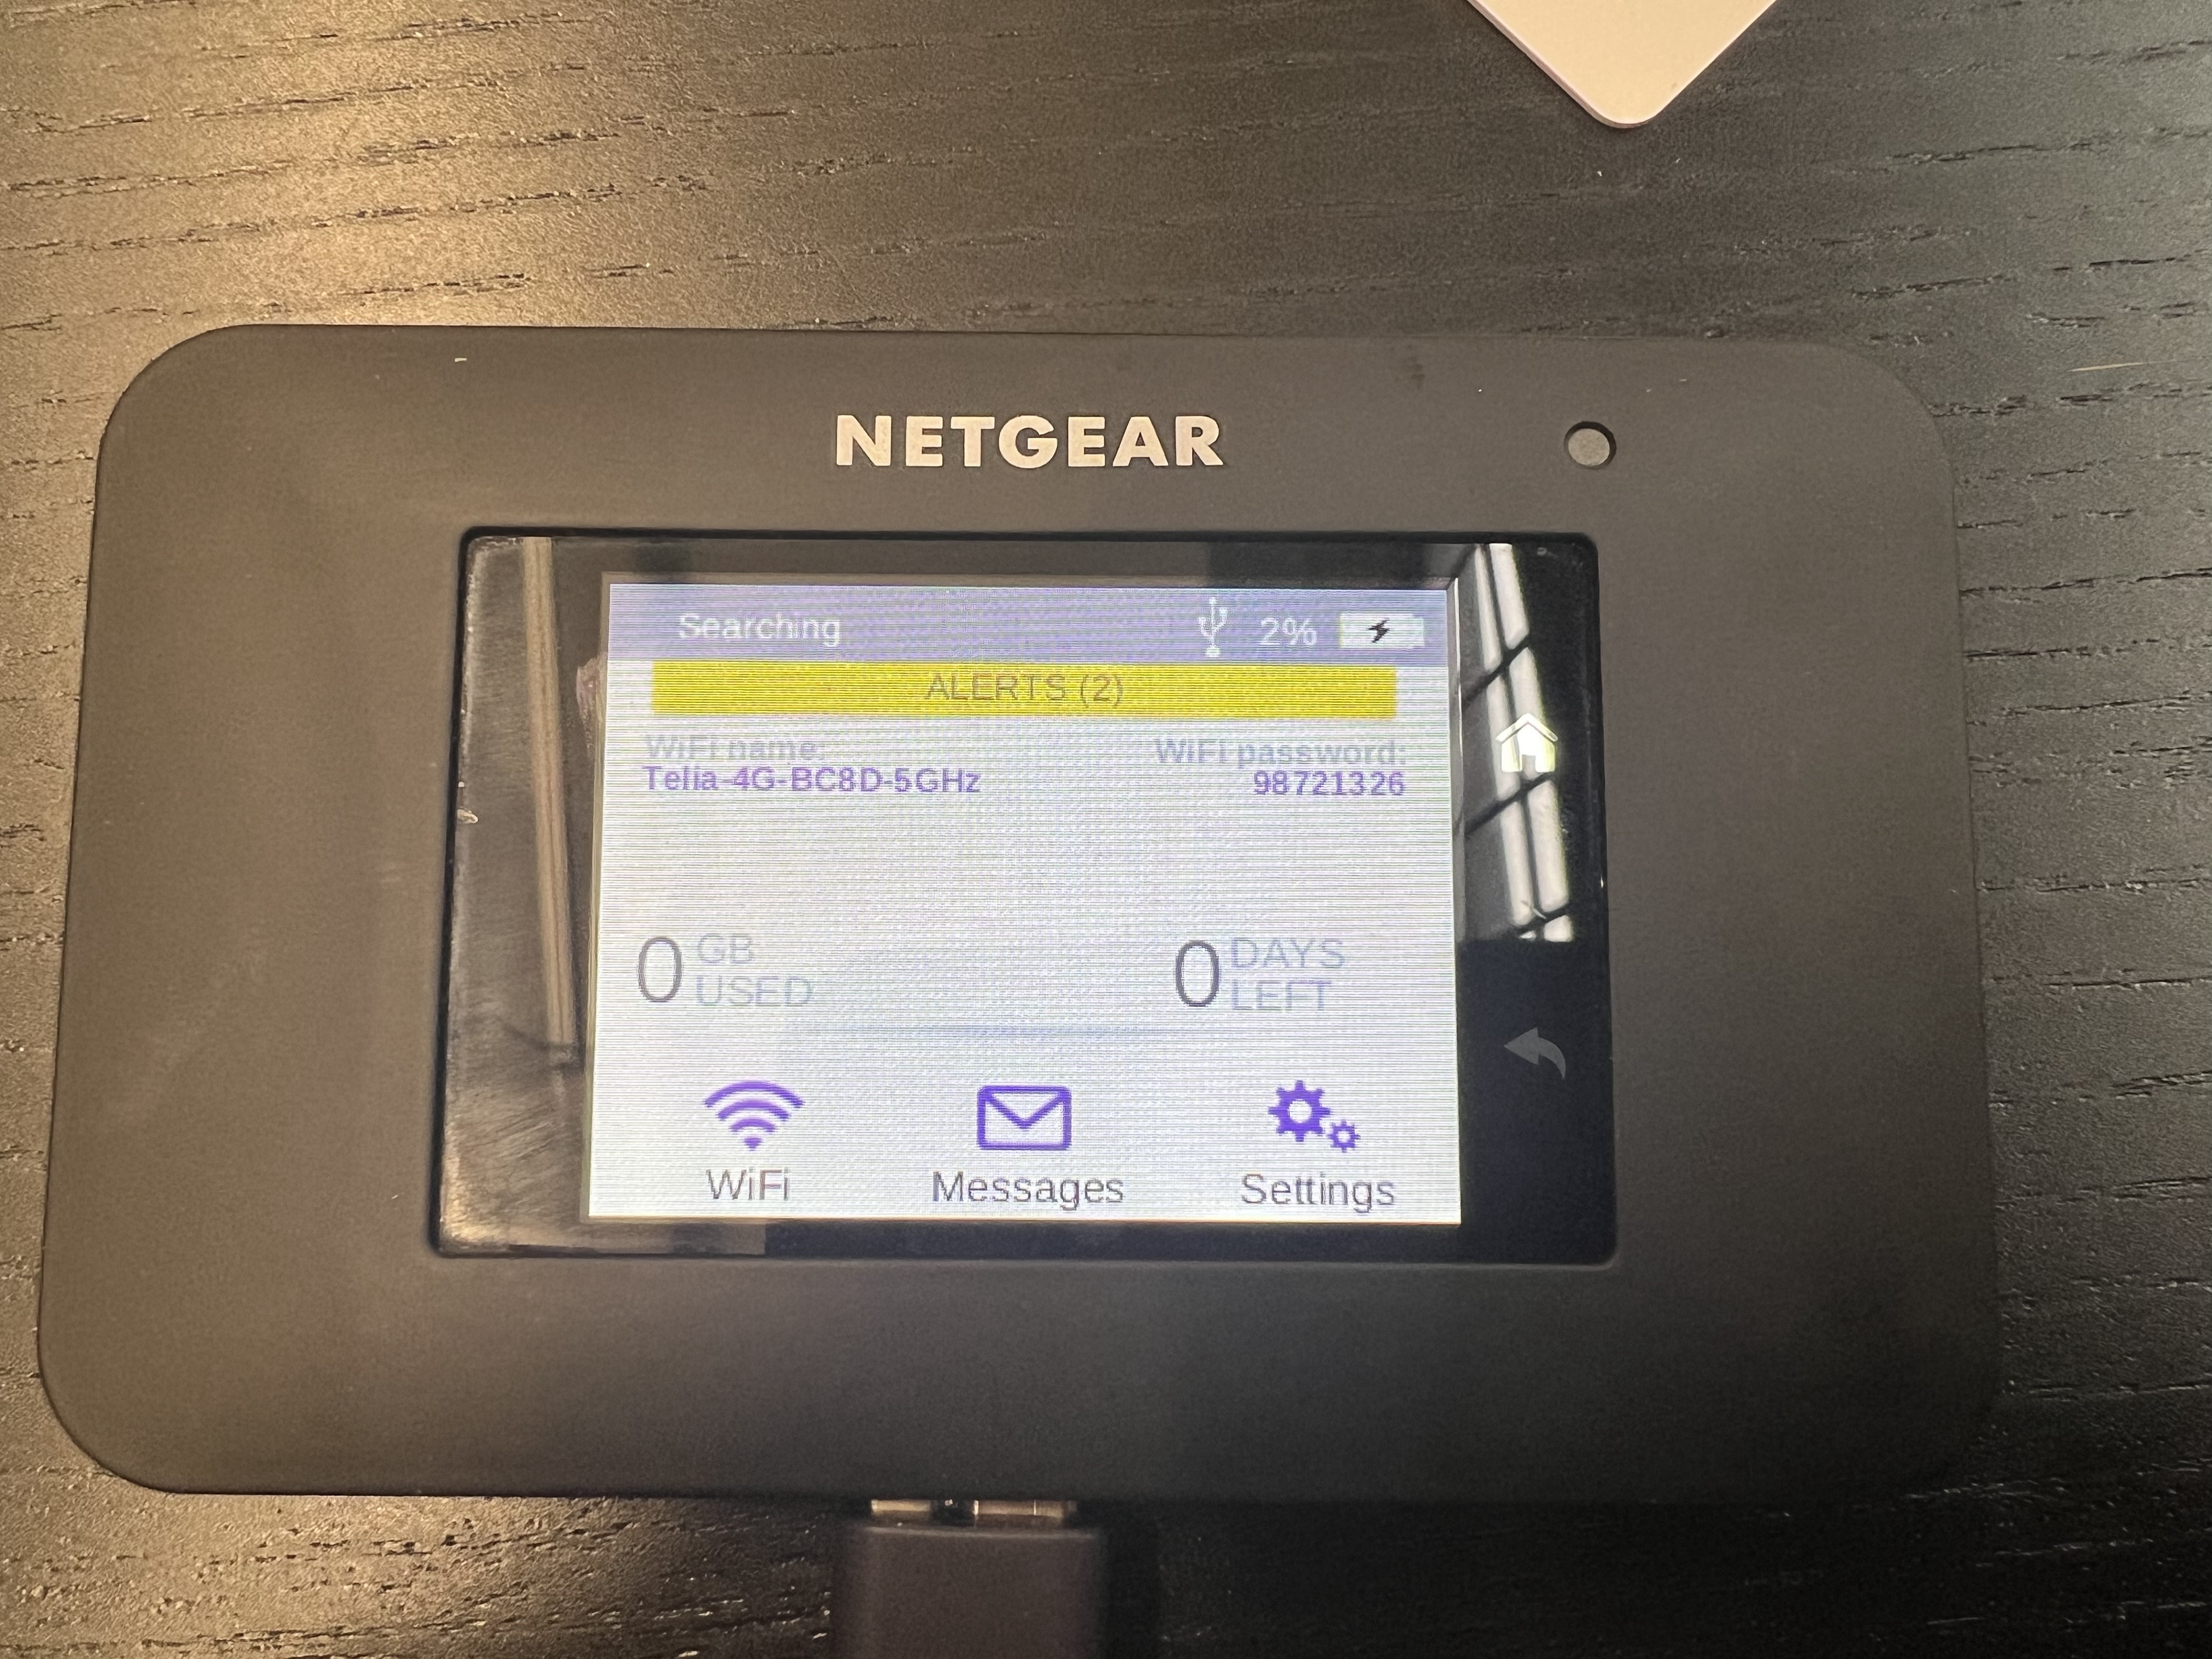
| WiFi NAME SSID | Wireless network name visible when connecting devices | Telia-4G-BC8D |
| Security Key | WiFi password needed for device connections | 98721326 |
| Password | Admin password for accessing device settings (case-sensitive) | password |
Step 3: Power On and Connect to WiFi
This is an important step — many people try to configure these devices without connecting to its WiFi first.
- Open the Wi-Fi menu on your device.
- Locate the NETGEAR network name from the sticker.
- Enter the security key when prompted.
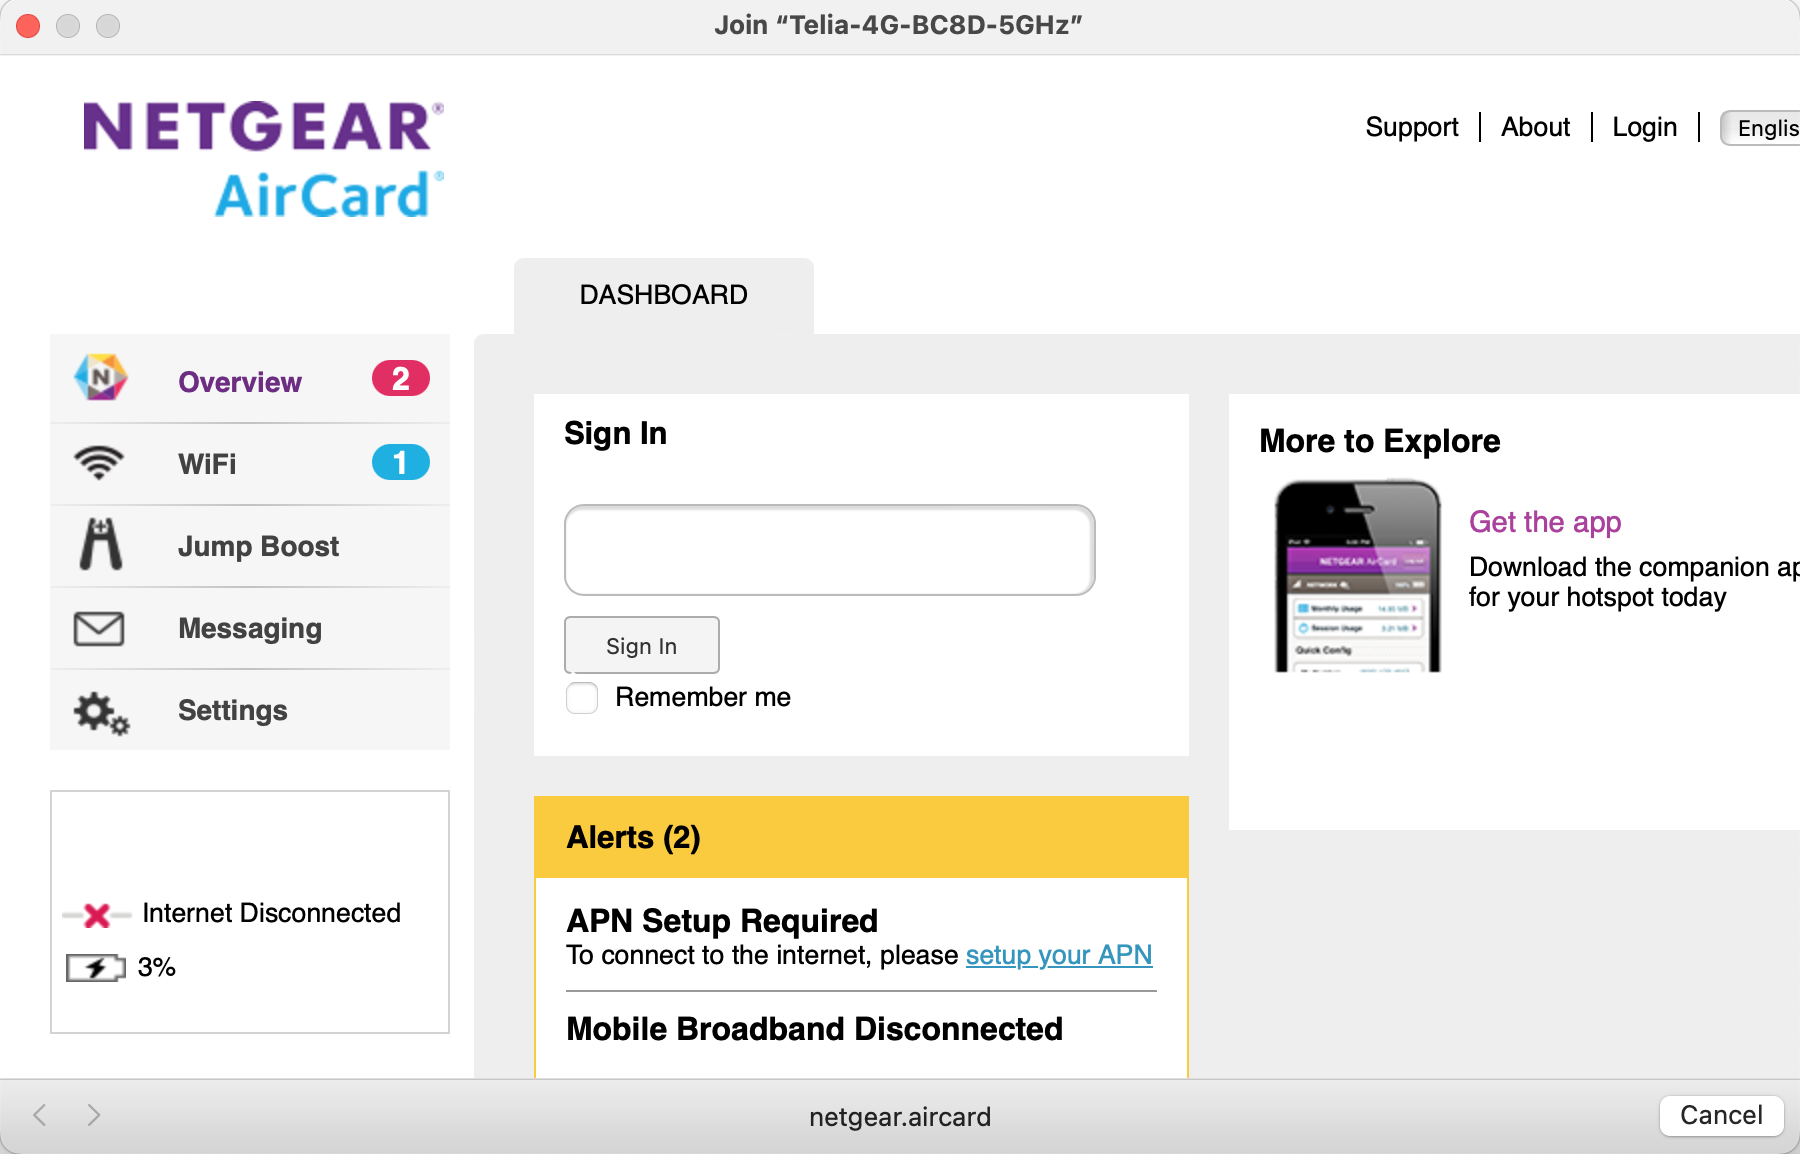
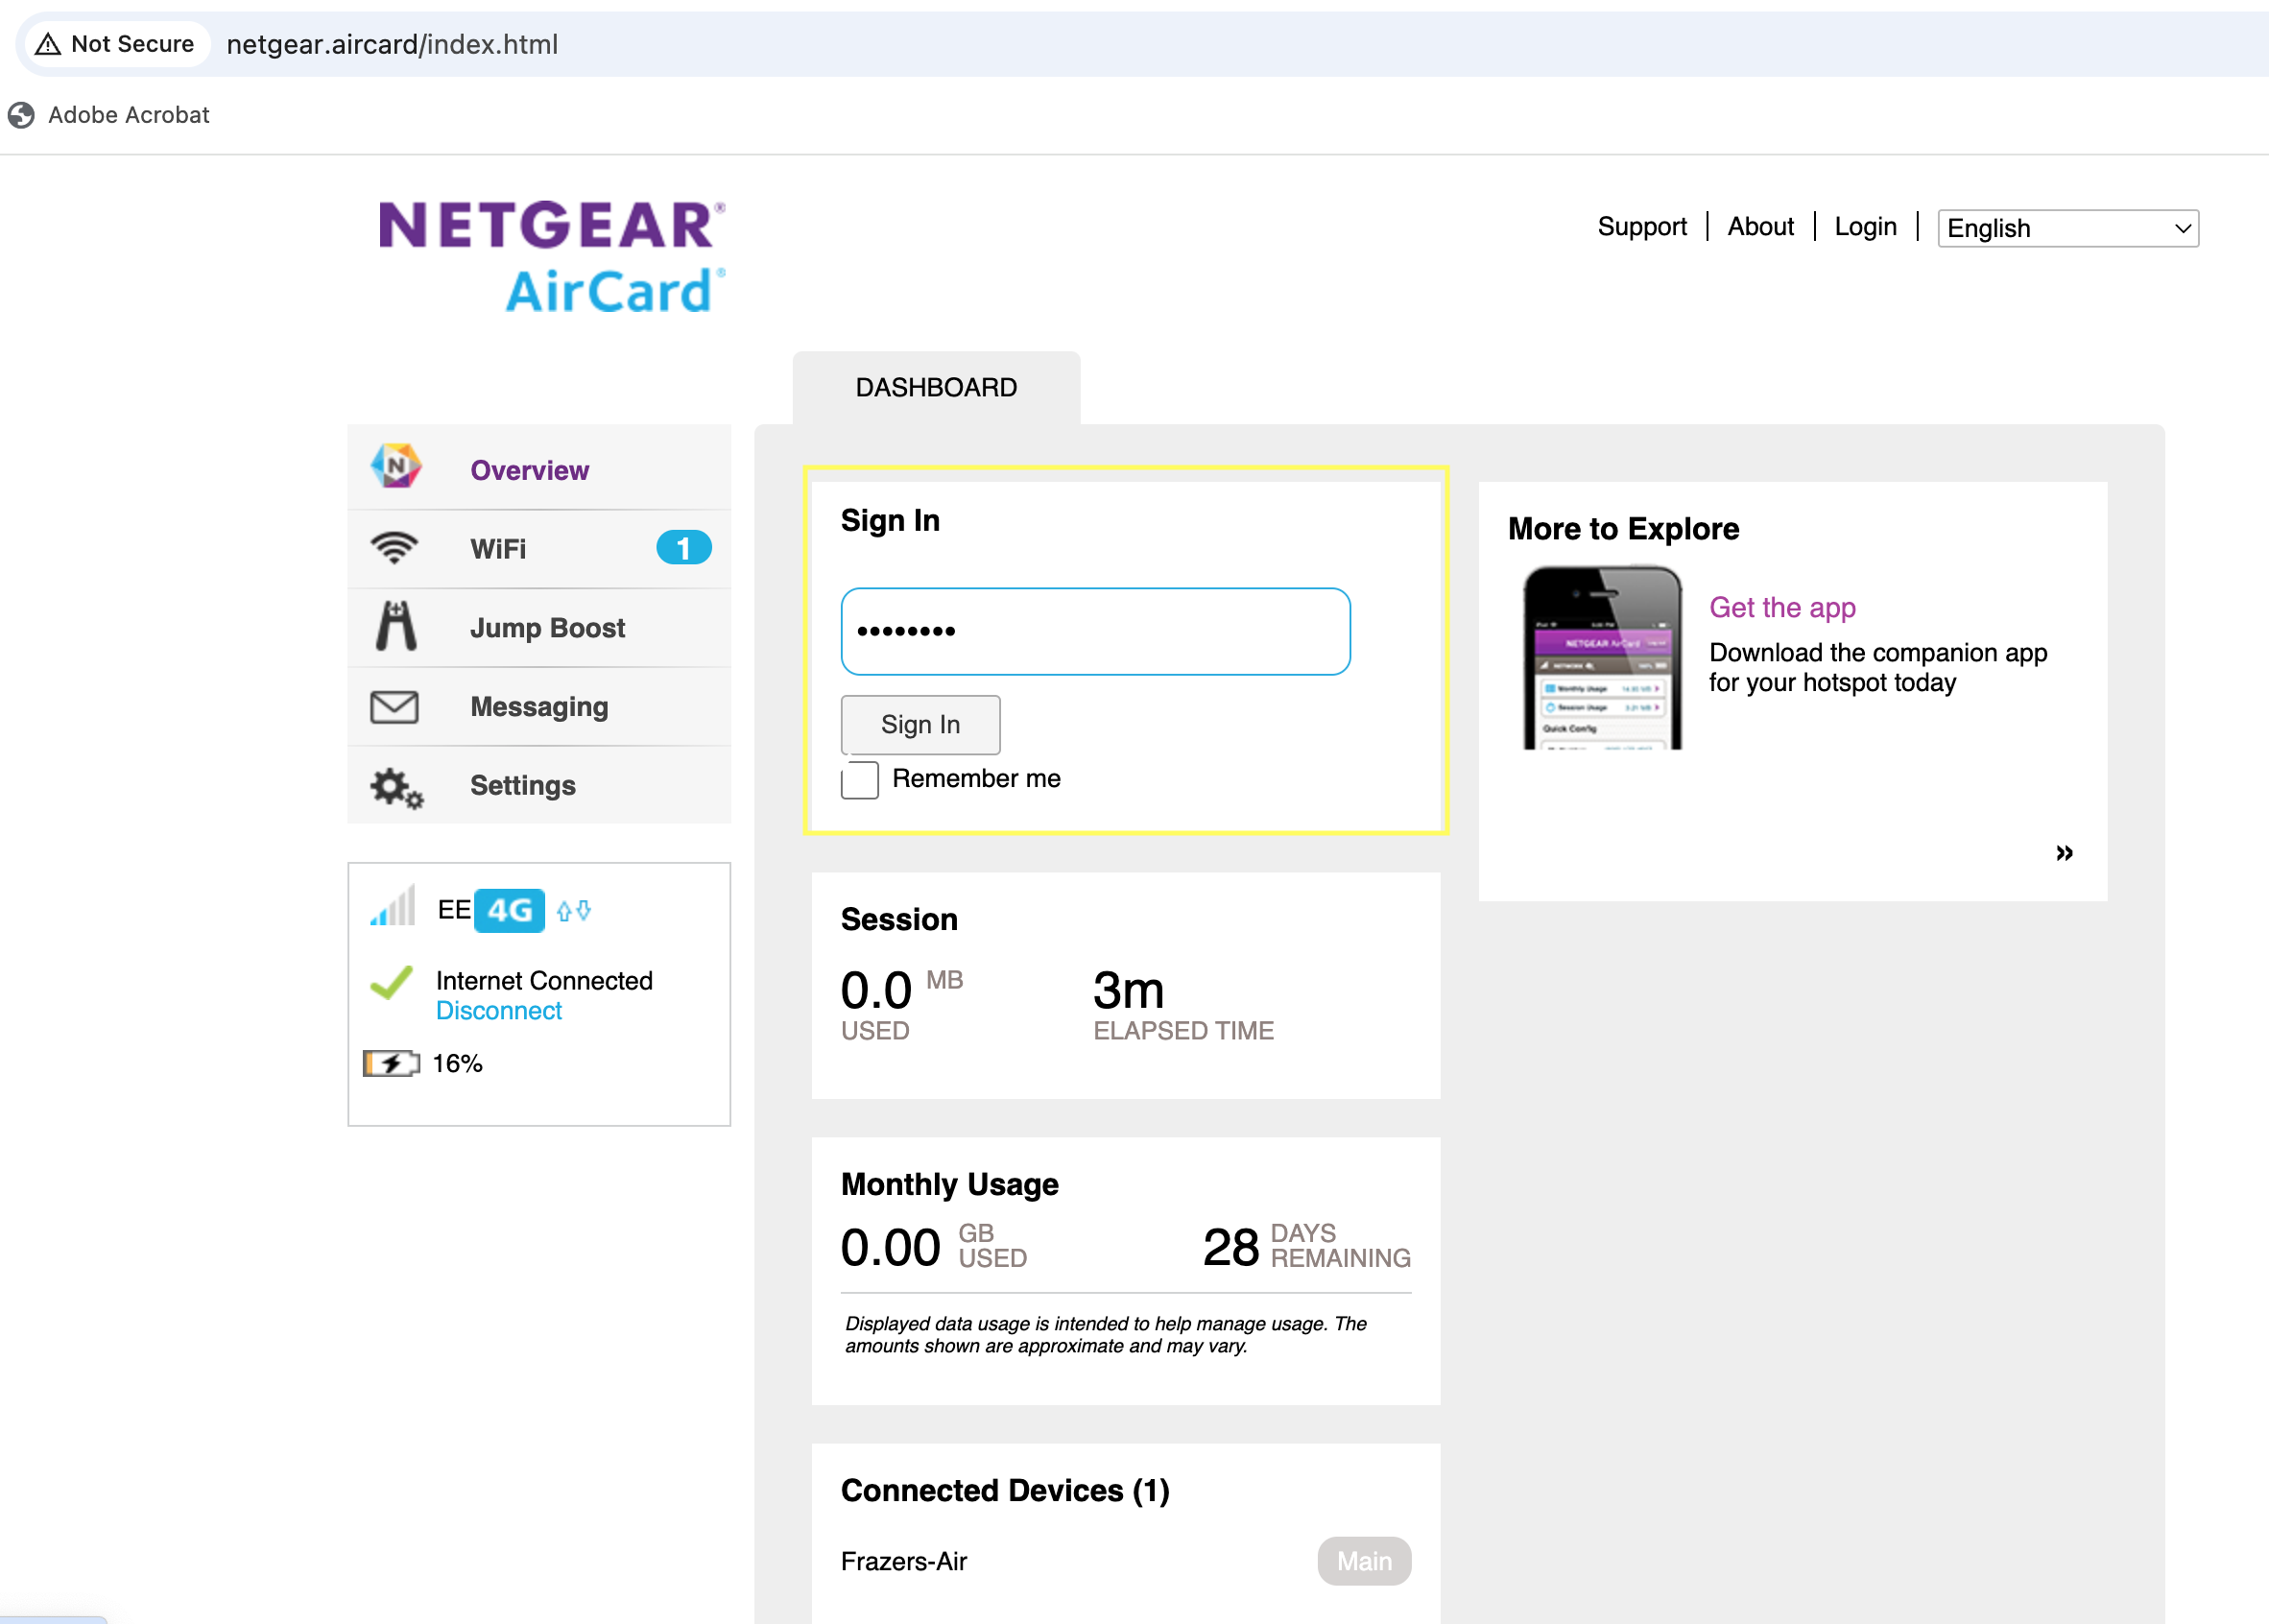
Step 4: Access the Interface
The setup screen should appear automatically upon WiFi connection. If not, type netgear.aircard/index.html into your browser's address bar (not the search field). Log in with the password from the sticker.

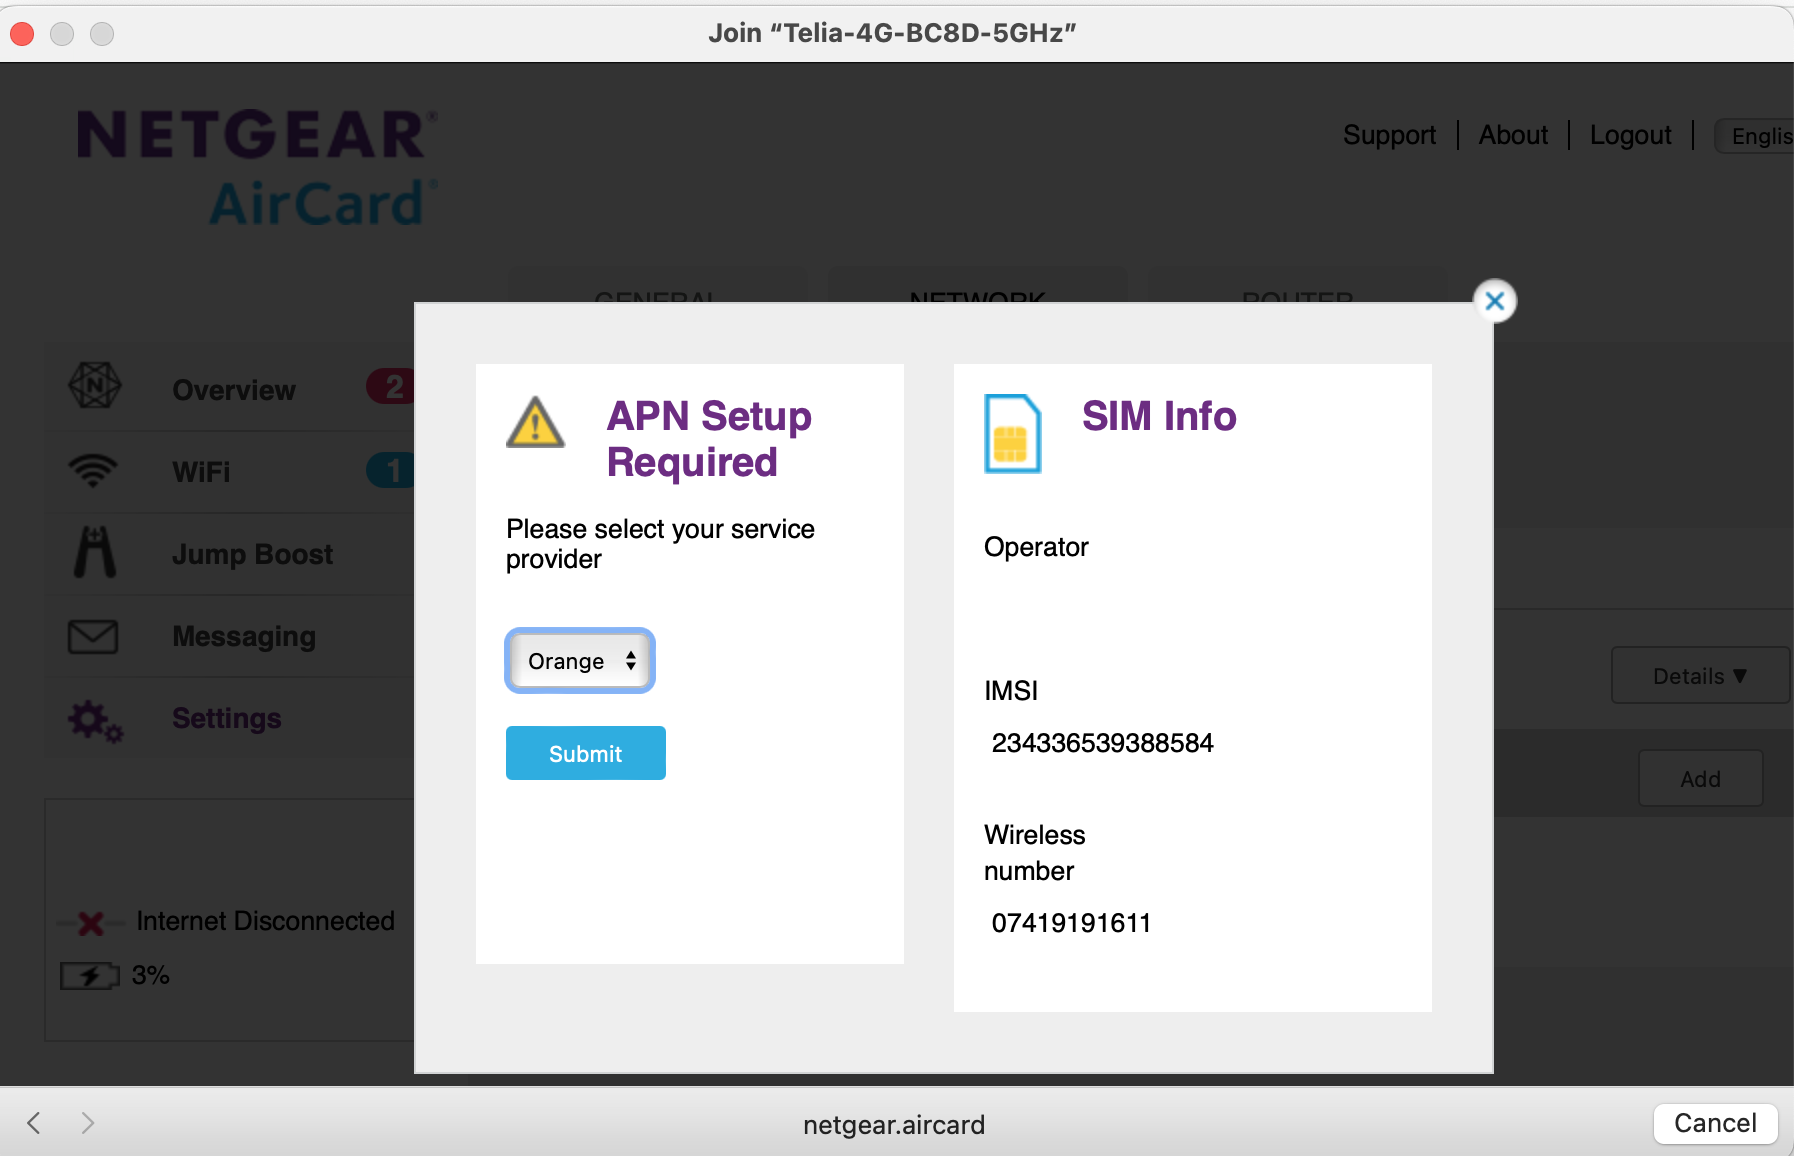
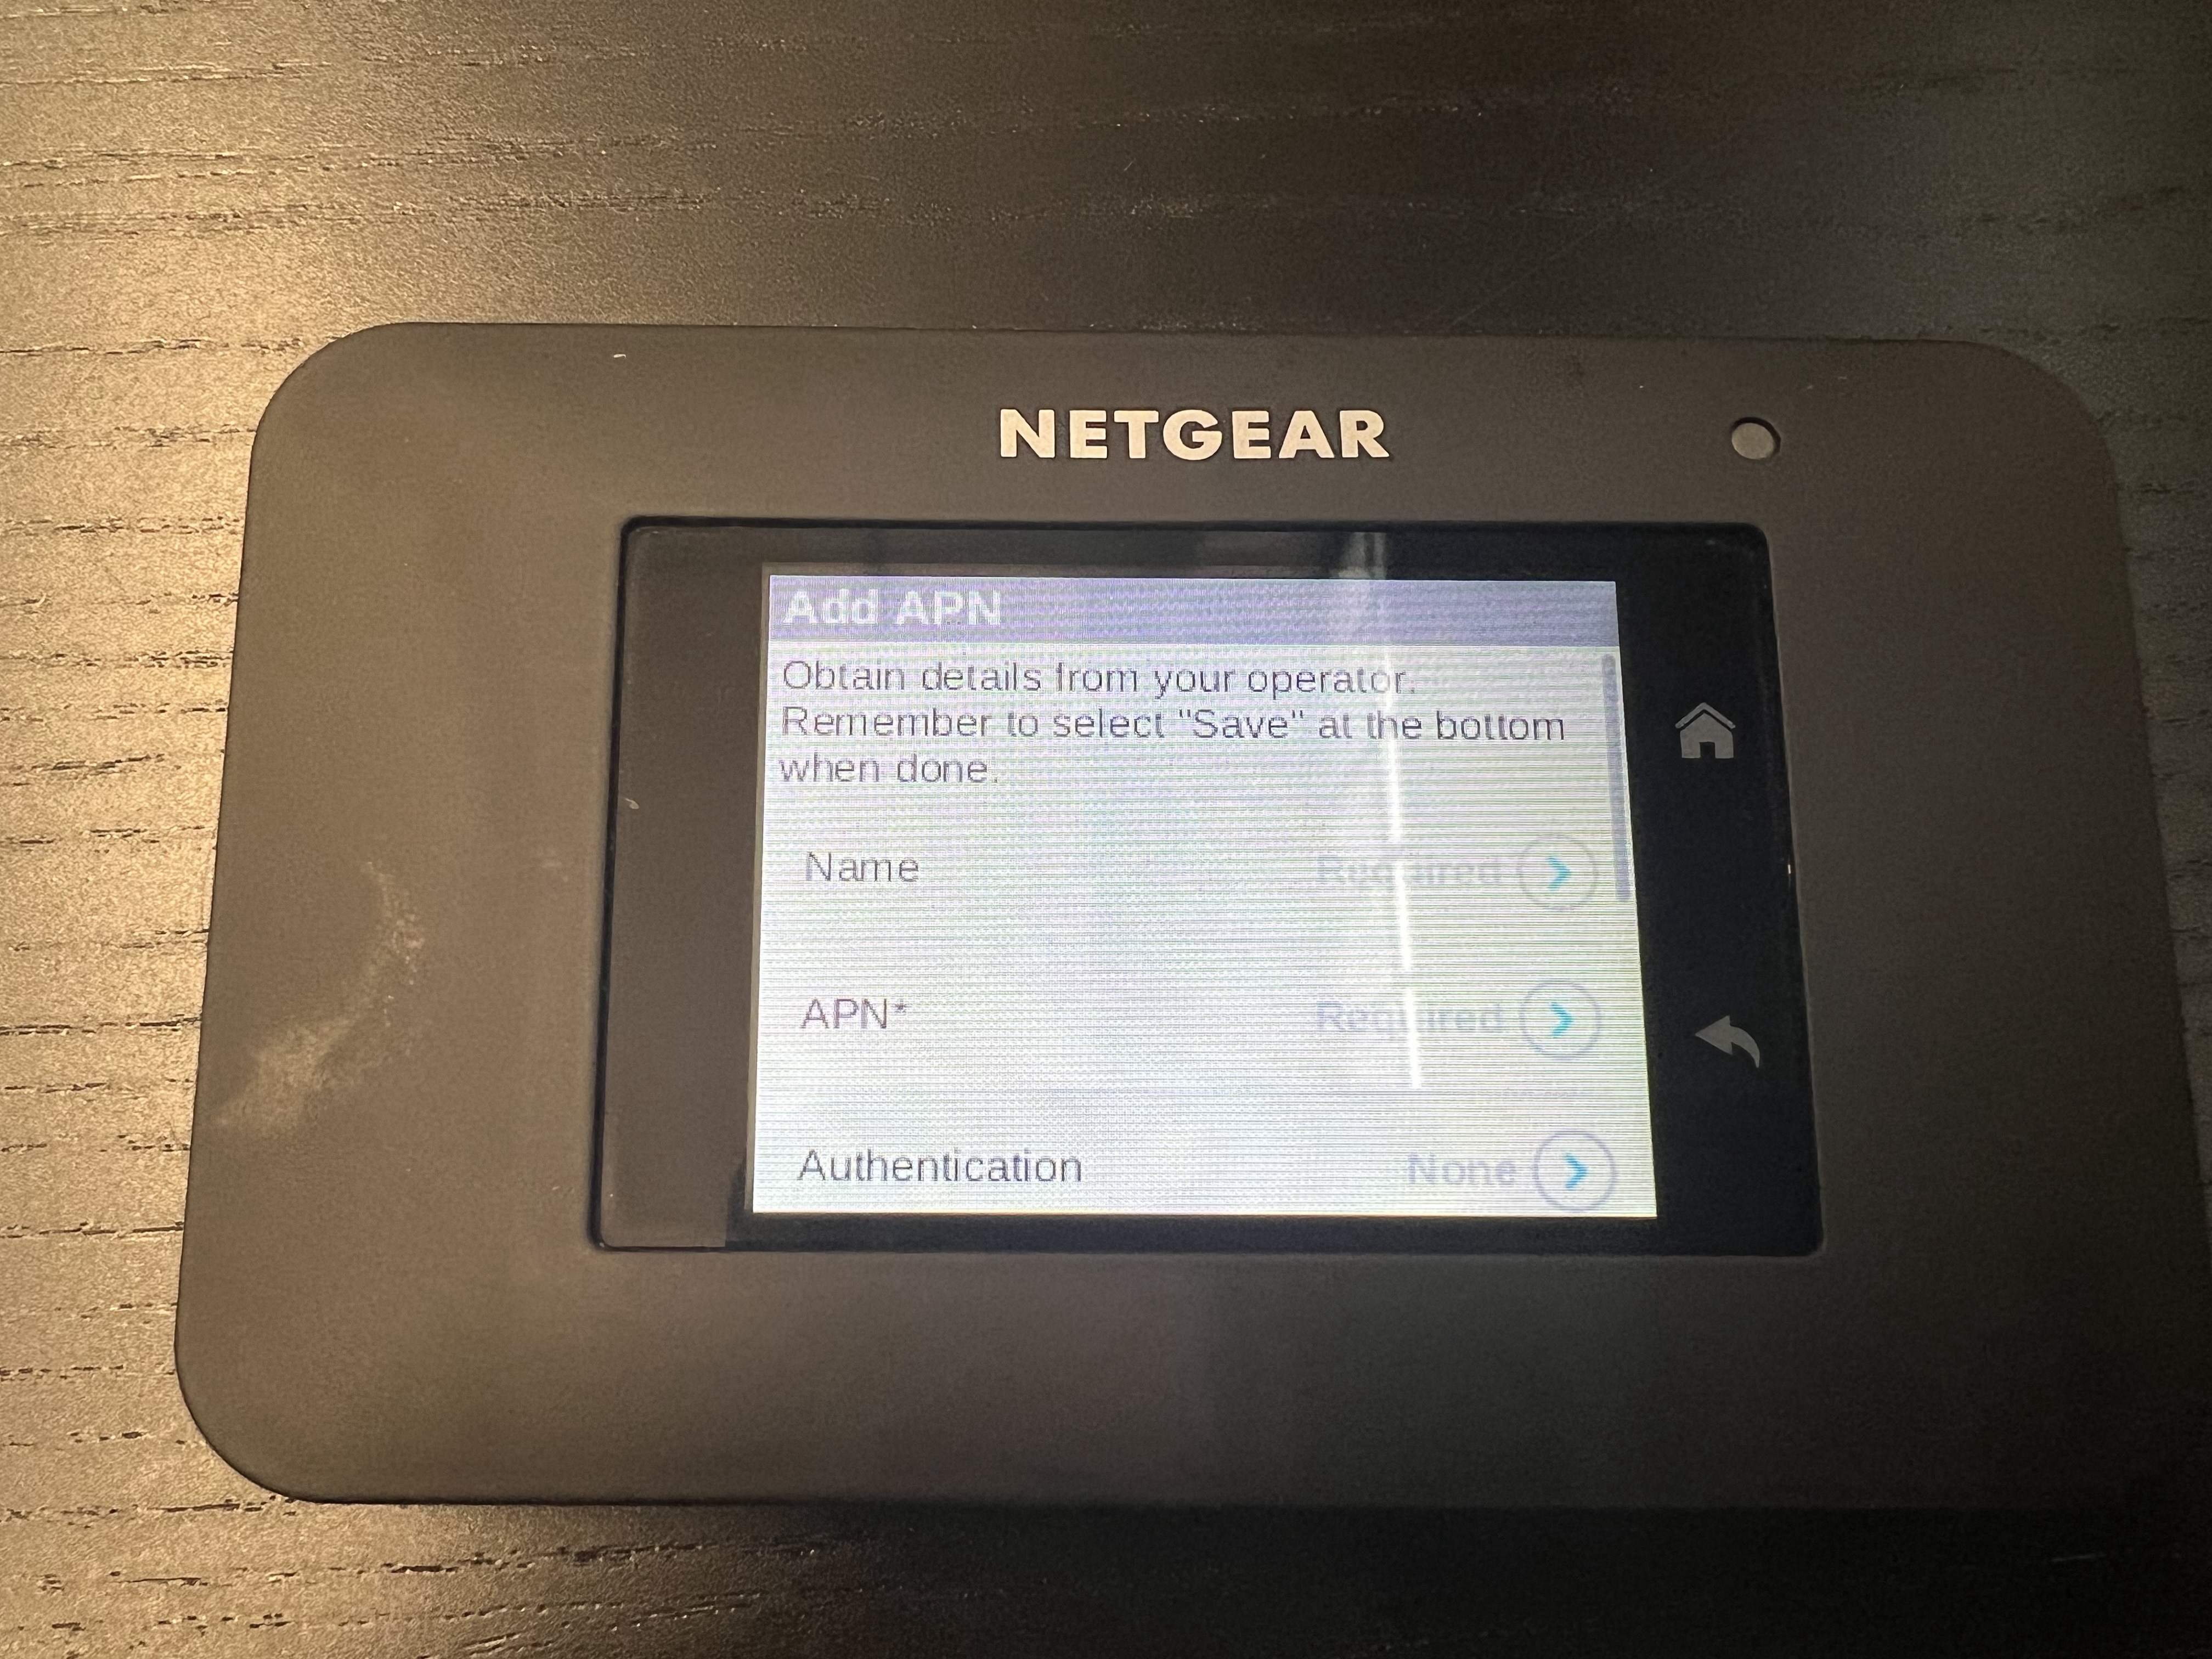
APN Configuration
Navigate to the Network menu, then the APN tab.
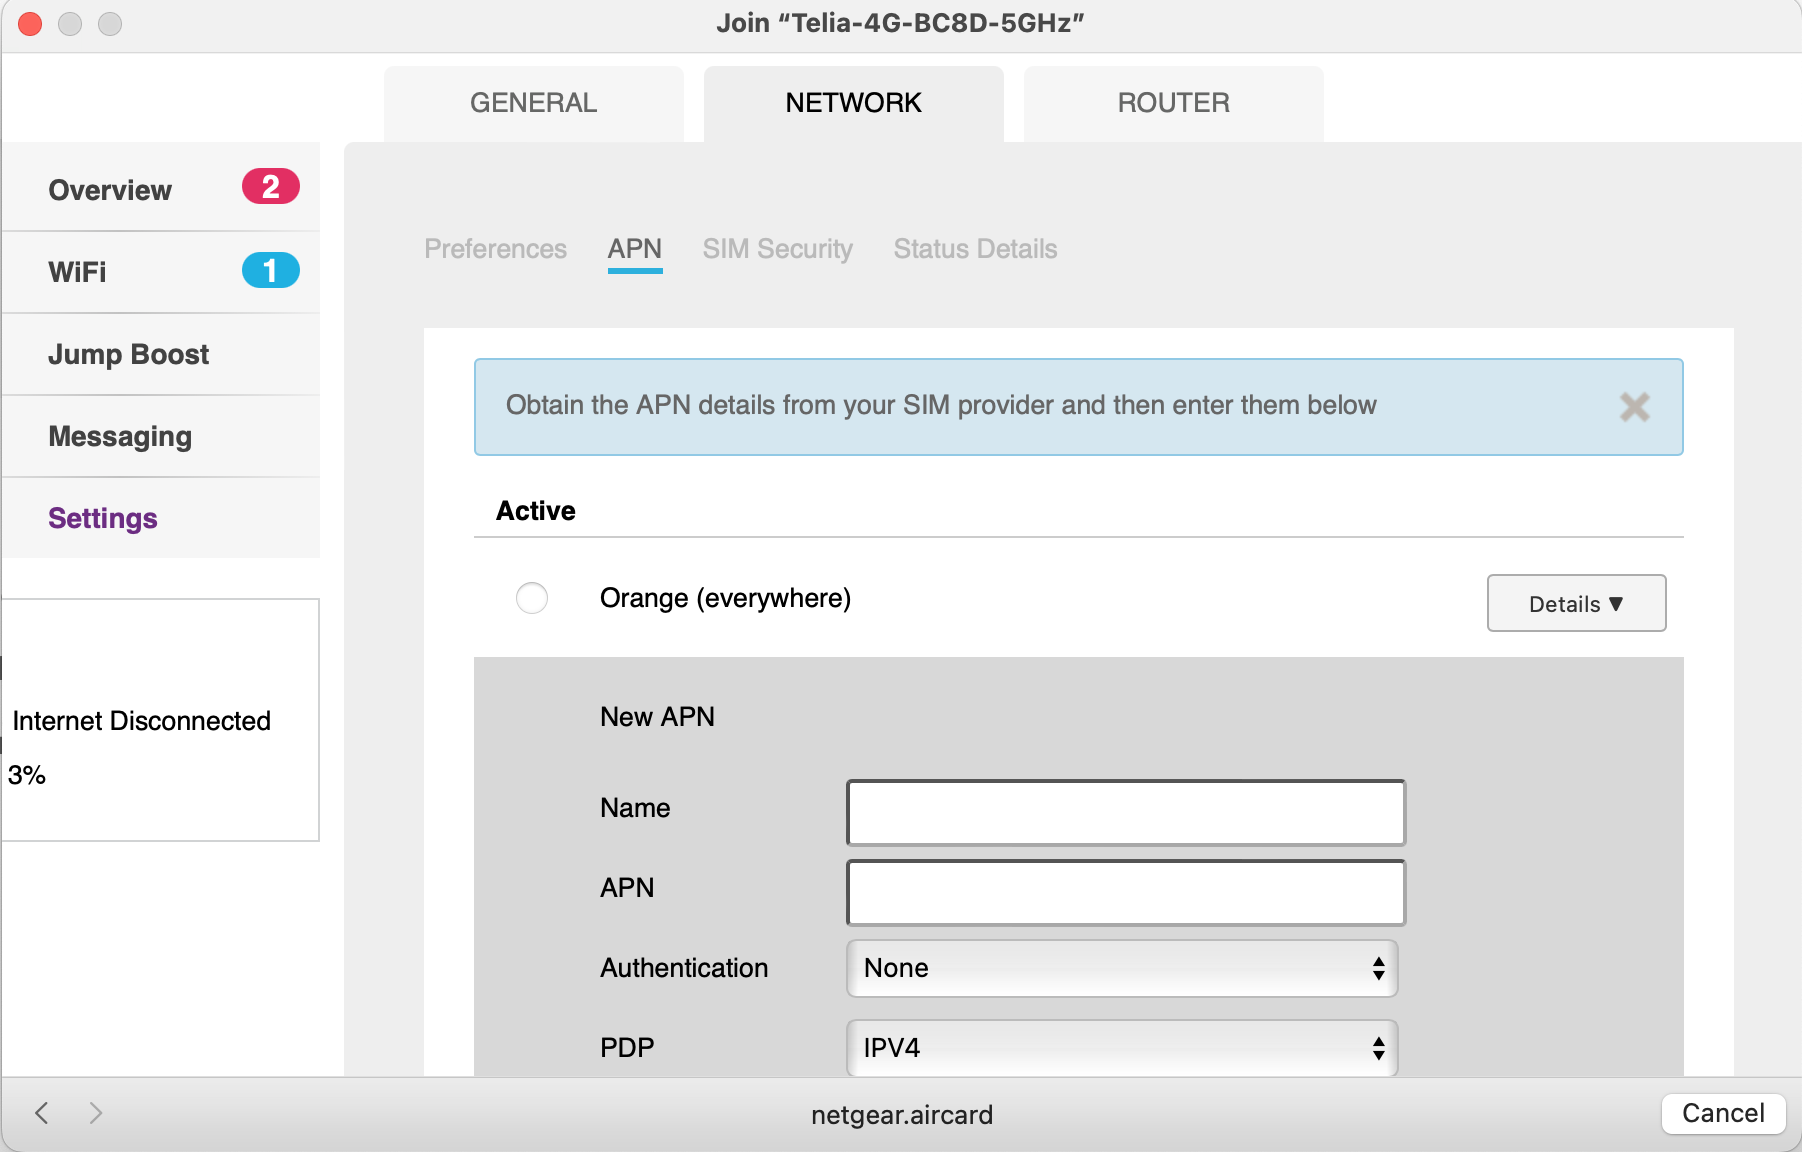
| Field | Value |
|---|---|
| APN | everywhere |
| Authentication | PAP |
| Username | eesecure |
| Password | secure |
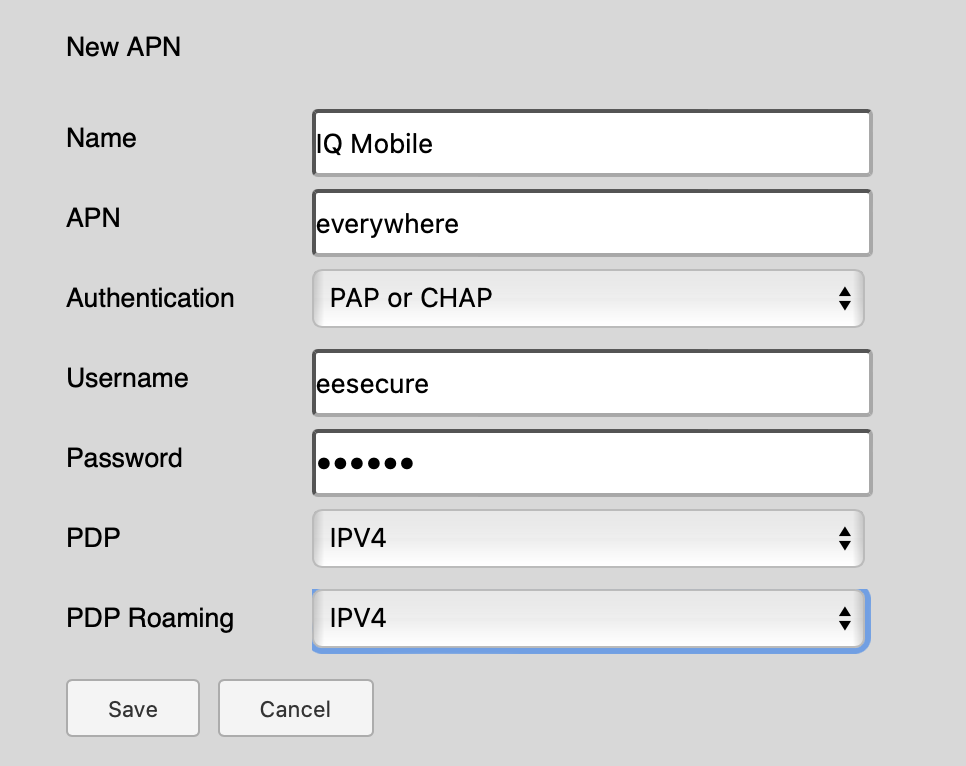
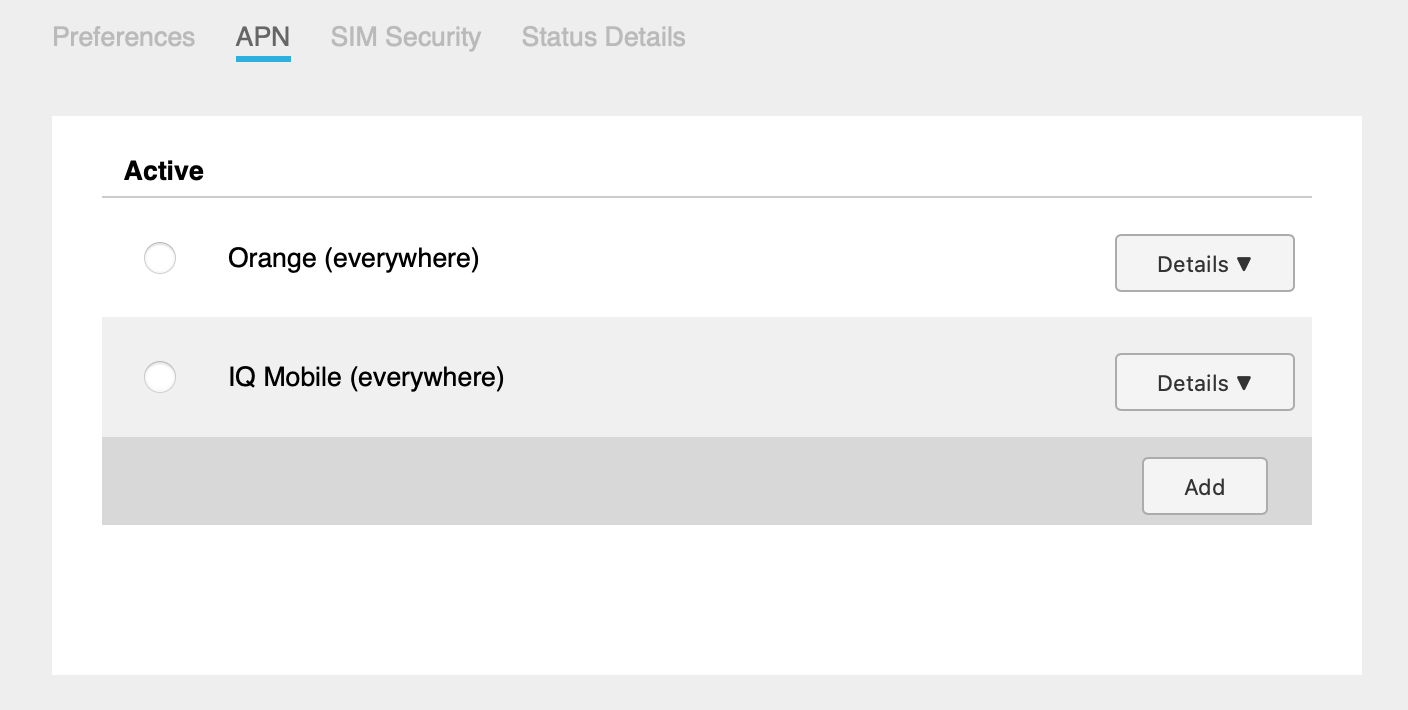
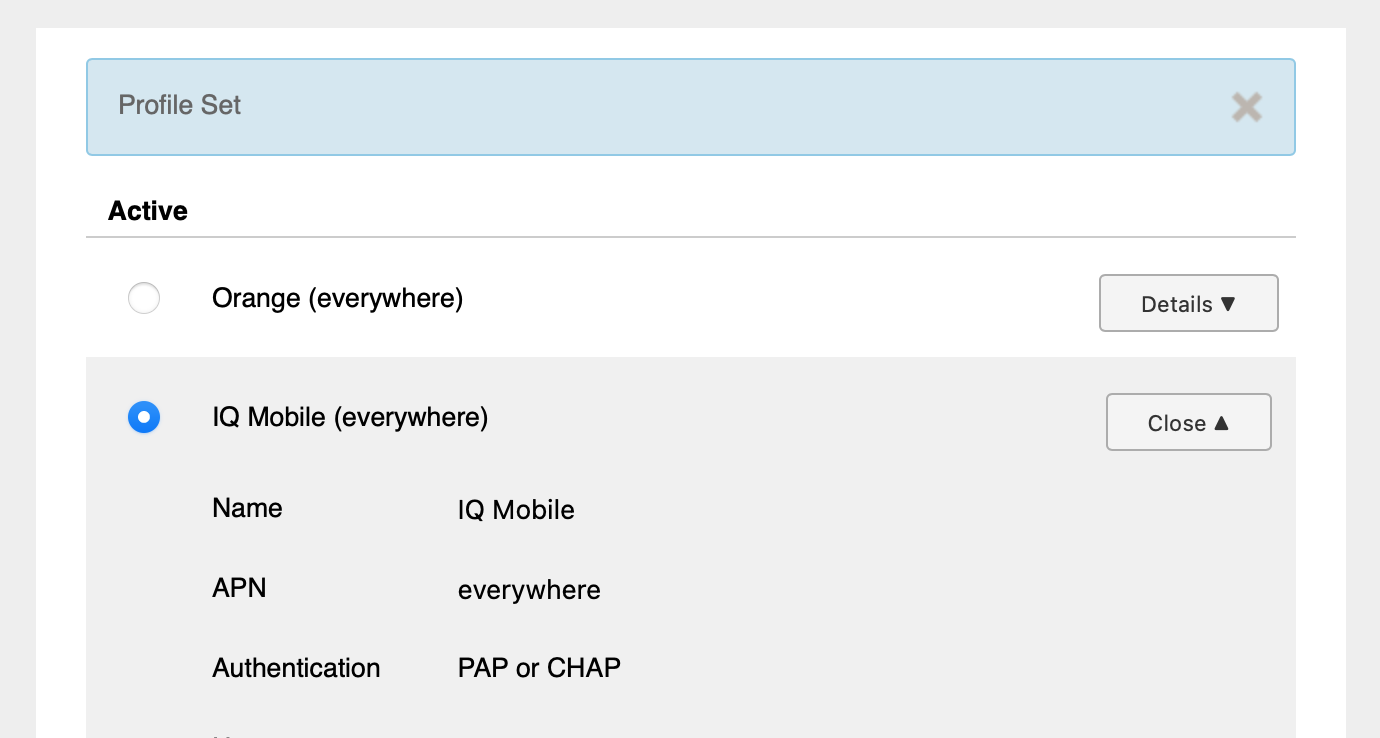
After entering settings, select SAVE. You can add multiple APN profiles and select which one remains active.
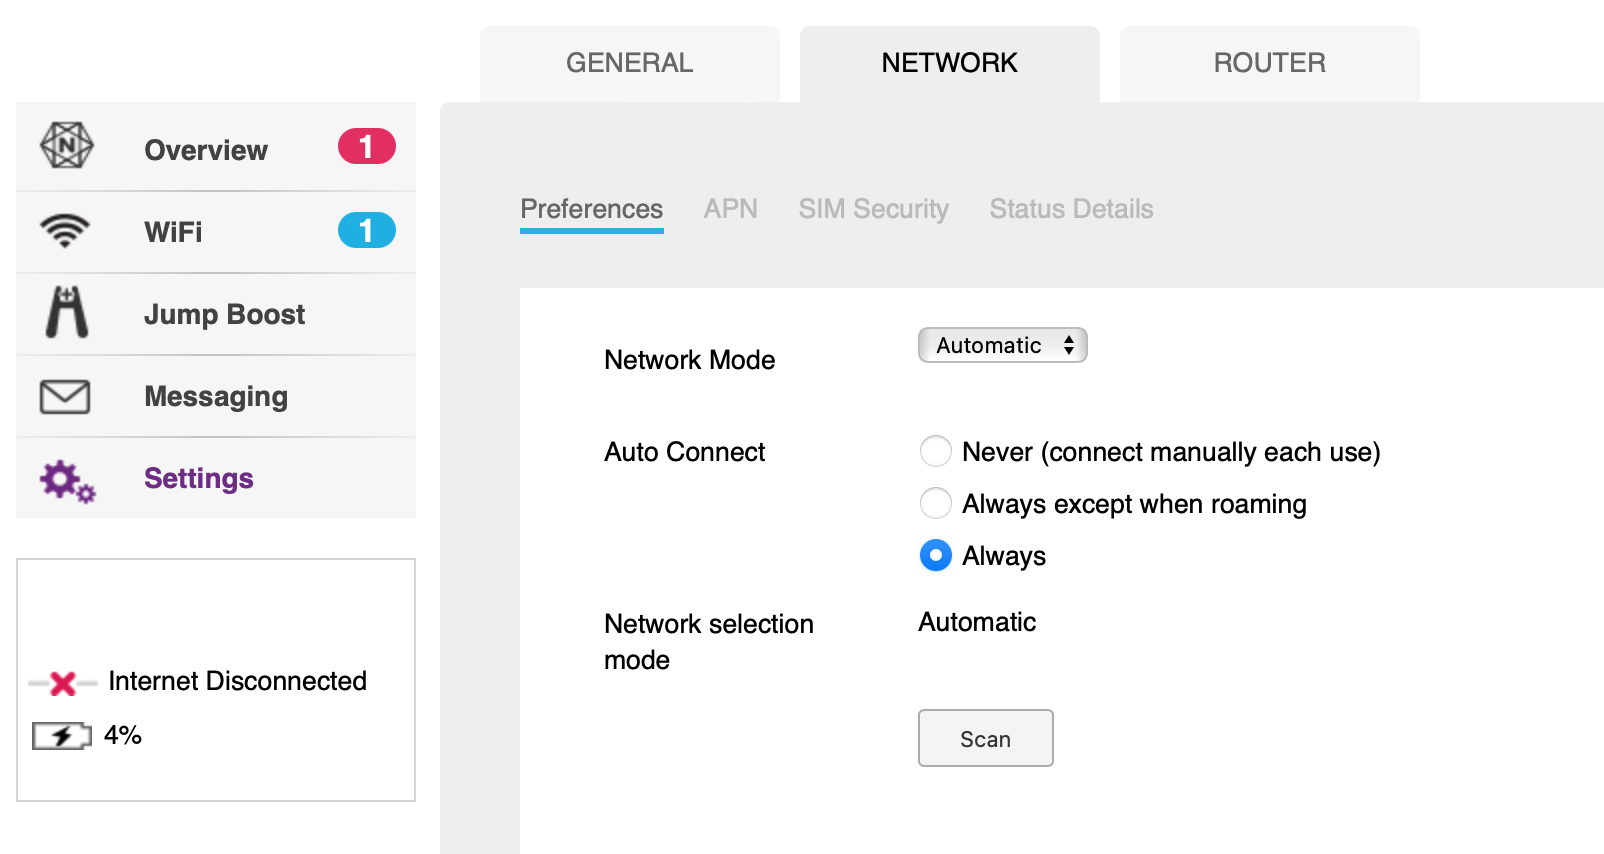
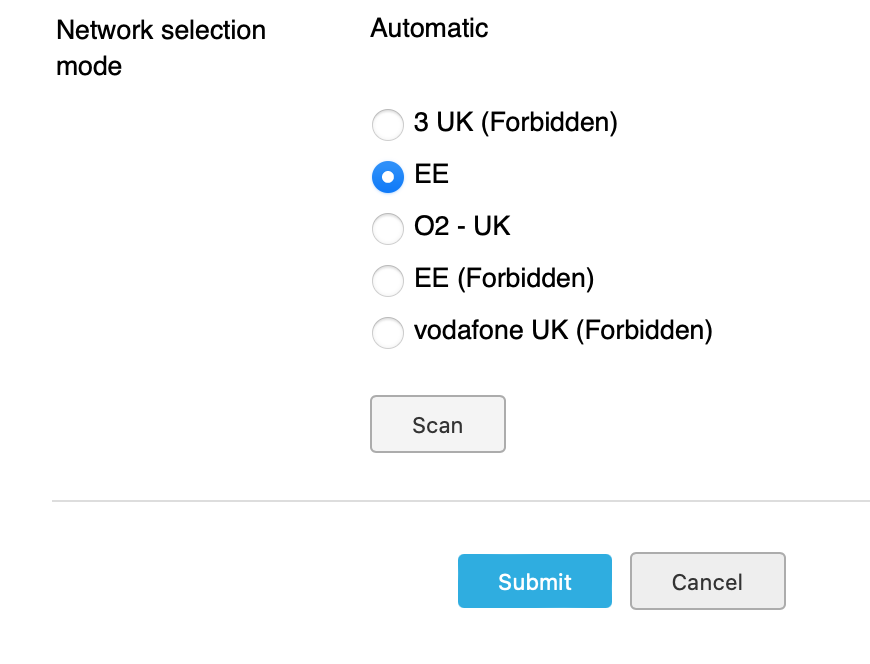
Network Selection
Navigate to Network tab > Preferences section. Press the "Scan" button to view available networks, then select and submit your preferred option. Remember to return selection to auto mode rather than leaving it on manual.
Still need help?
Our UK-based team is here for you