Router Configuration
Huawei E5577C (4G)
Setting up the Huawei E5577C for use with IQ SIM
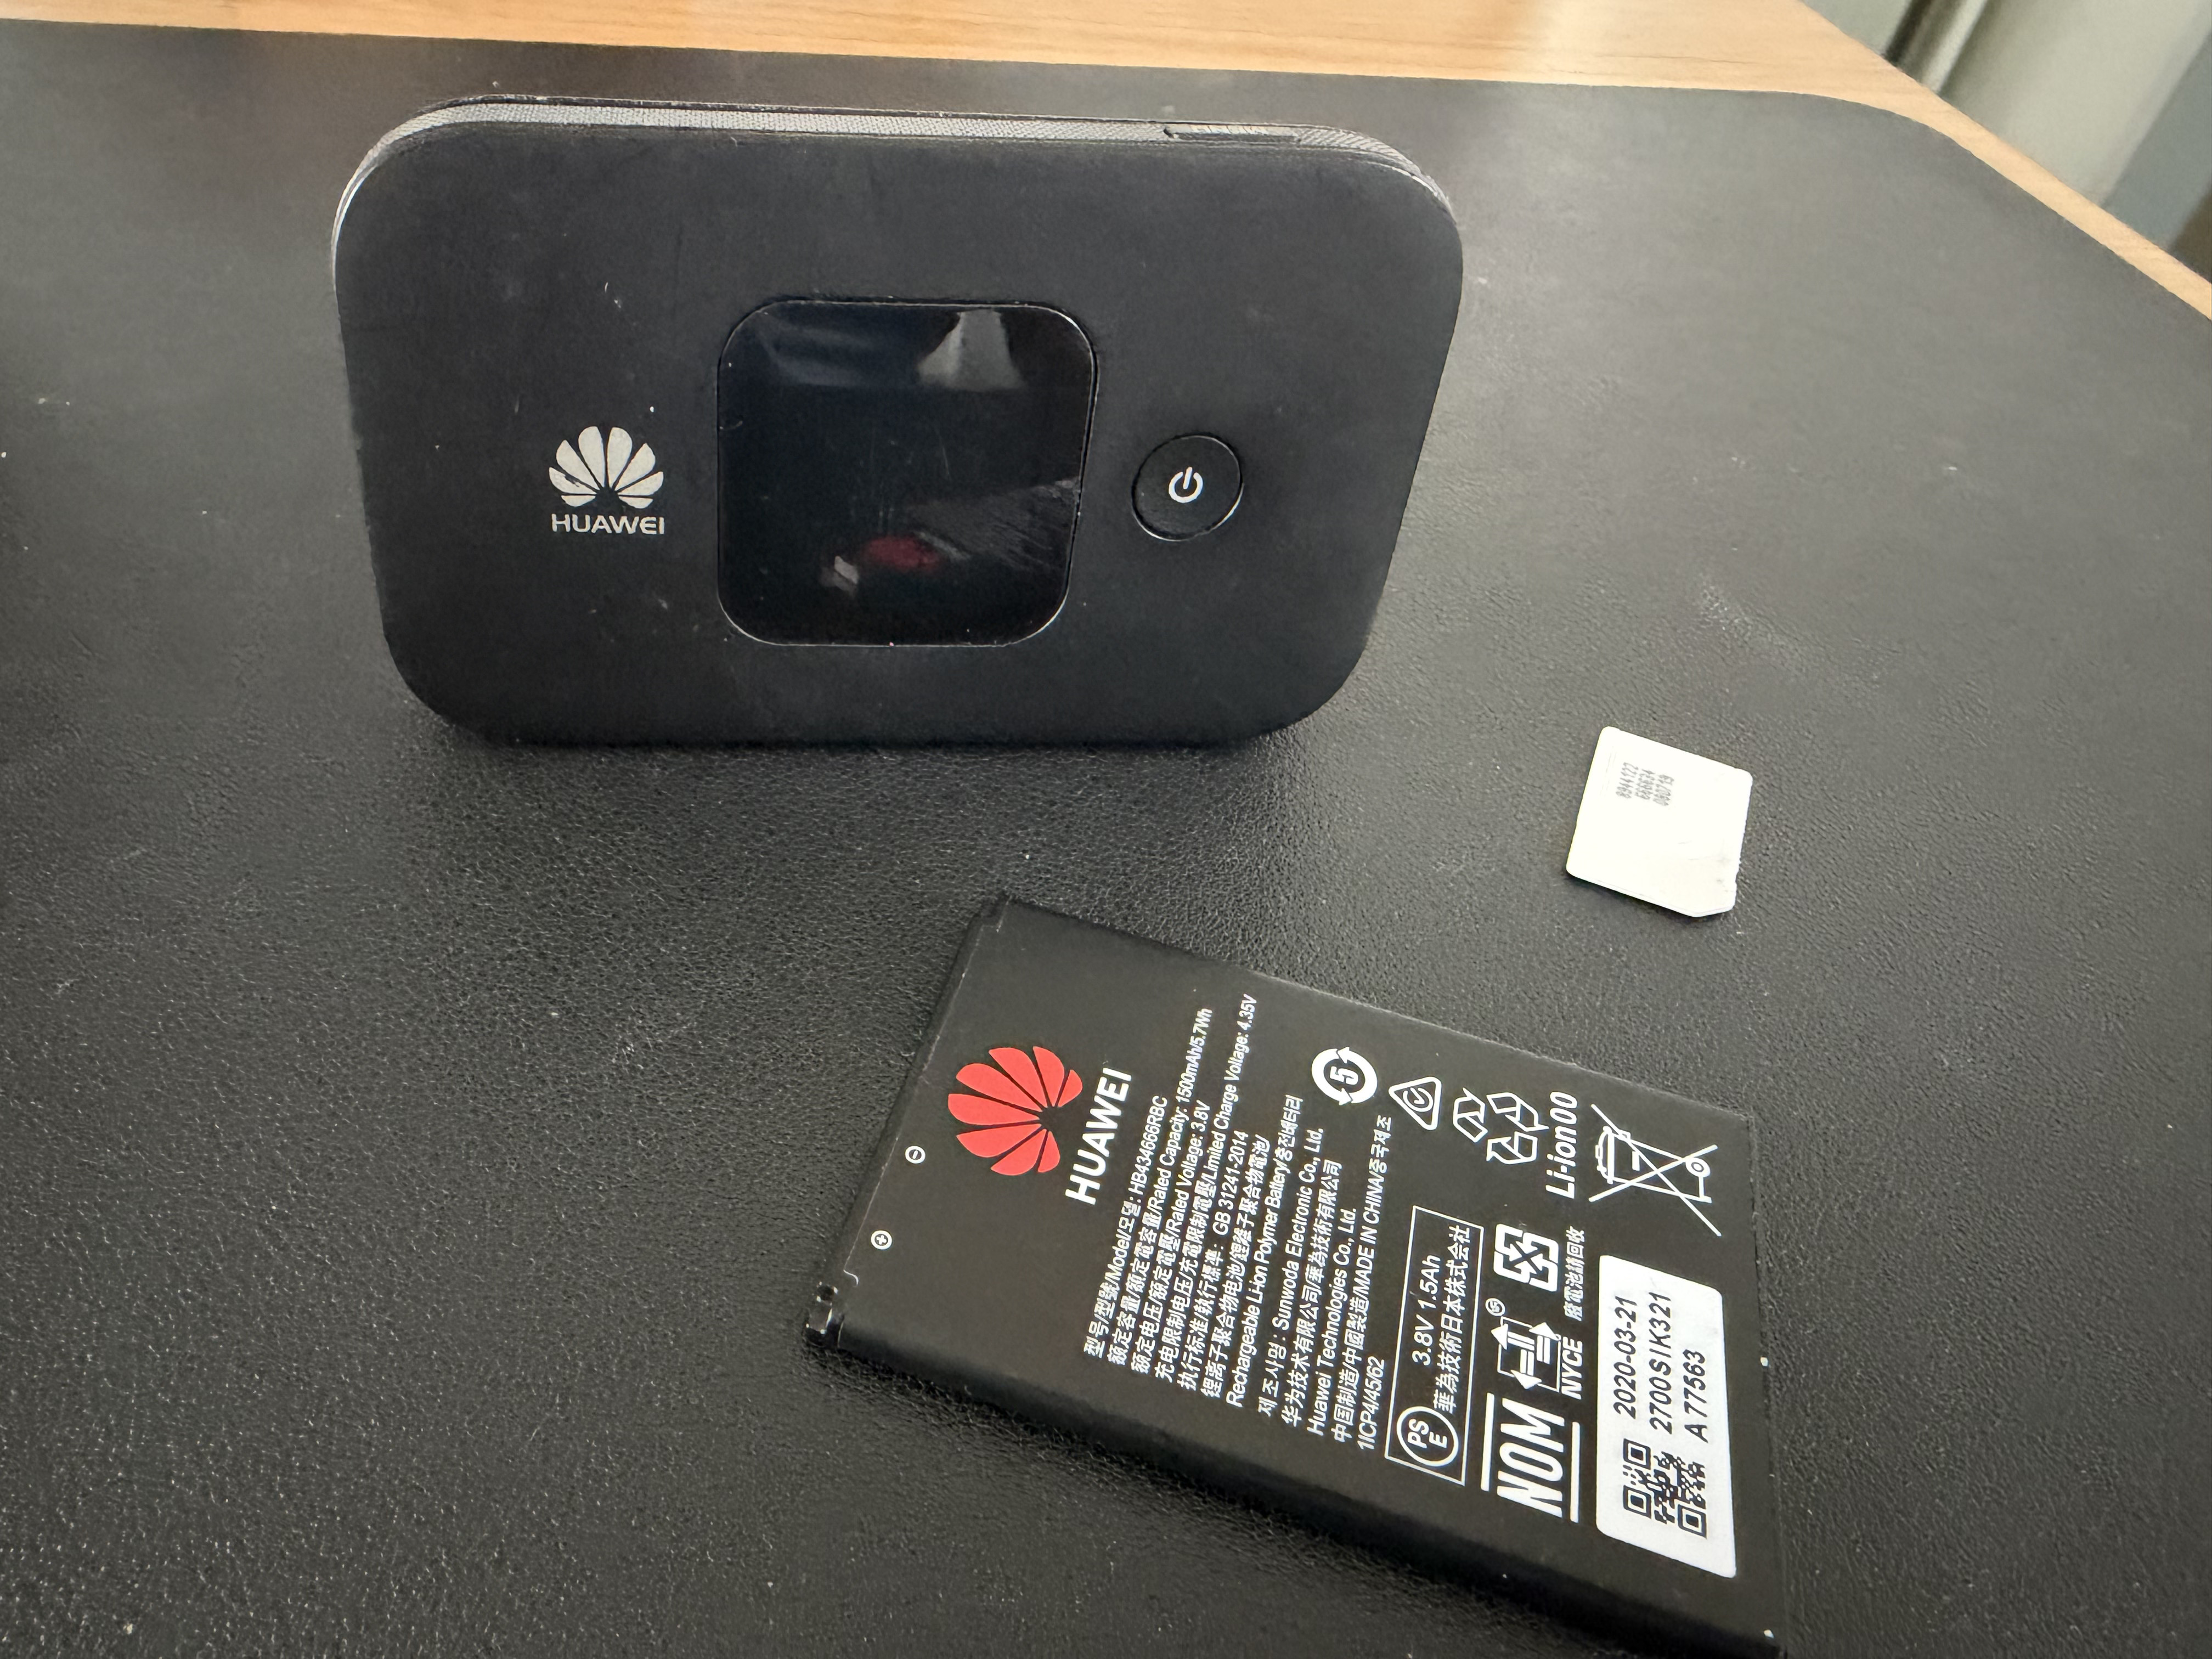
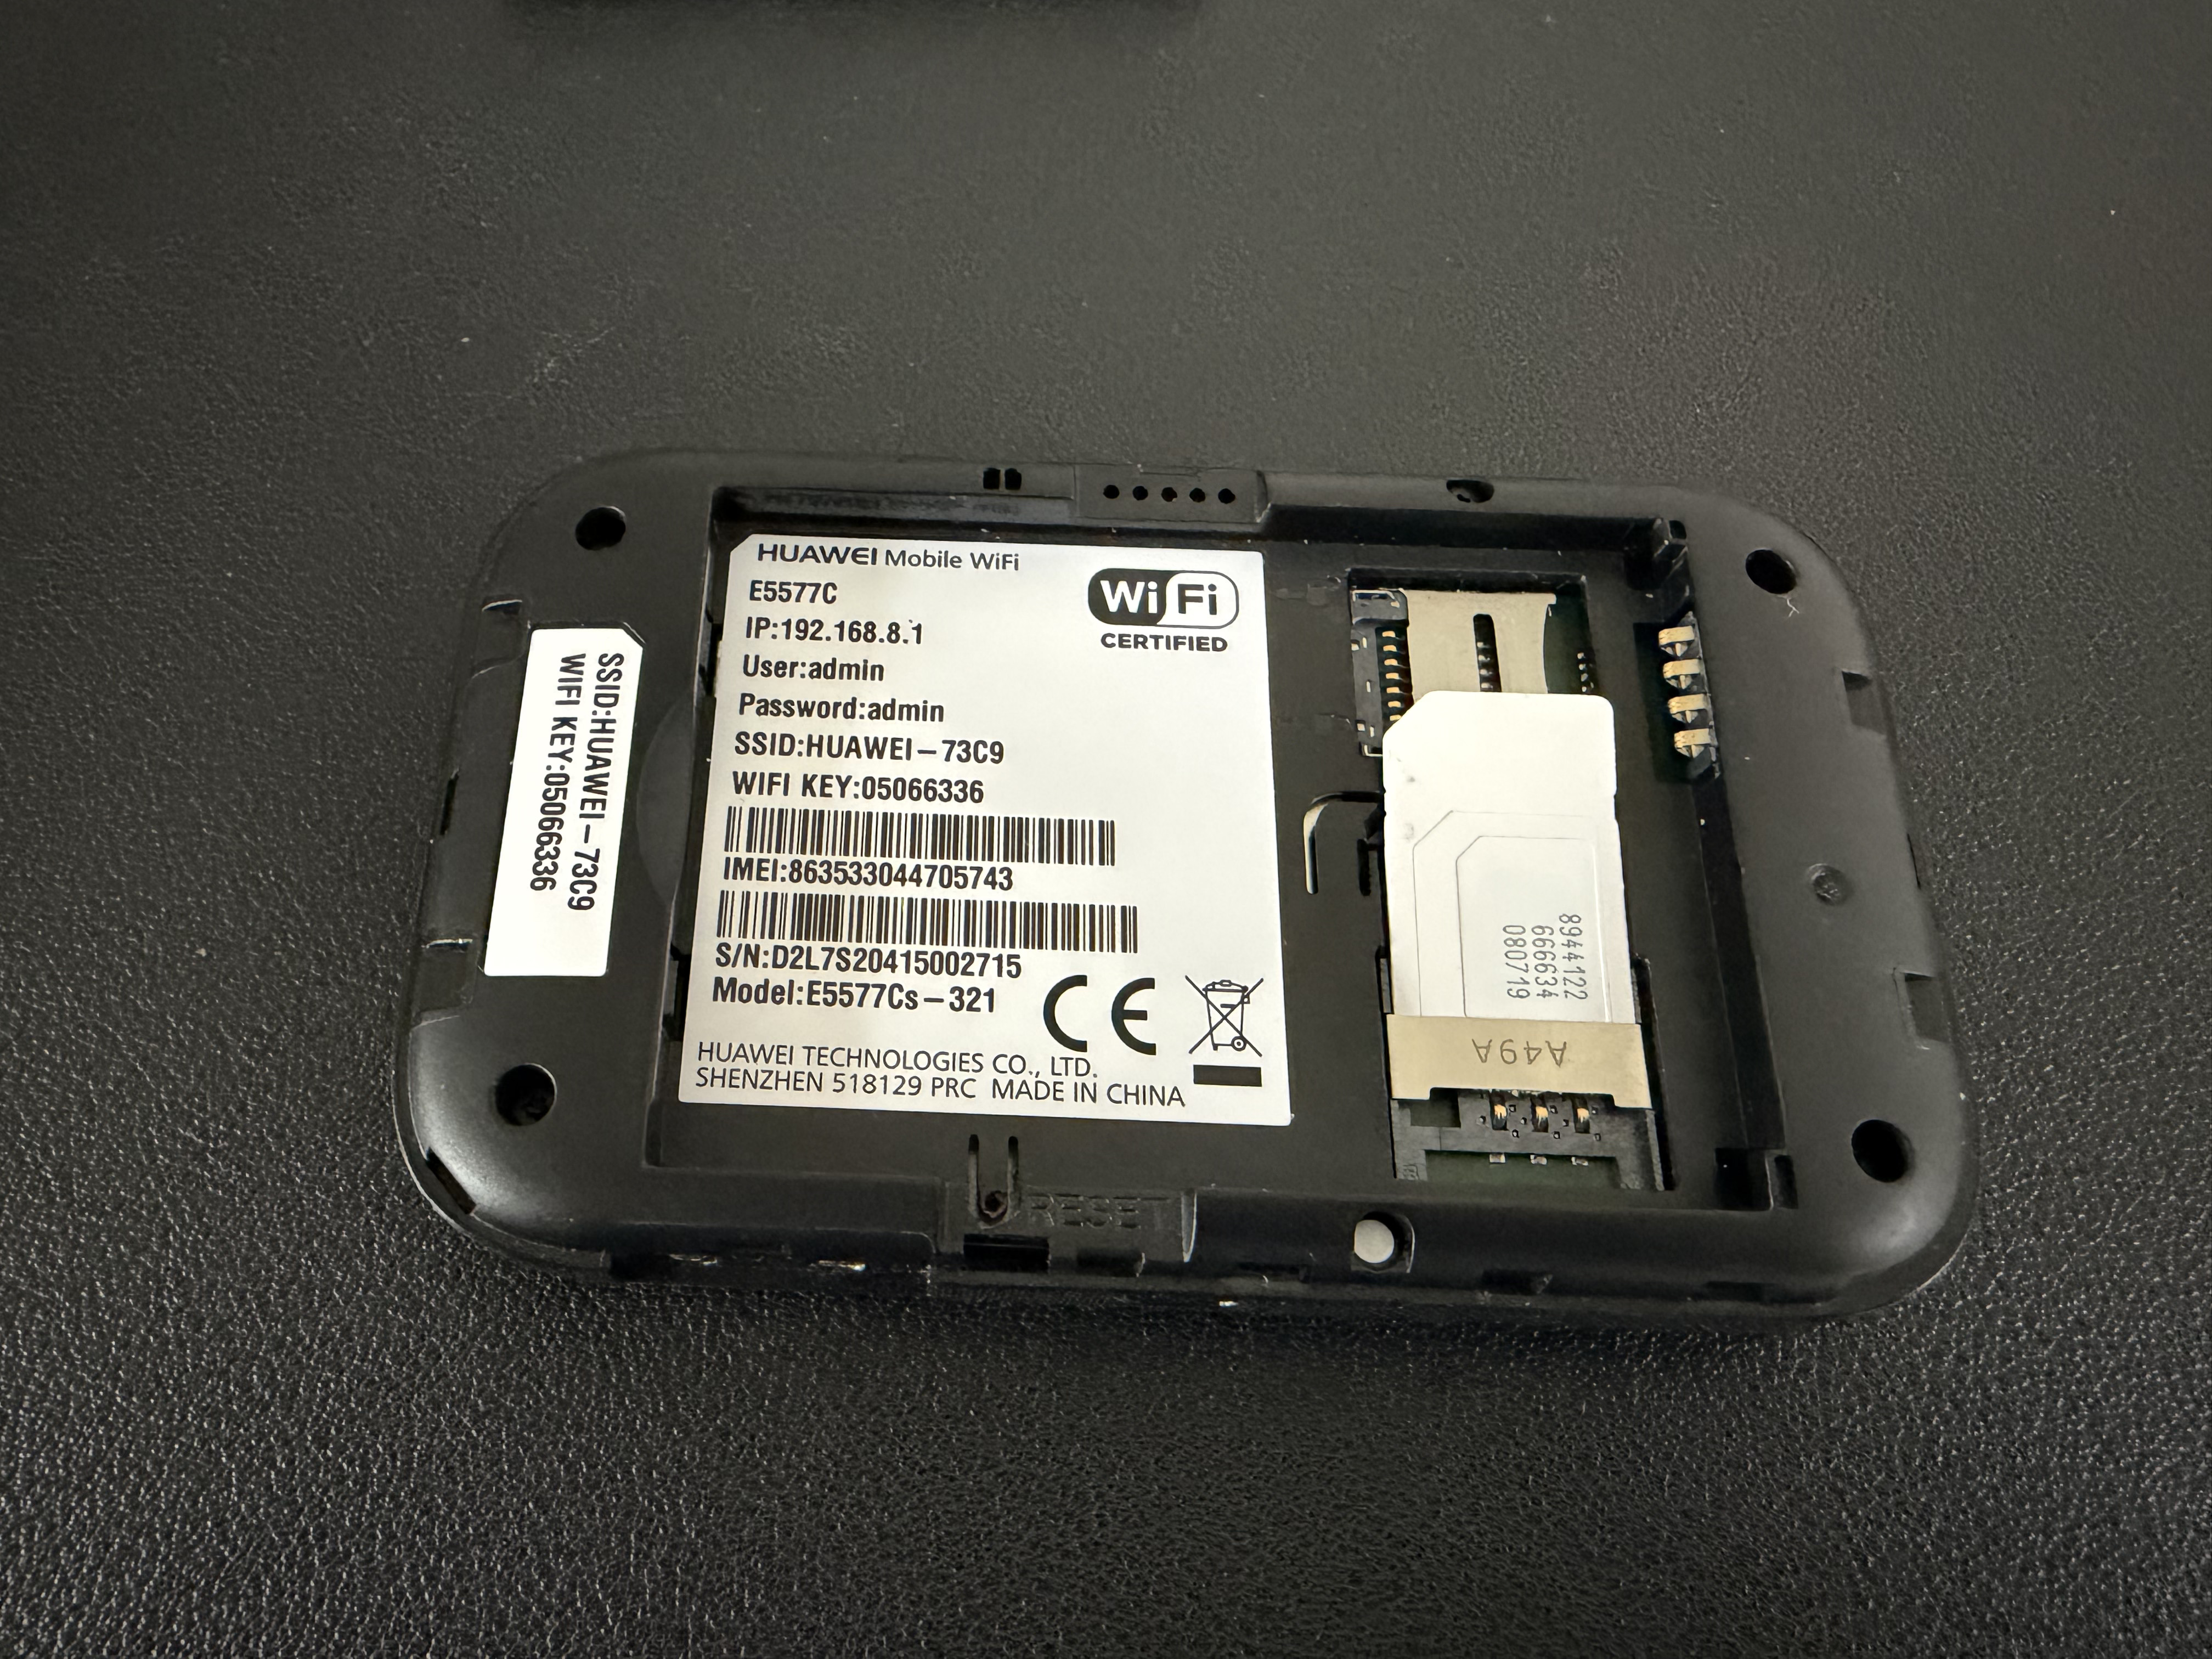
Step 1
Once you have opened the device, please make a note of the information contained on the sticker (perhaps take a photo of it) Please insert the SIM as shown in the picture below.
Step 2
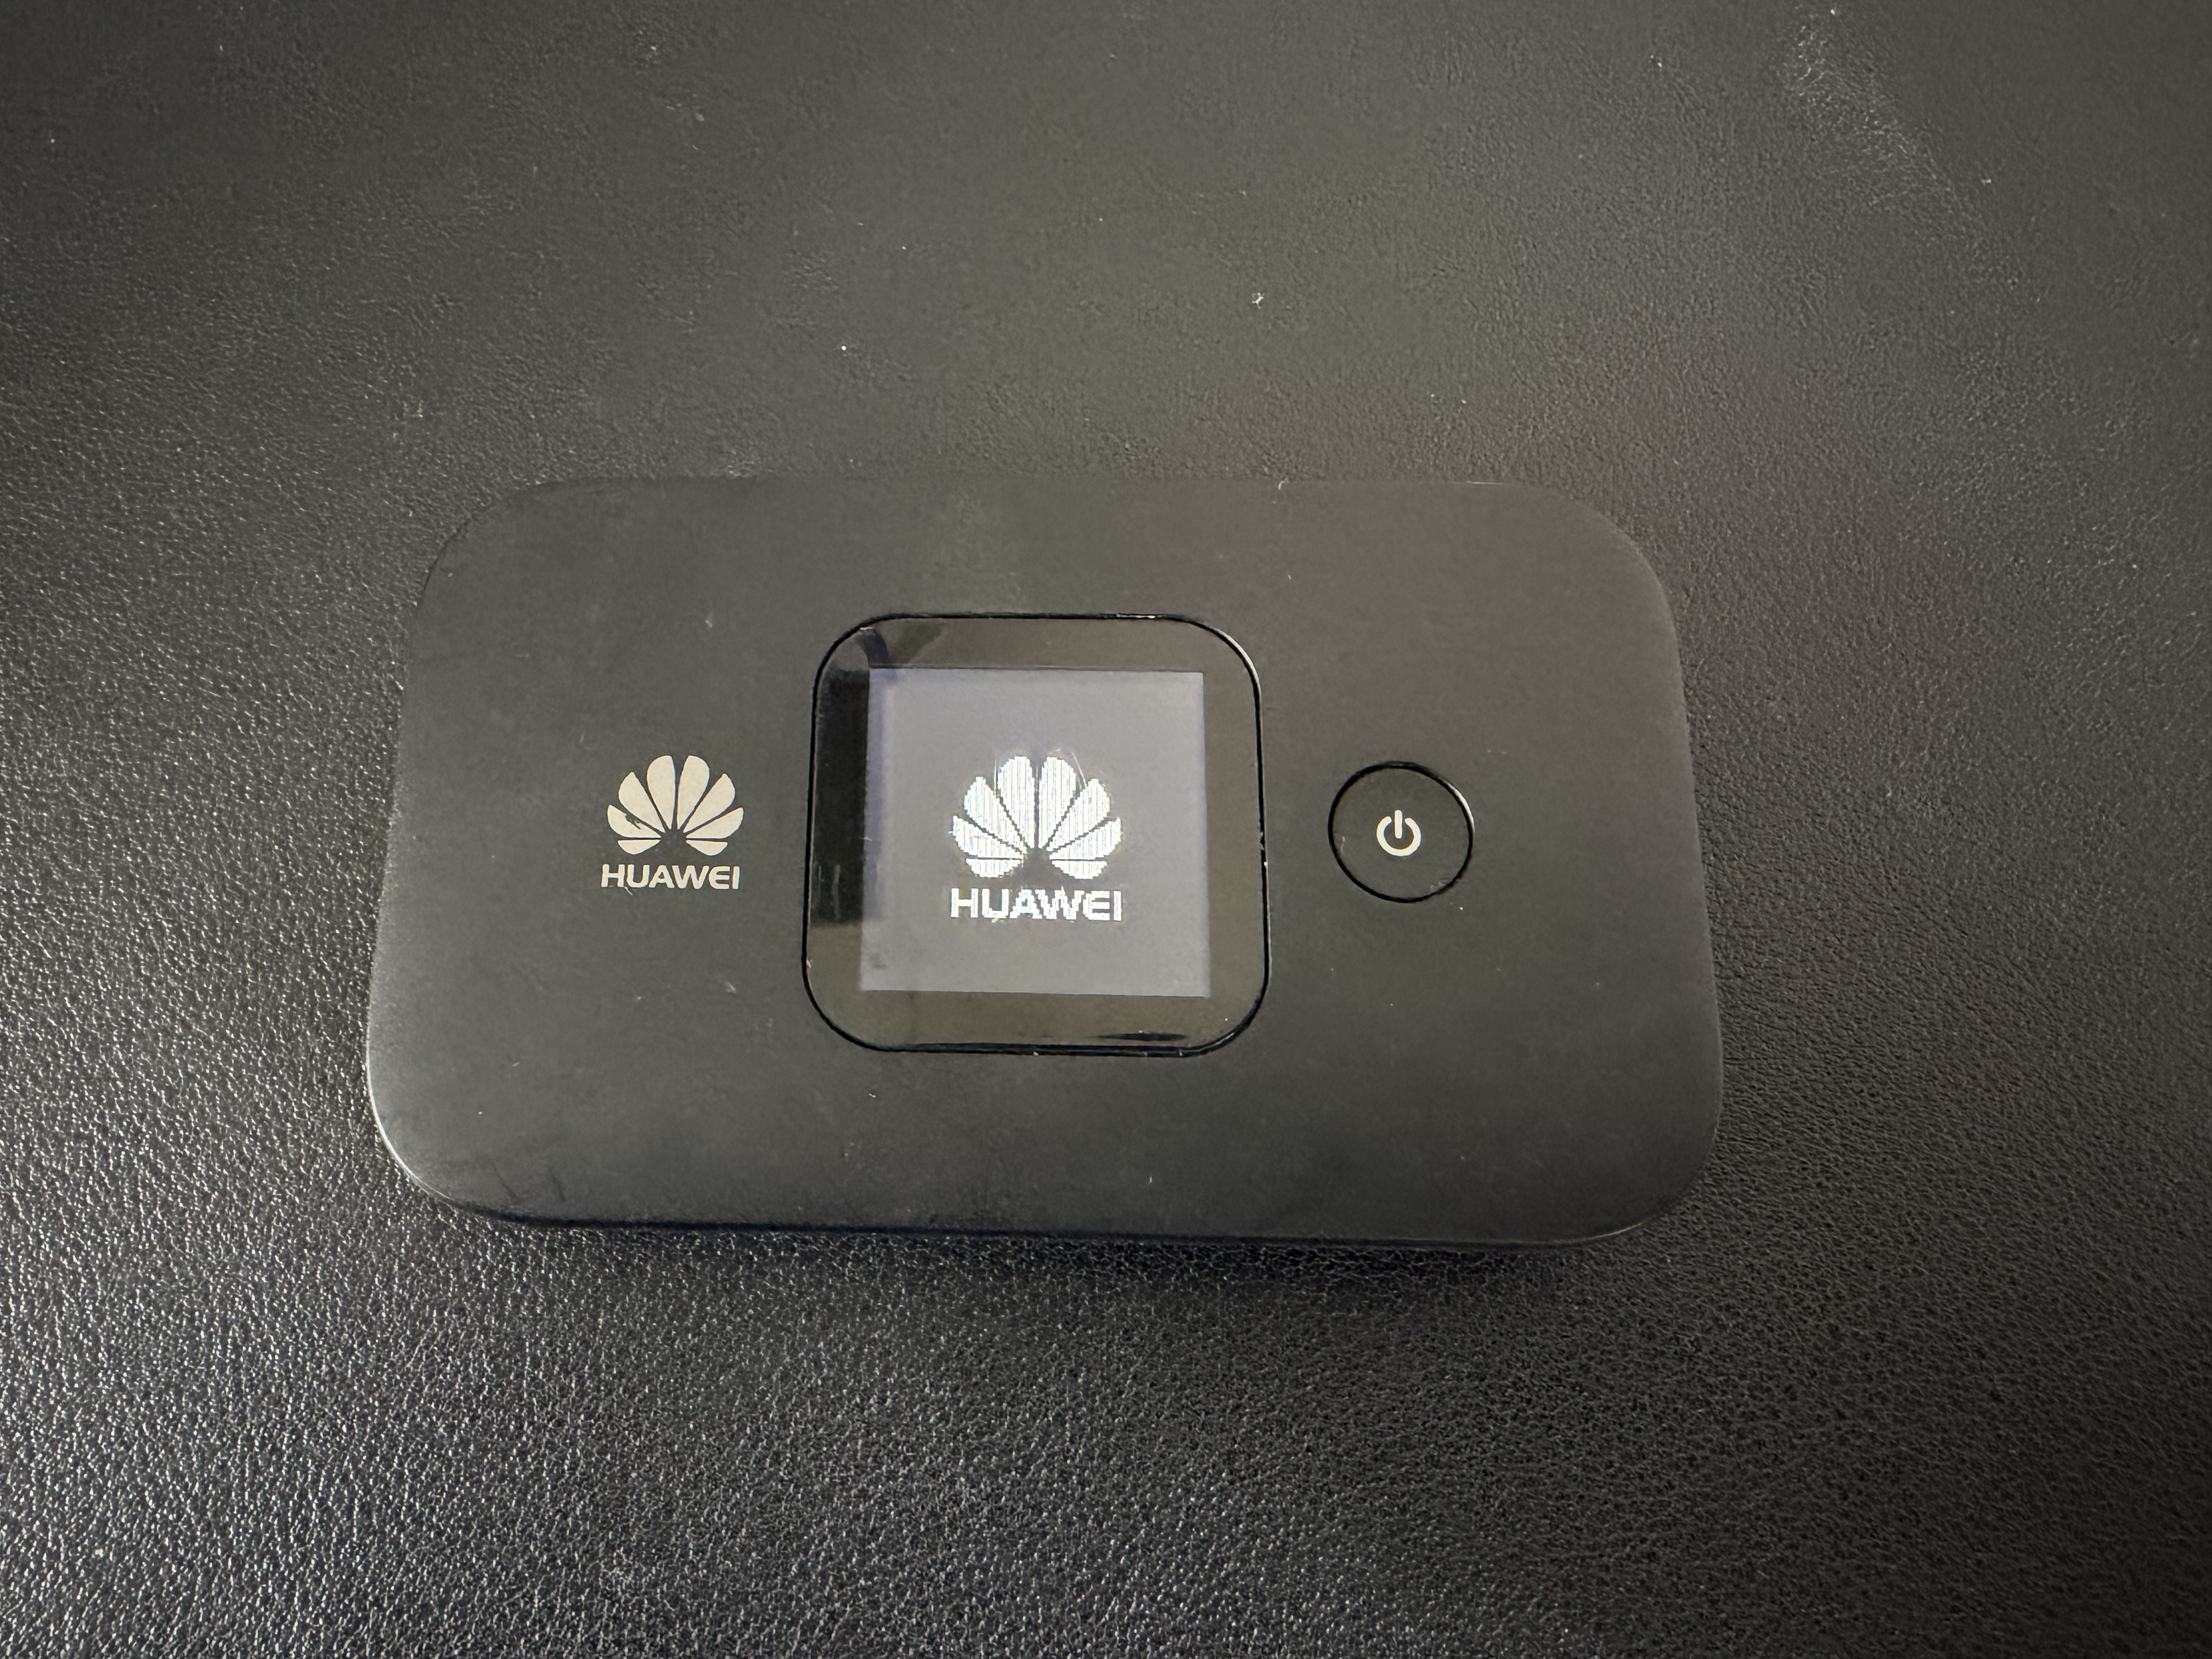
Once you have inserted the SIM and made a note of the information on the sticker, please put it back together and switch on, you can ignore any information on the screen at this time.
Step 3
Now you need to connect to the devices Wi-Fi, this is an important step and should not be missed, you cannot connect to it if you are on another Wi-Fi!.
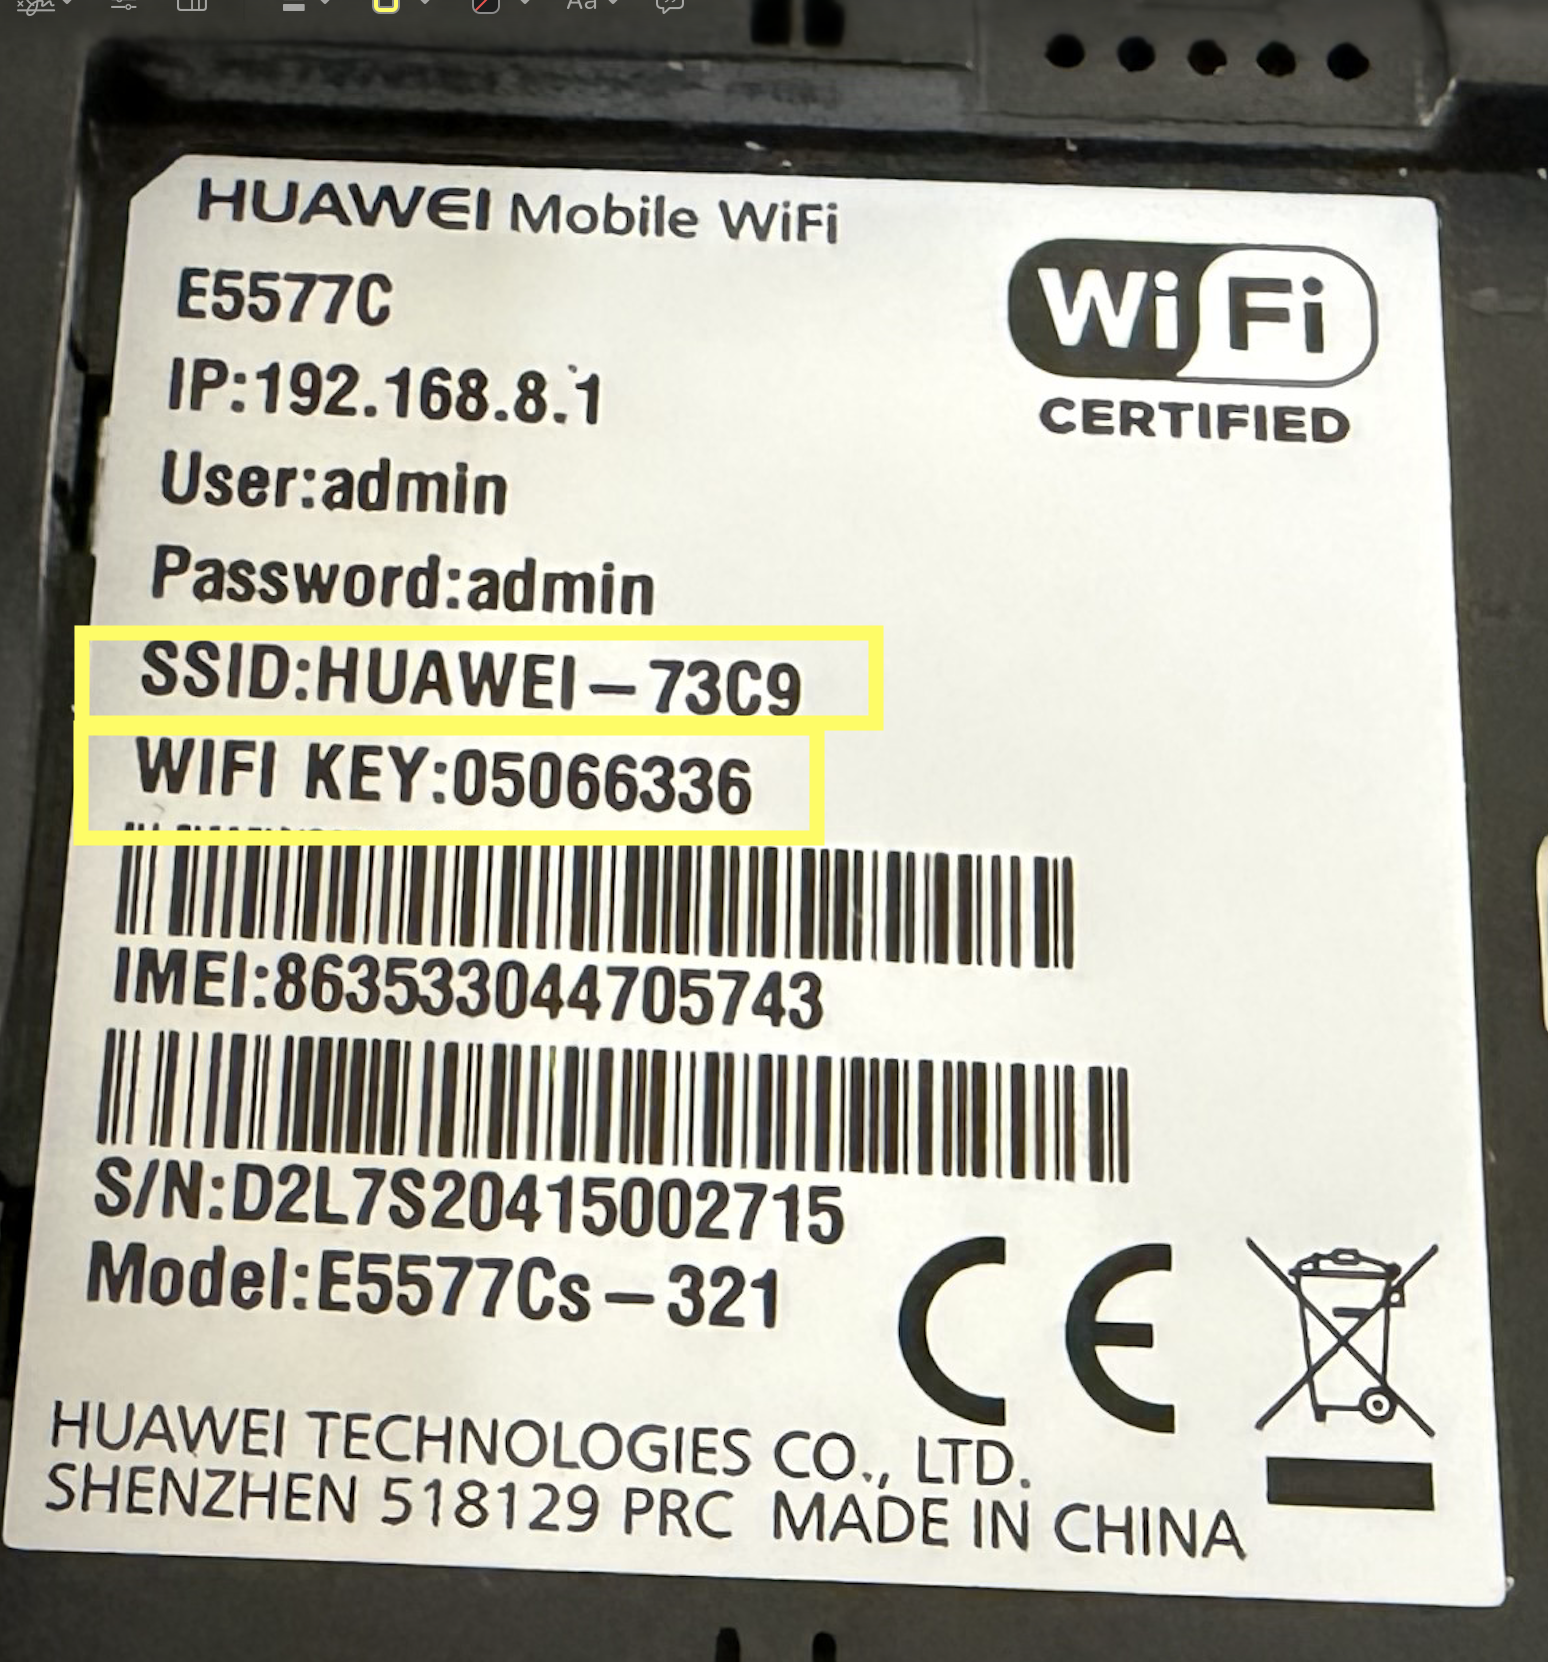
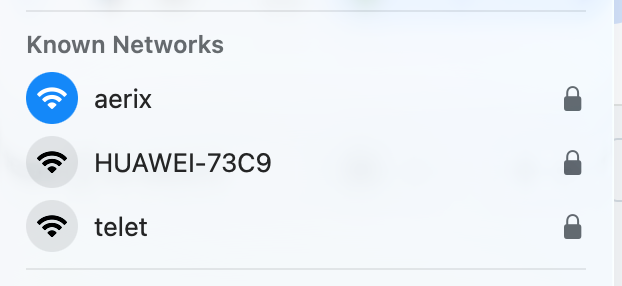
Using your phone, laptop, or tablet please search for Wi-Fi signals (the name of the Wi-Fi is on the sticker) in this example the Huawei is called - Huawei-73C9
When you see it, you need to or will be asked for the Wi-Fi key, this is also printed on the sticker. Enter that, and you should now be connected to the routers Wi-Fi
Step 4
The remaining steps are now all performed on the device you connected, so using the same laptop, phone or tablet you need to open an internet browser and go to the address printed in the sticker, in this case it was 192.168.8.1
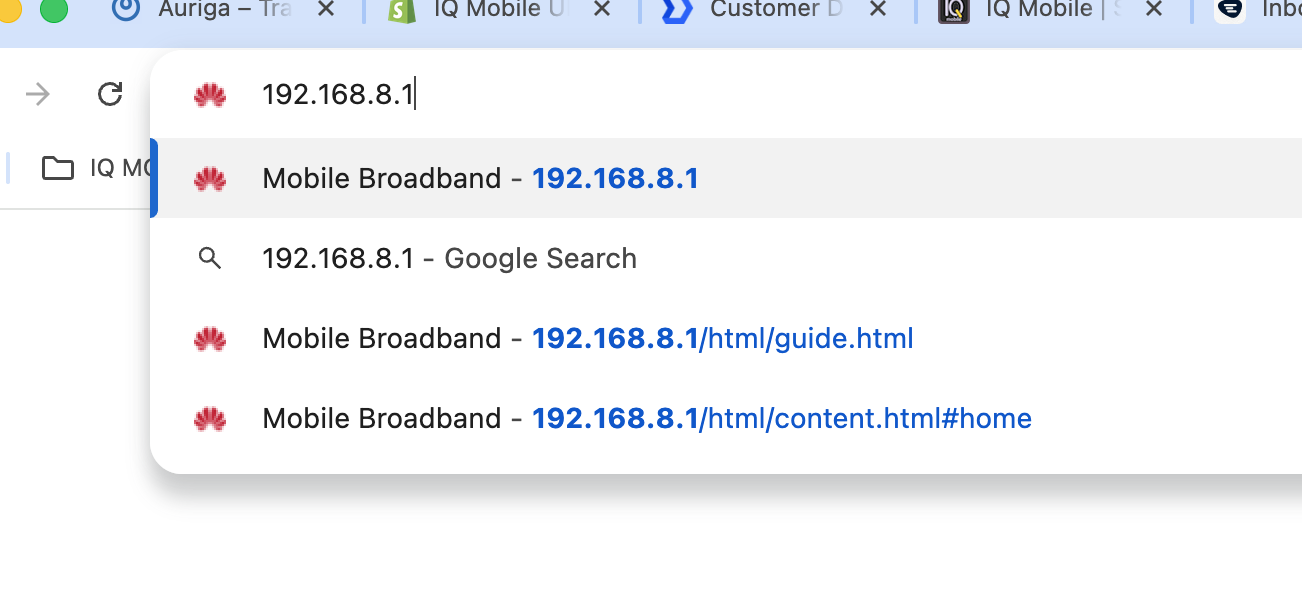
This should take you to the Huawei admin page, the login information is found on the sticker, and on this device the username = admin and the password = admin
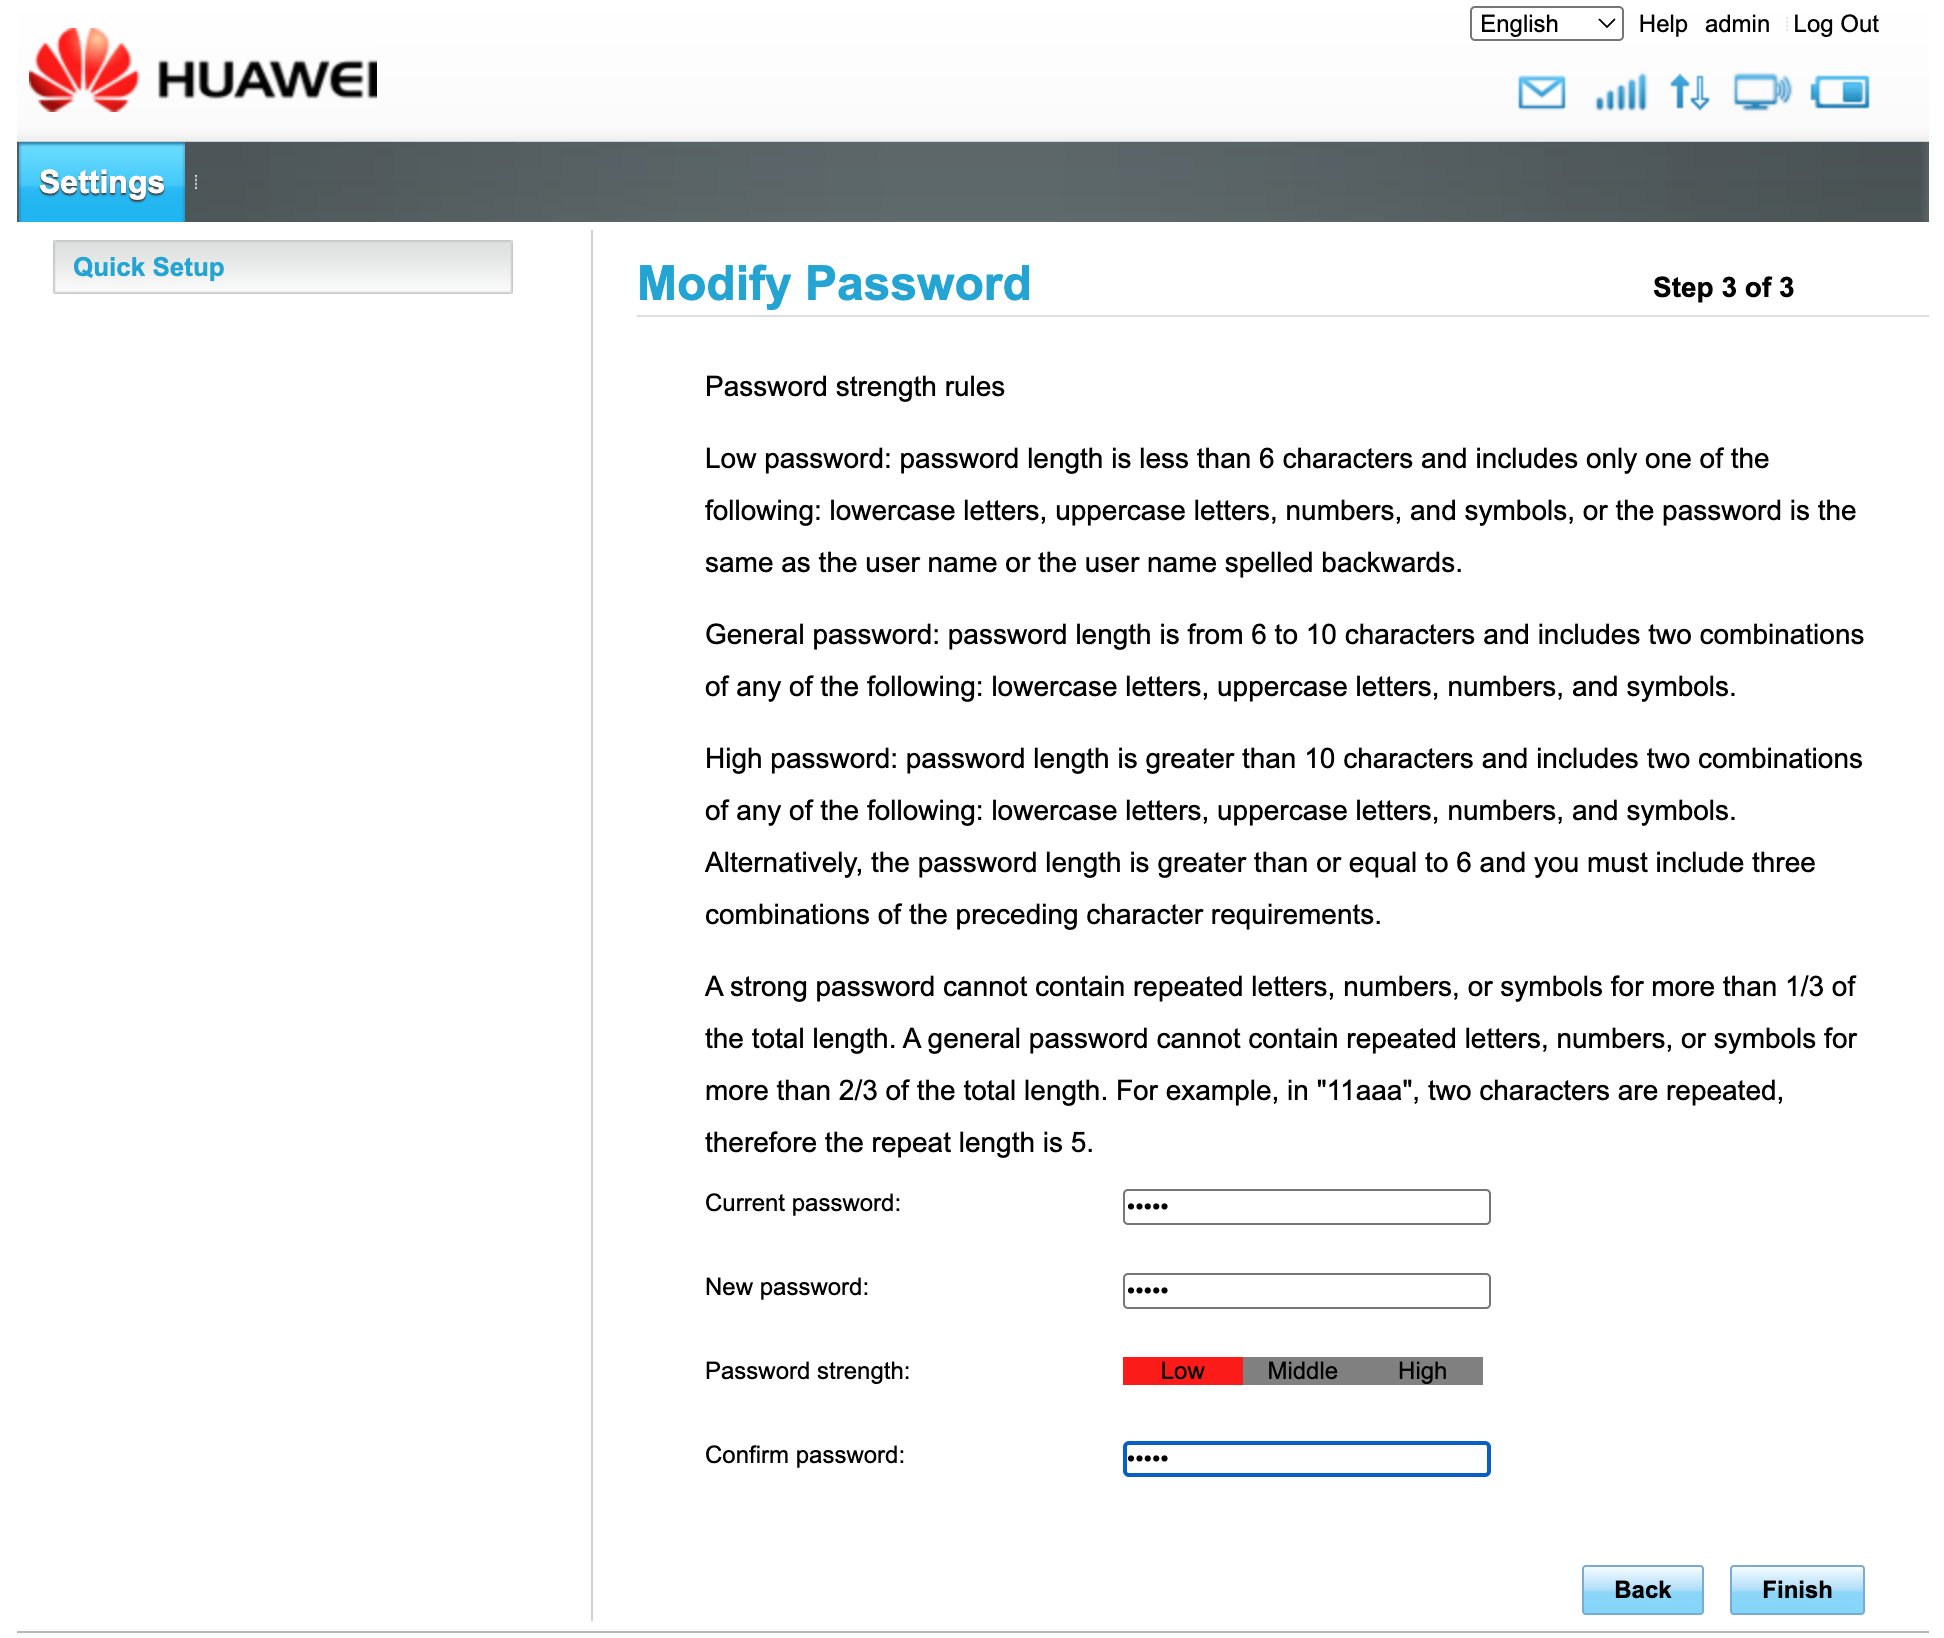
Please note: It makes you change the password on first login!

Followed by new password creation
Step 5
Once you are logged in and have changed the password (mandatory step) please make a note of it, as that section of the sticker then becomes out of date.
You should then be on the Dashboard screen which looks like this:
The screen of interest from here is the 'connection settings' menu written in blue. When you press that it takes you to this menu.
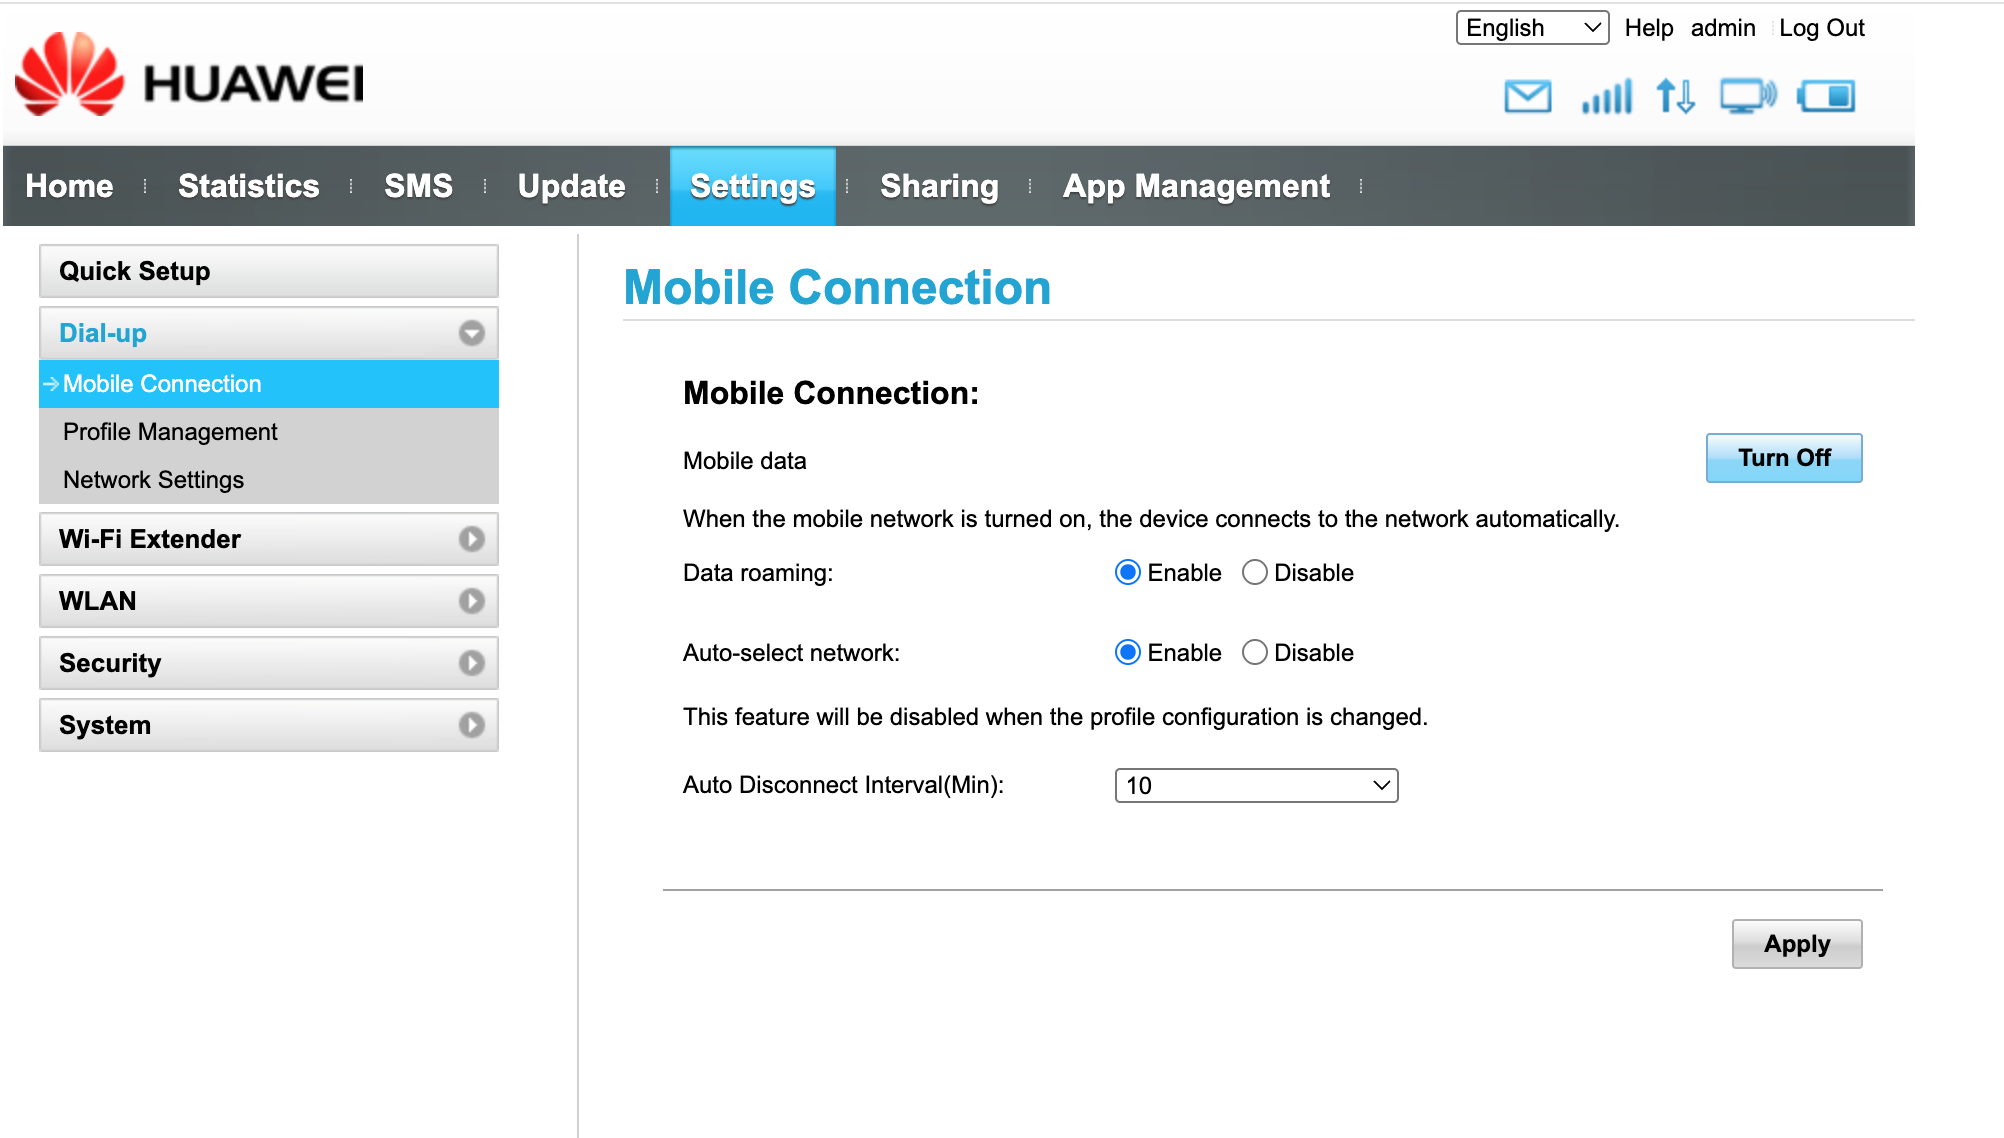
Please note the DATA ROAMING is Enabled (little blue dot in box) - It is important this it turned on when using this router outside of the UK.
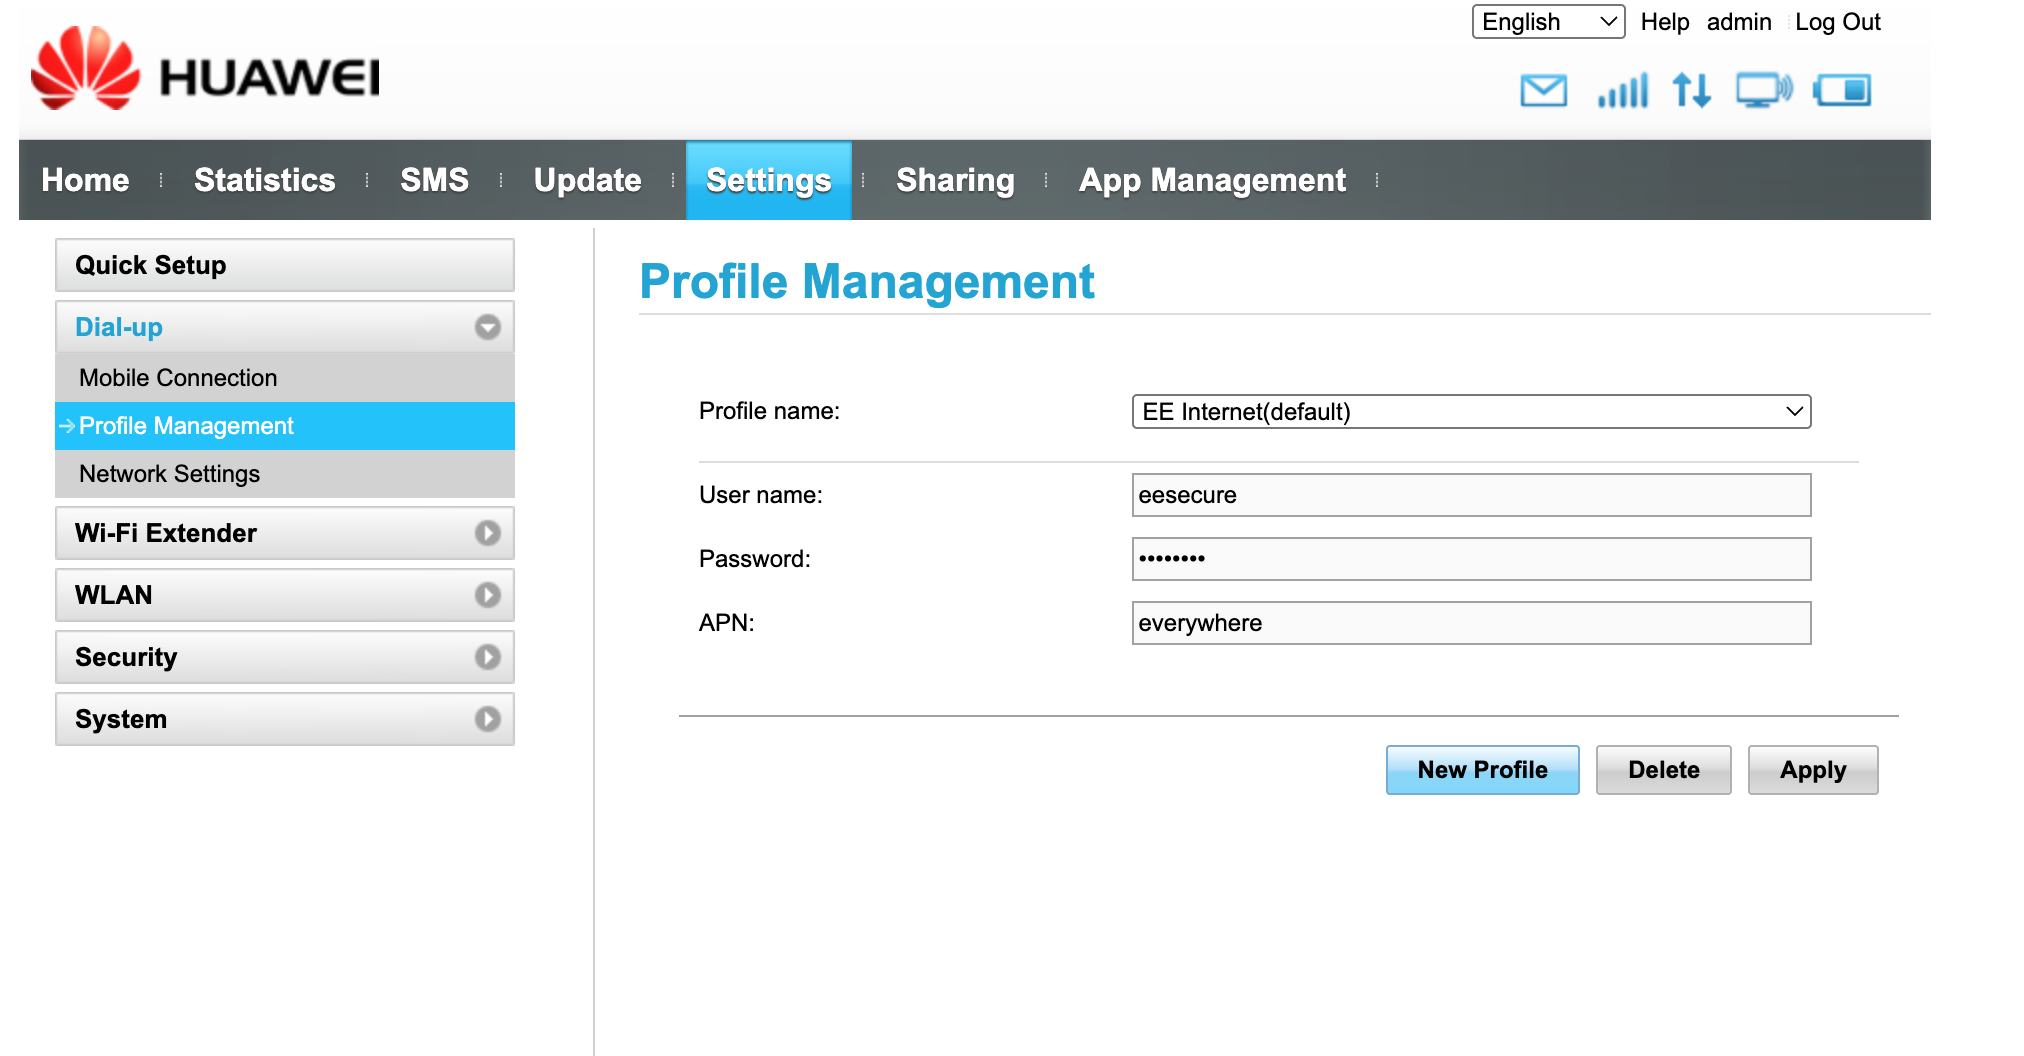
From here, it is on 'Mobile Connection' you should then also check the profile management tab by clicking it. It should then look like this:
Step 6
Within profile management, you should make sure the settings are as indicated for our SIM. For example,
APN = everywhere
Username = eesecure
Password = secure
These are then saved as a profile in the device. Note: it is possible to have more than one profile for multiple sims. You can change between them if swapping SIMs.
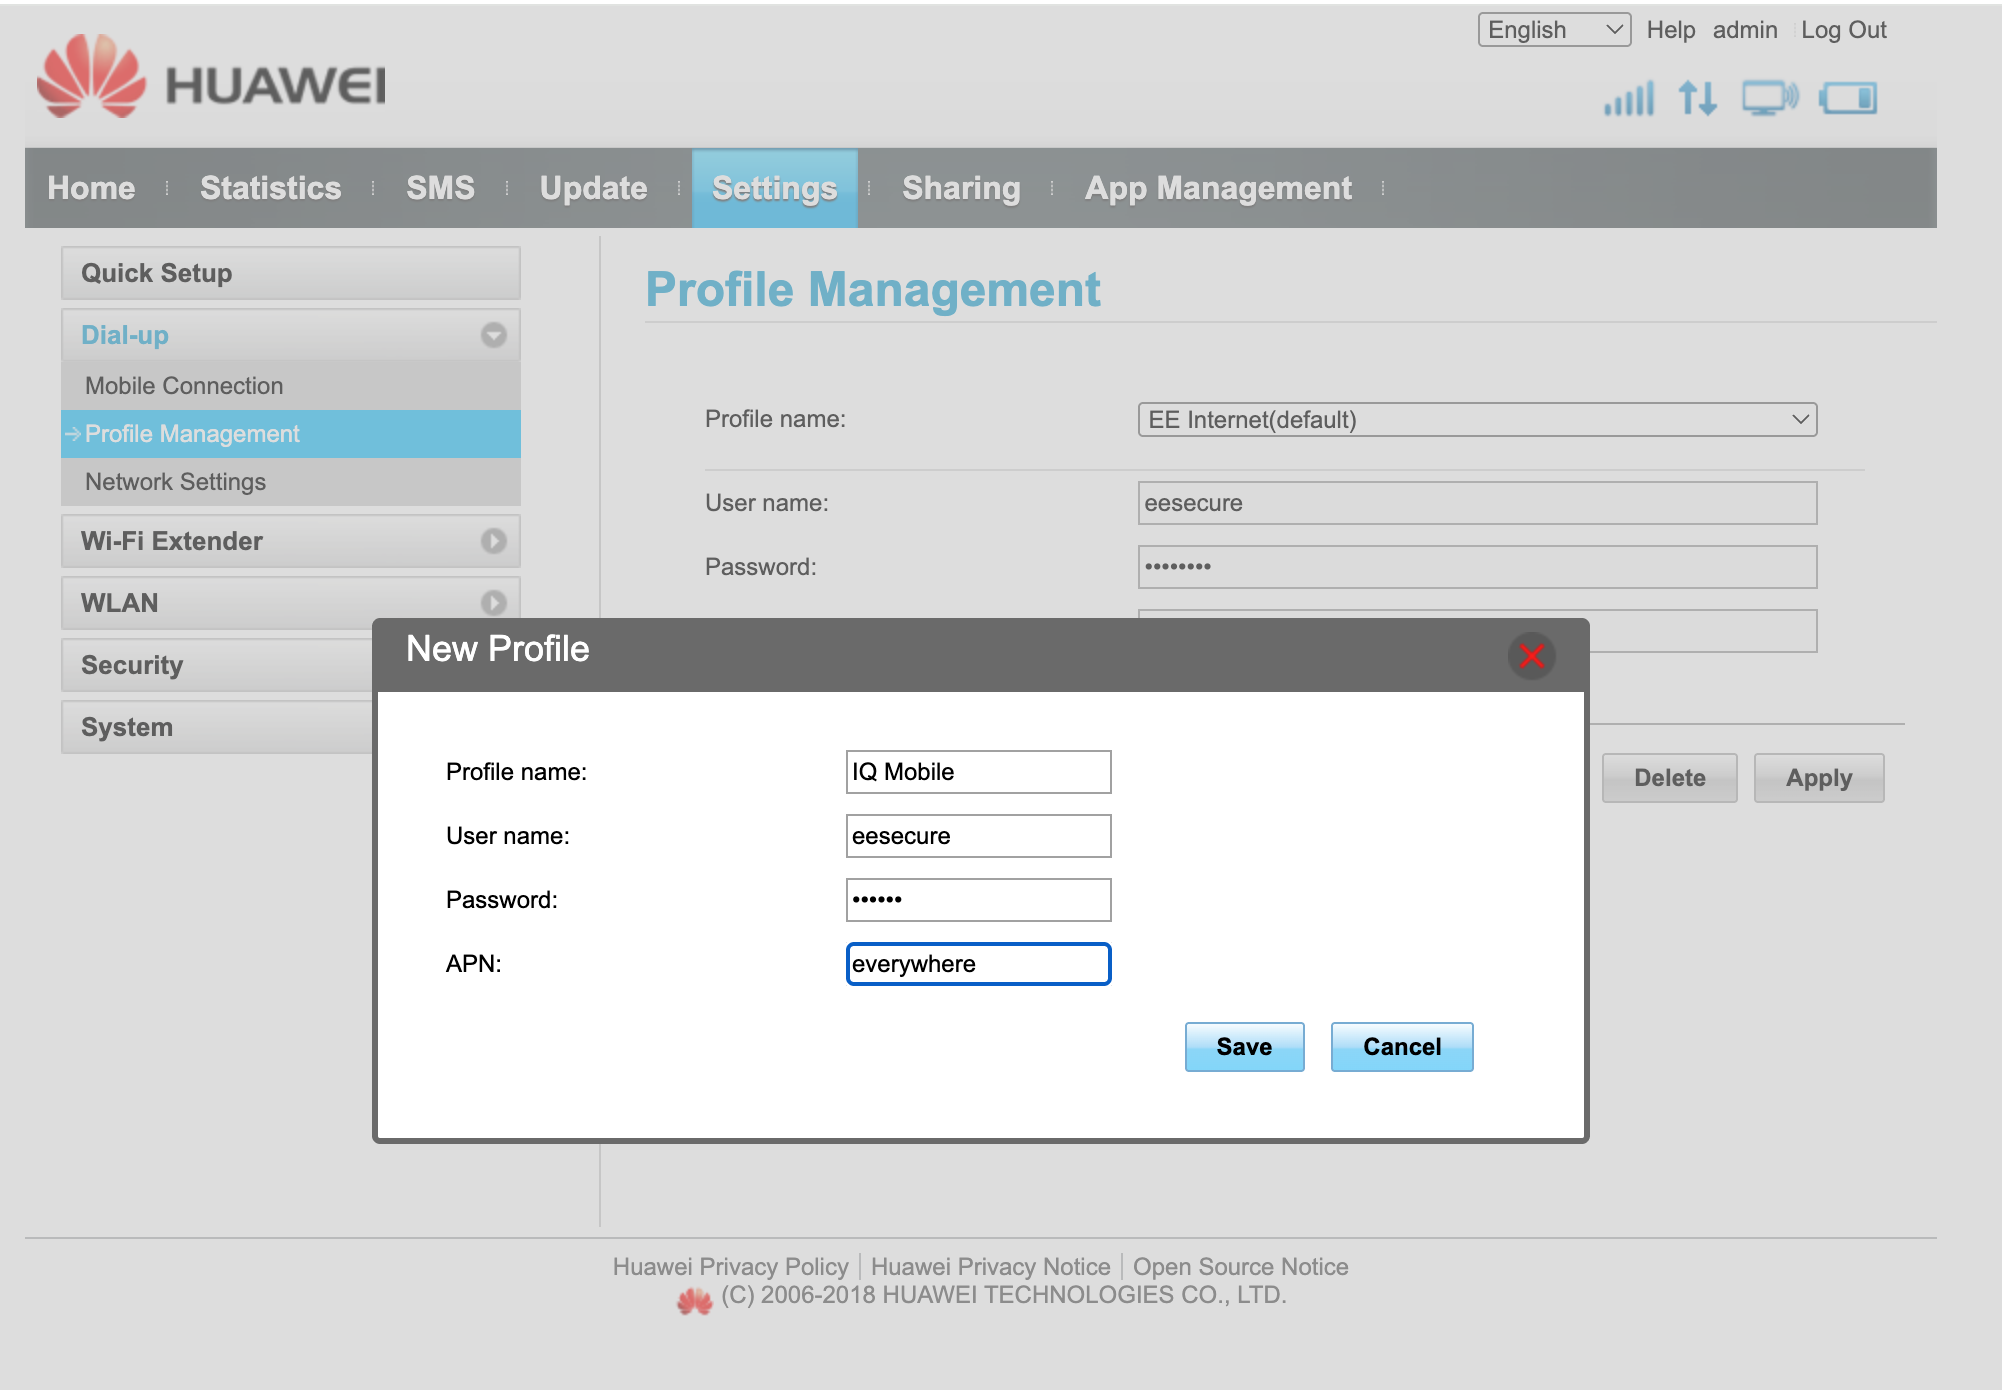
In the above shot we pressed the new profile button and added the details manually as opposed to the automatic detection which was there previously. Press save, this then becomes the default.
Step 7
The only other menu of note relating to the SIM settings is the network selection menu shown below.
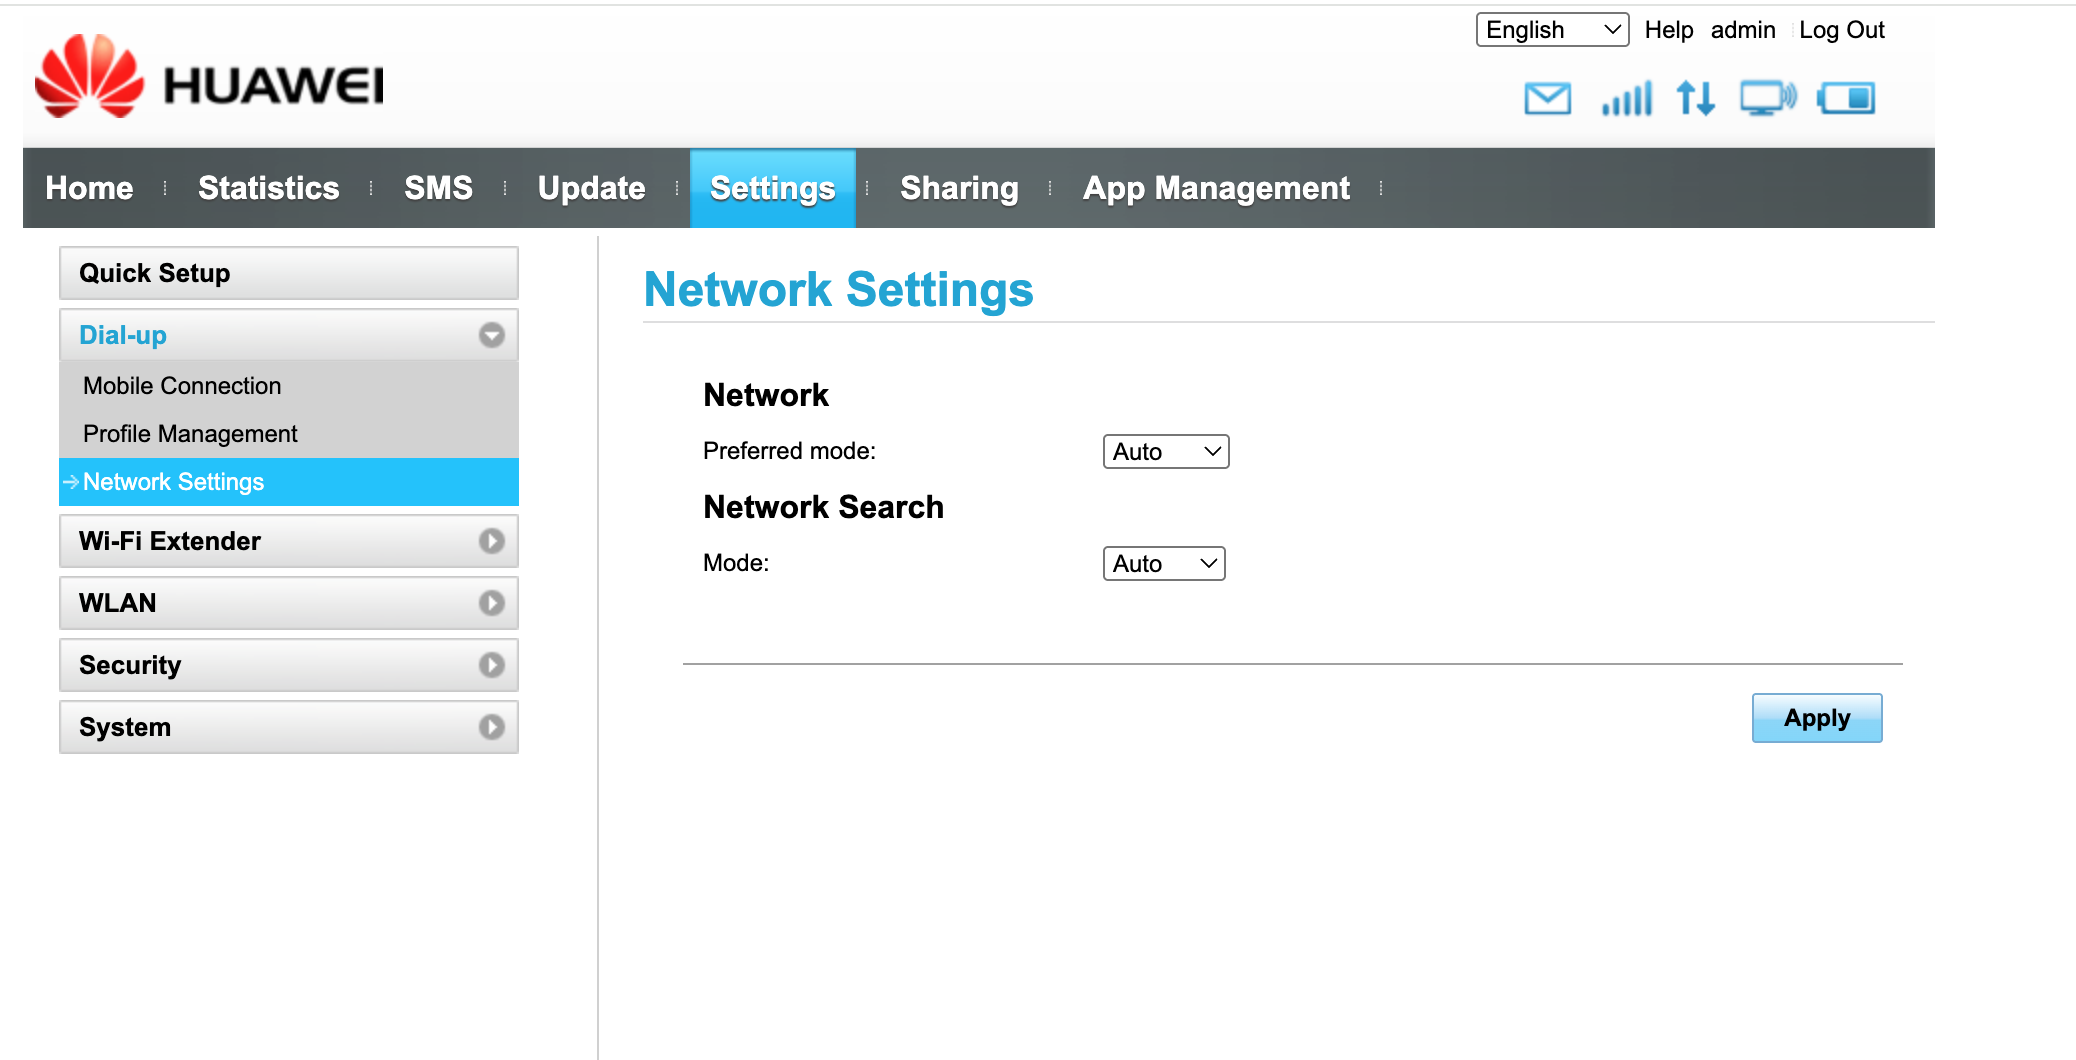
This is useful when moving between countries, sometimes you will need to make the router look for new signals and networks and by changing it from auto to manual, you should then be able to self-select other signals as most countries when roaming have more than one choice.
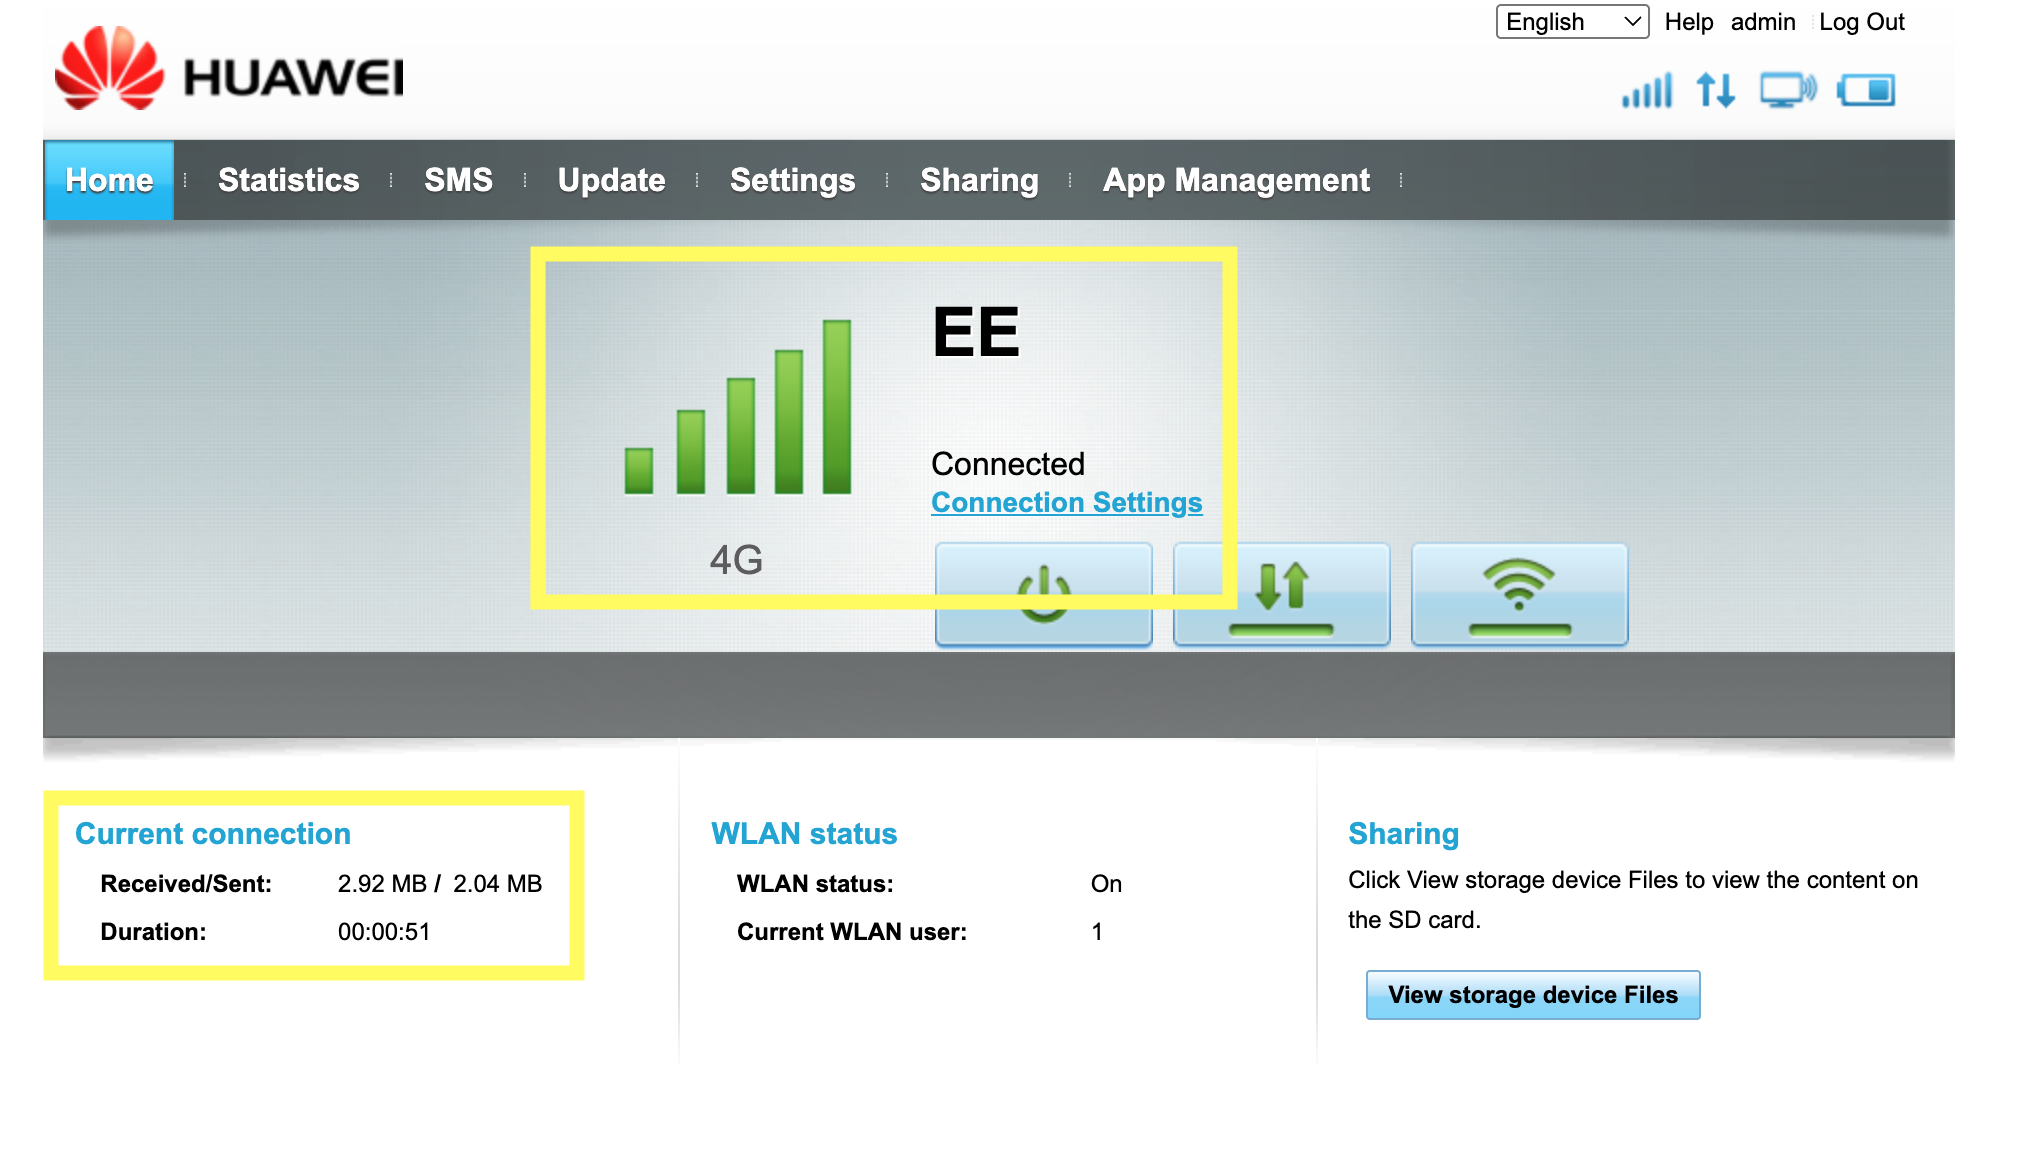
Step 8
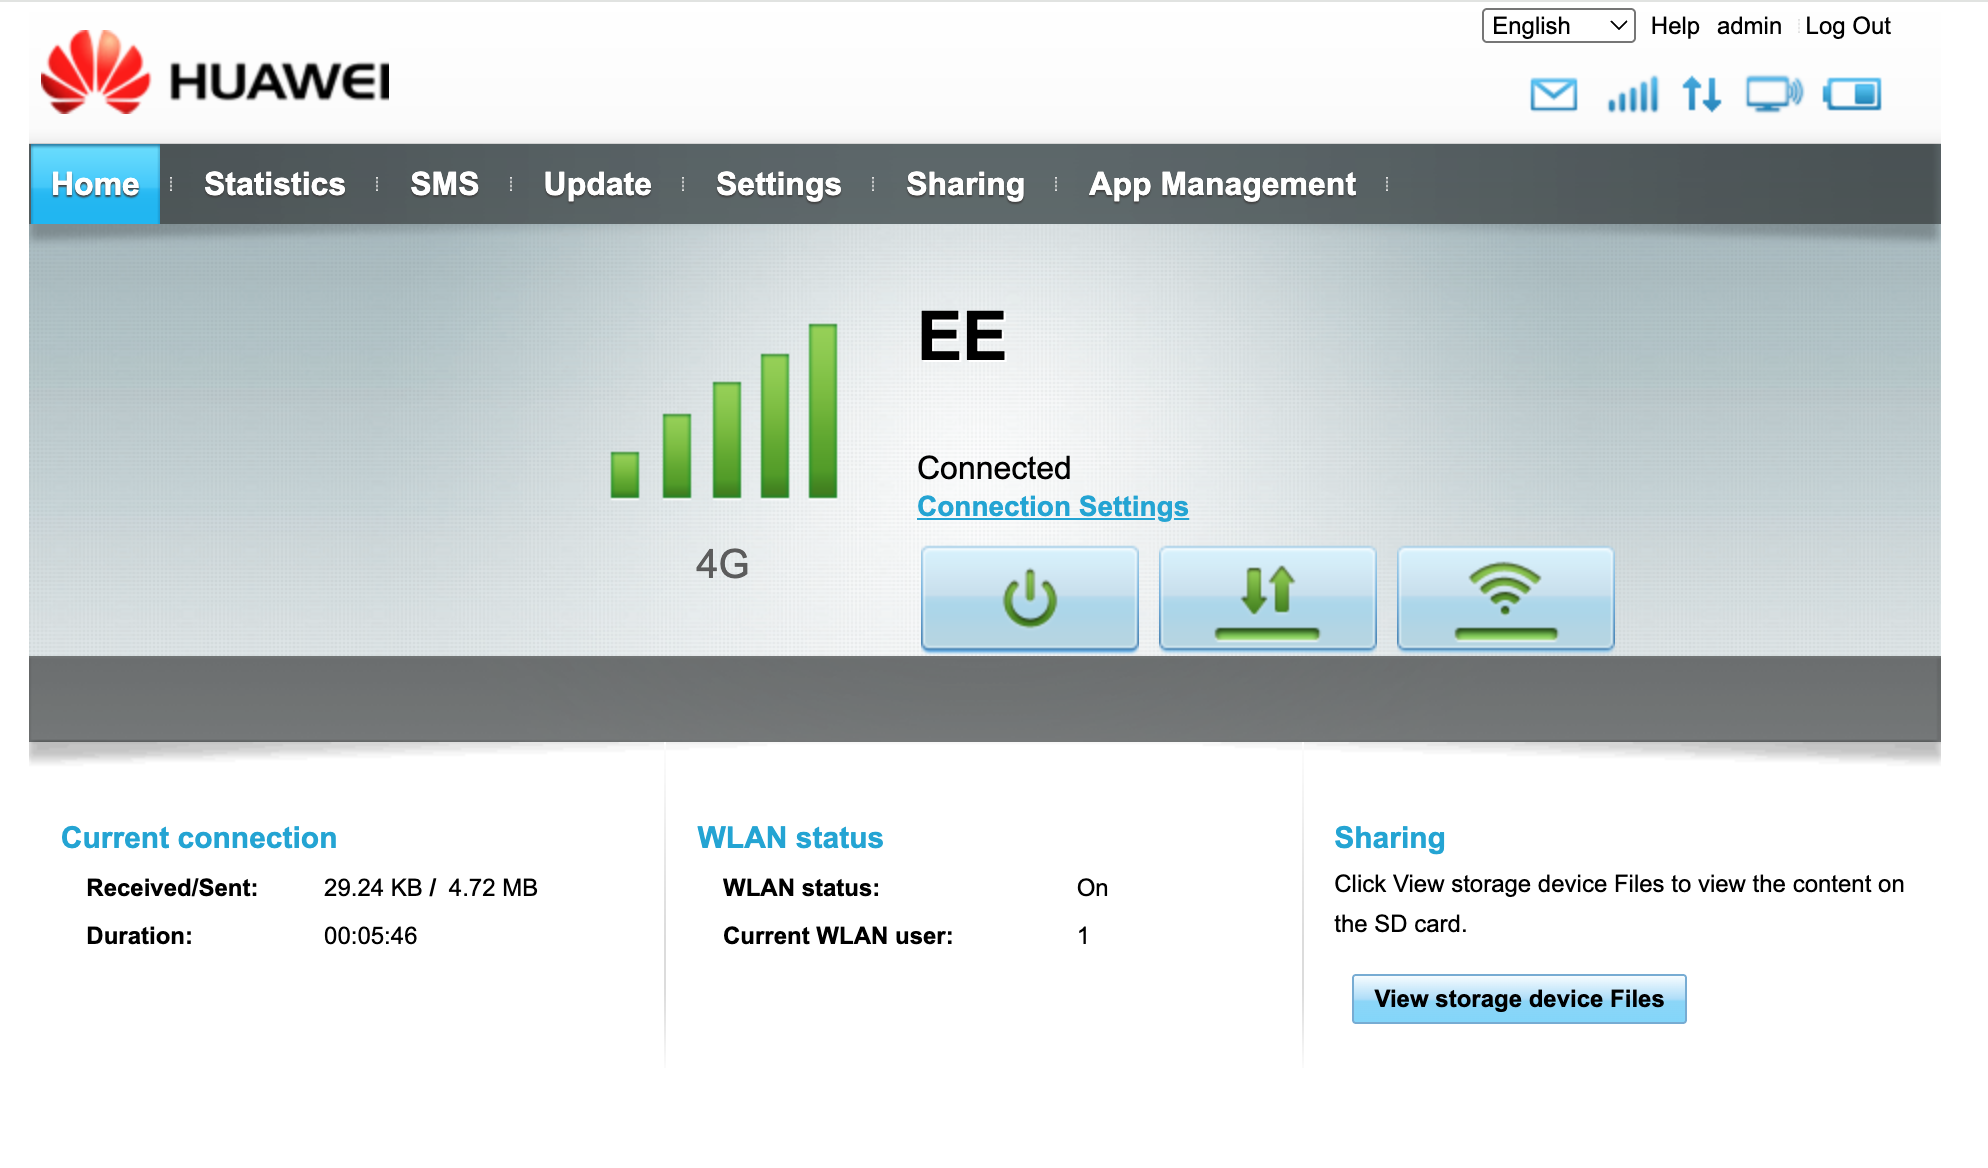
Finally, back on the dashboard page you should see positive messages indicating the device is now online as shown below.
End of guide
If you found this guide useful we would be grateful if you could leave us a review here:
https://www.trustpilot.com/review/helloiq.co.uk
And if you need any support for an IQ Mobile SIM, then our WhatsApp is: +447480782101 and email help@helloiq.uk is accessible 24/7
Still need help?
Our UK-based team is here for you