Router Configuration
Huawei B535-235 — Configuration Guide
IQ Mobile does not sell or support this device. This guide is provided to help IQ Mobile customers configure third-party routers with our SIM cards.
This guide covers inserting your IQ Mobile SIM, connecting to the router, completing first-time setup, and configuring the correct APN settings so the Huawei B535-235 connects to the internet over the EE network.
Step 1 — Insert your SIM card
The SIM slot is on the side of the router. Slide open the cover to reveal the slot.

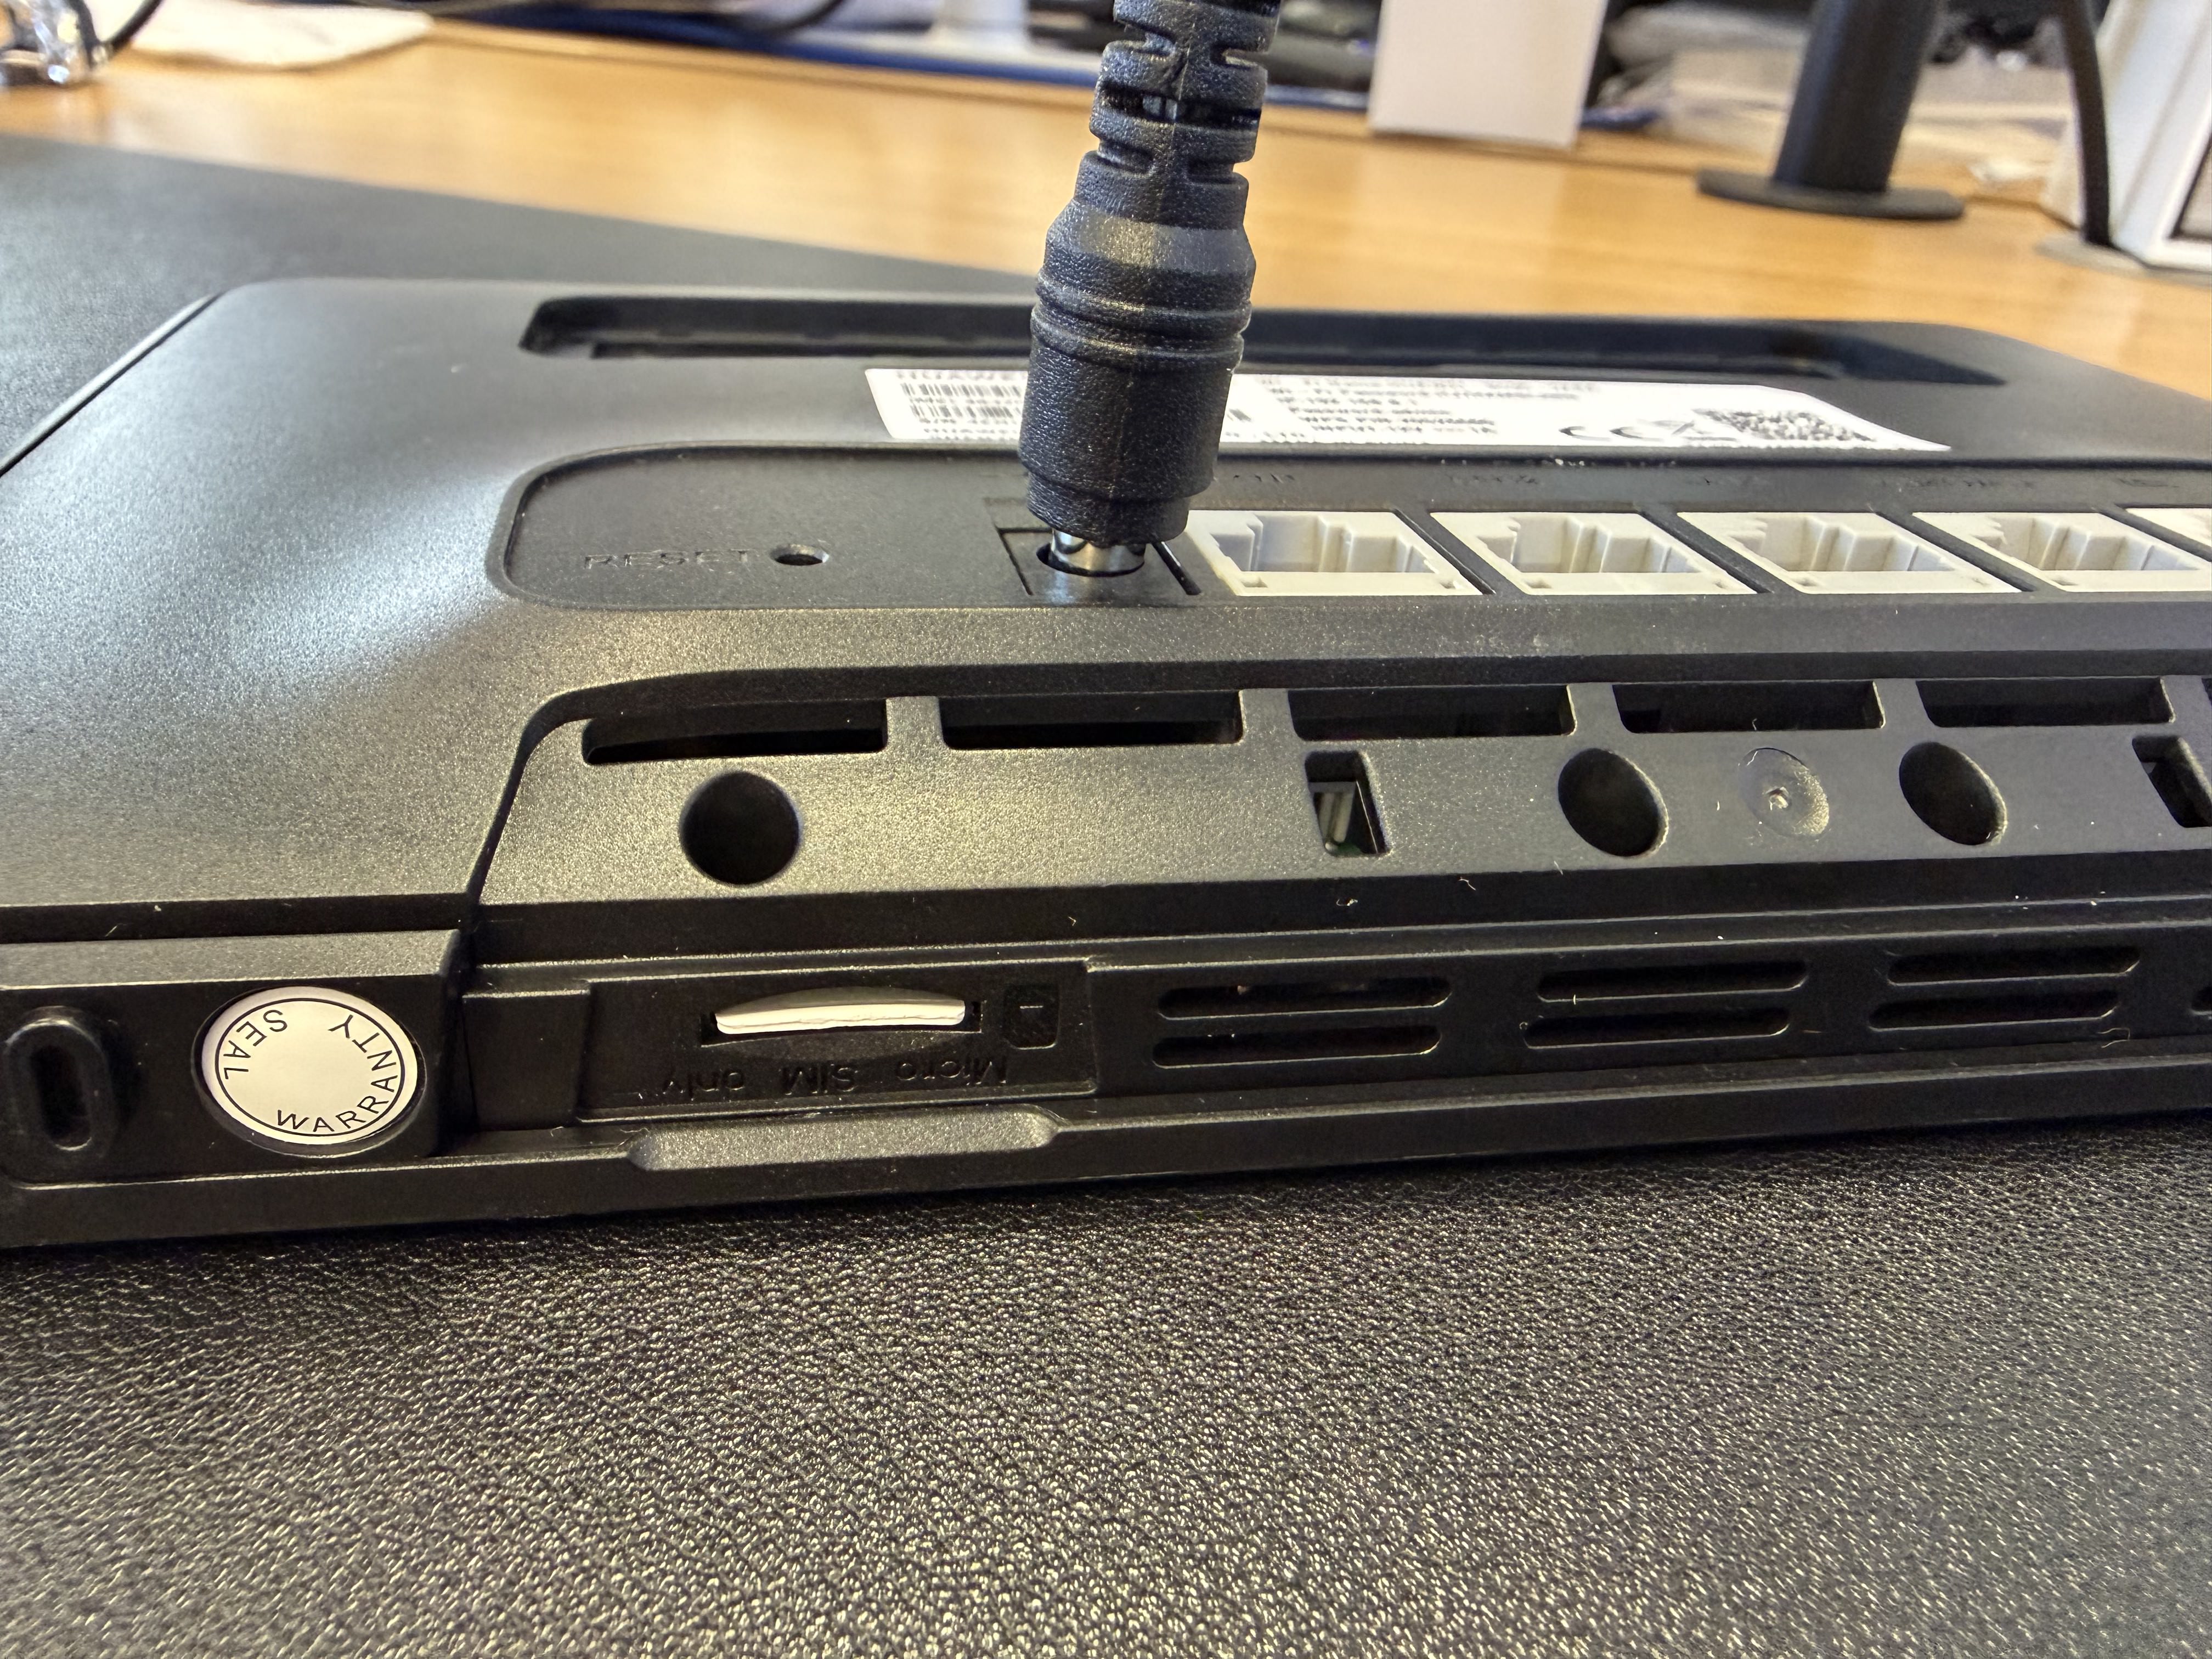
Insert your IQ Mobile SIM card into the slot with the gold contacts facing down and the notched corner aligned with the slot guide. Push gently until it clicks, then close the cover.
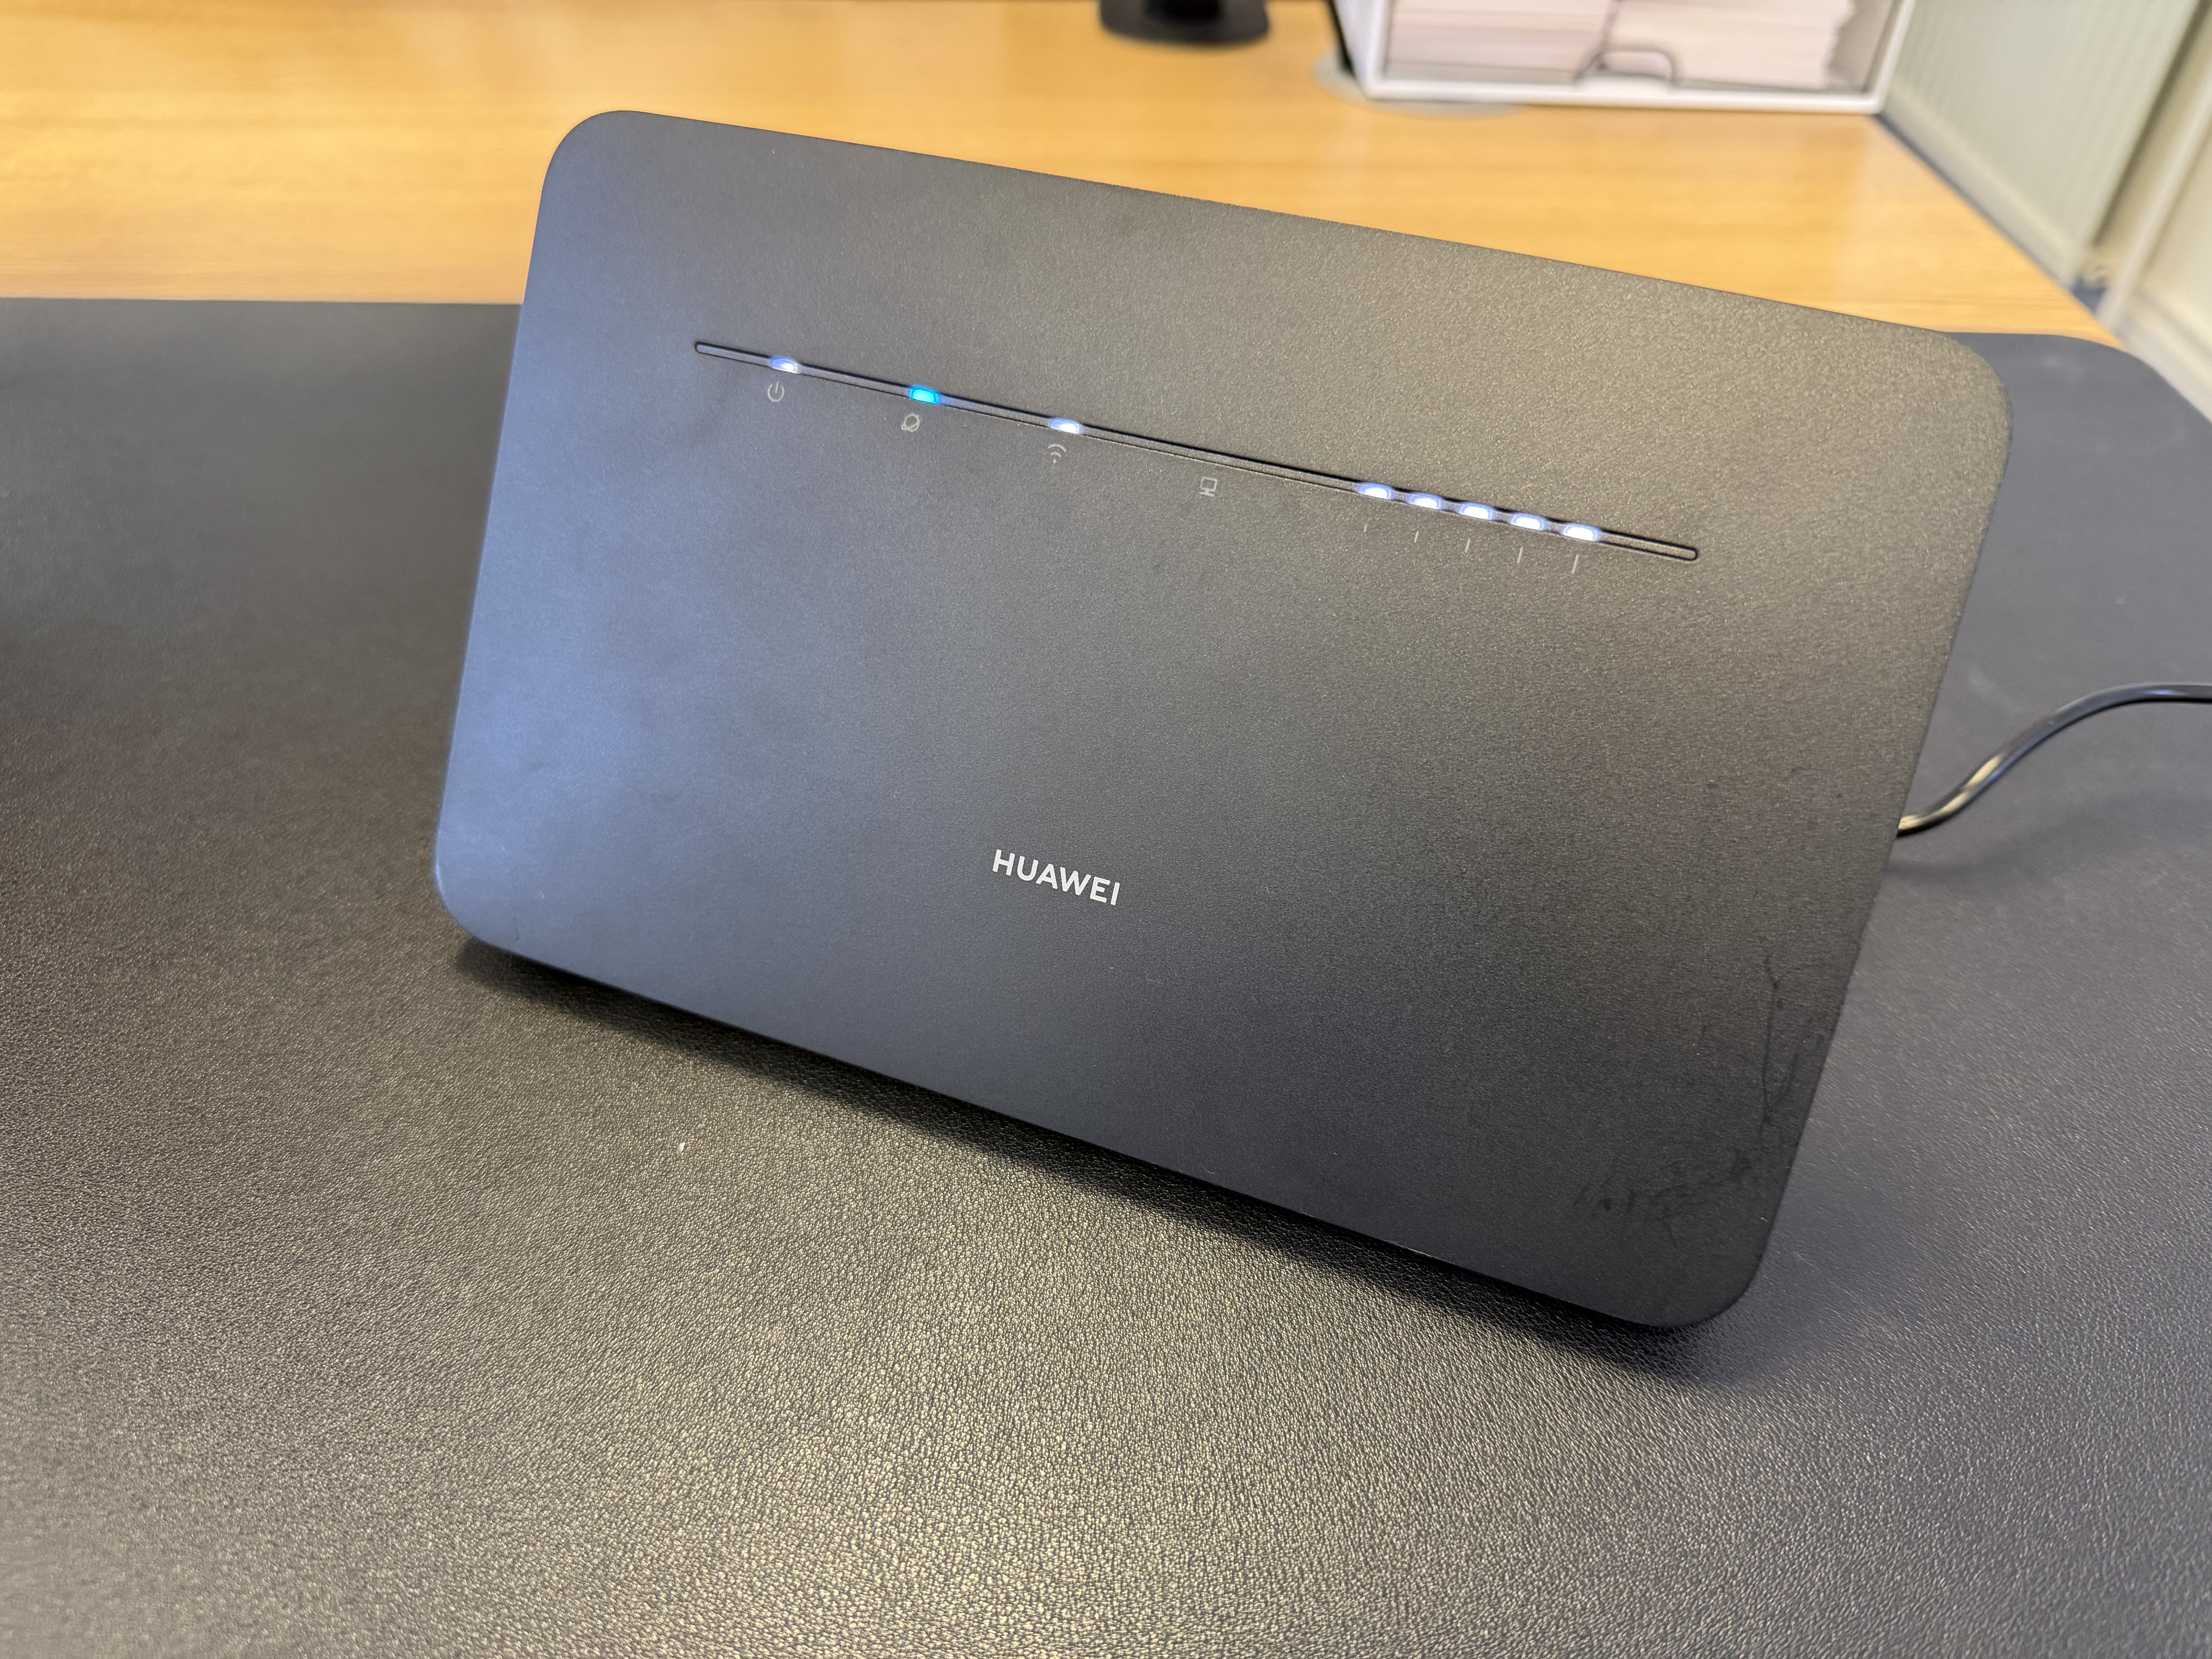
Power the router on and wait for the LED indicators to stabilise before continuing.
Step 2 — Find your router's default credentials
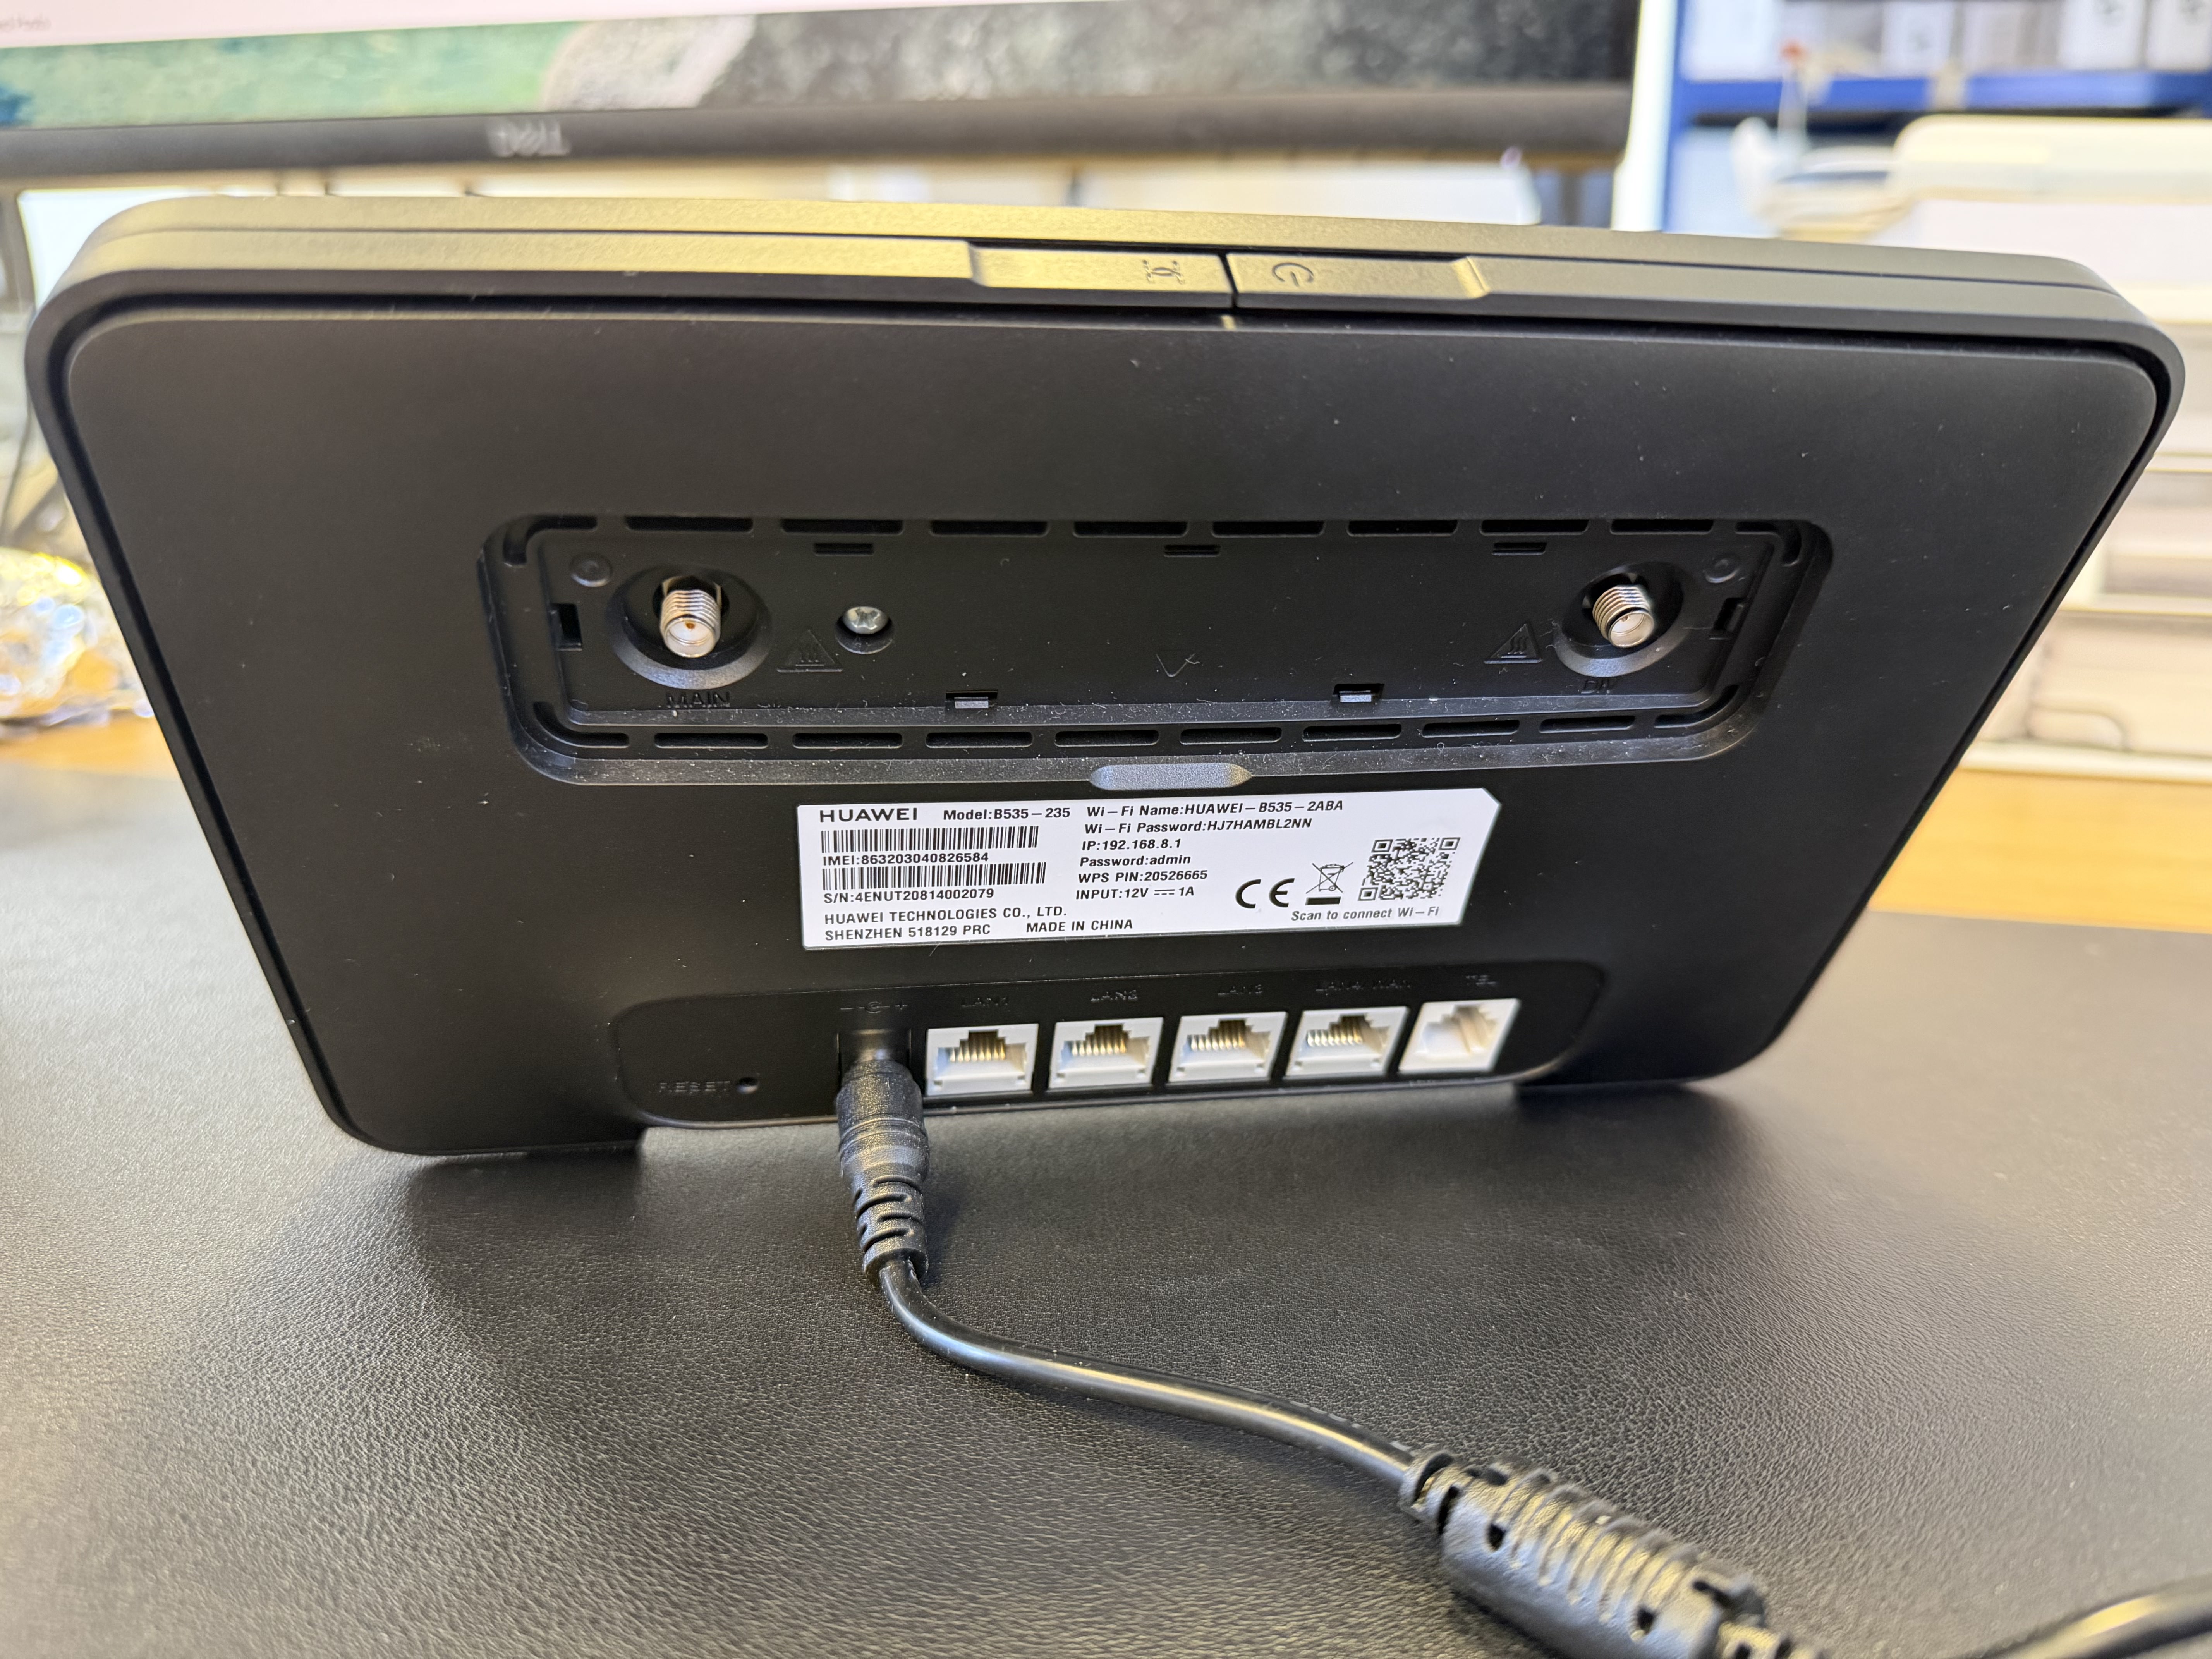
Your router's default WiFi name, WiFi password, and admin panel details are printed on the sticker on the back of the device.
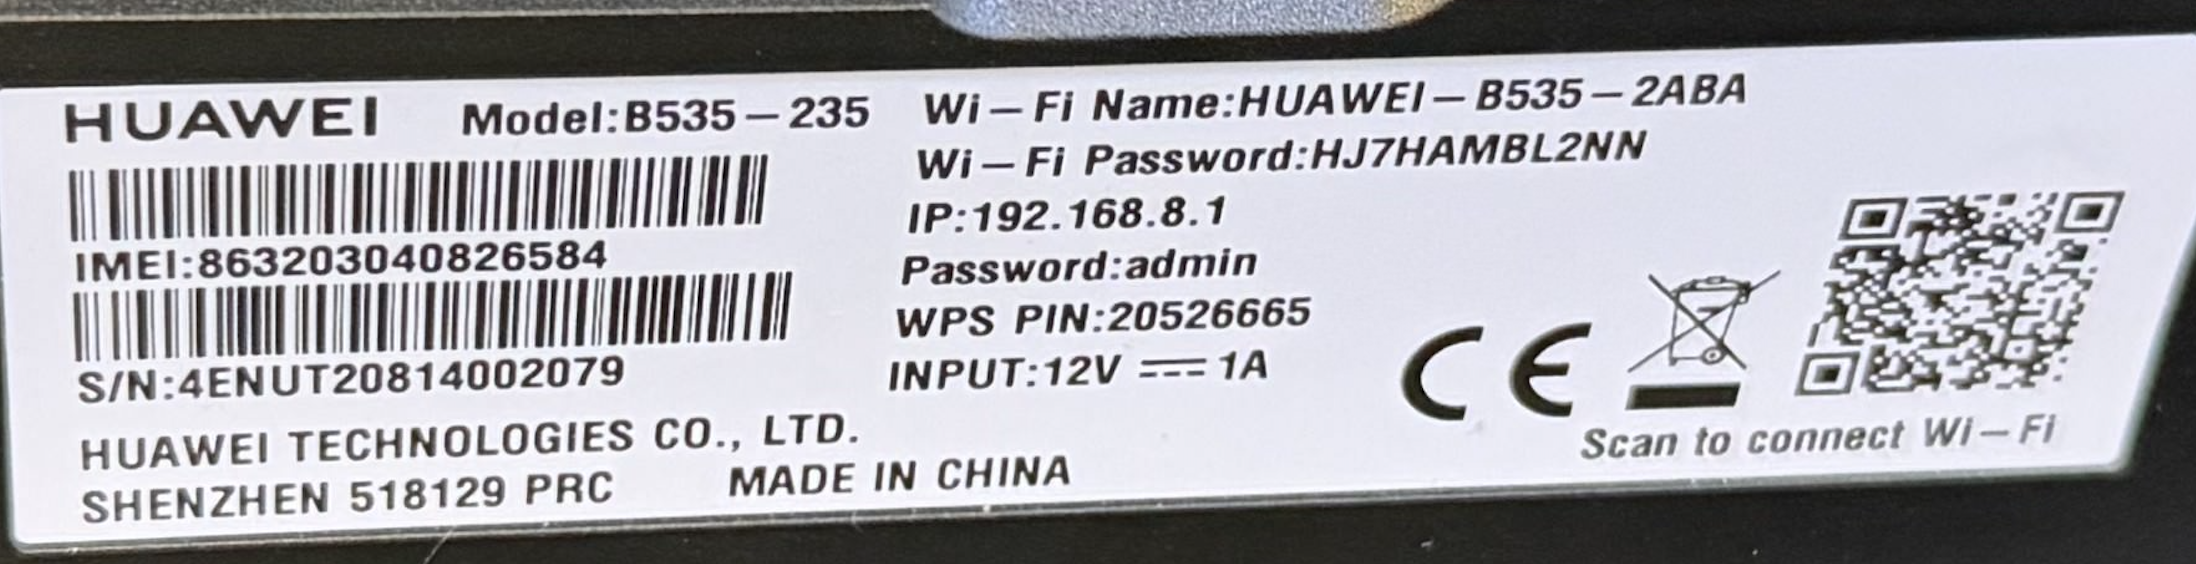
Note down:
- WiFi name (SSID) — e.g. HUAWEI-B535-XXXX
- WiFi password — printed beneath the SSID
- IP address — 192.168.8.1
- Admin password — printed on the sticker (you will be prompted to change this on first login)
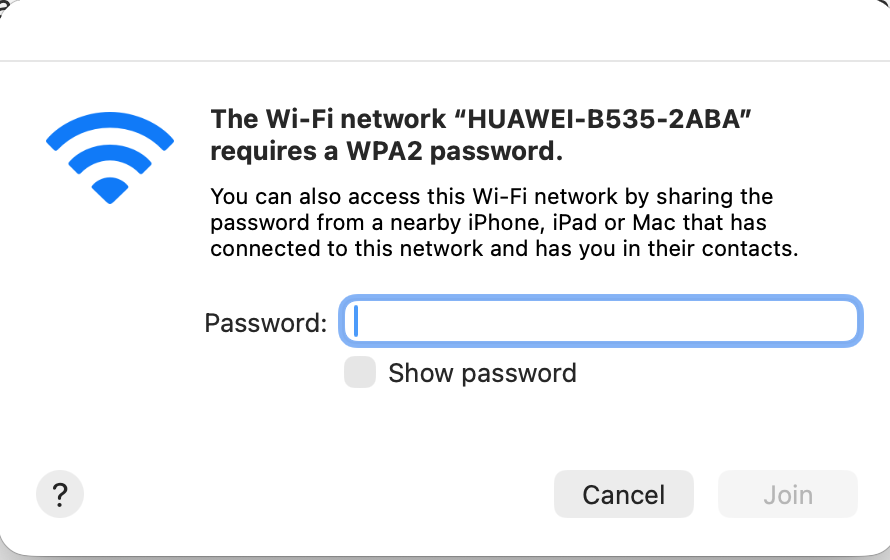
Step 3 — Connect your computer to the router's WiFi
On your computer or phone, open the WiFi settings and select the network matching the SSID on your router's sticker.
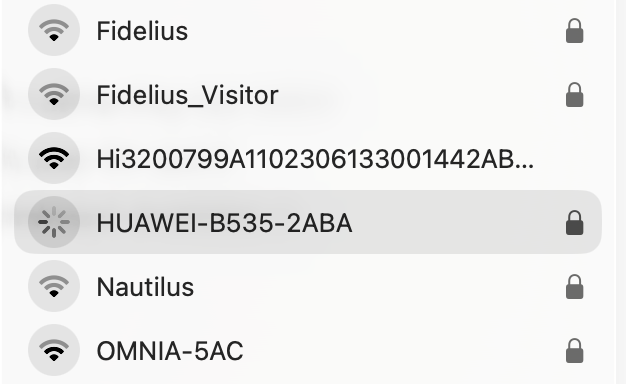
When prompted, enter the WiFi password from the sticker.
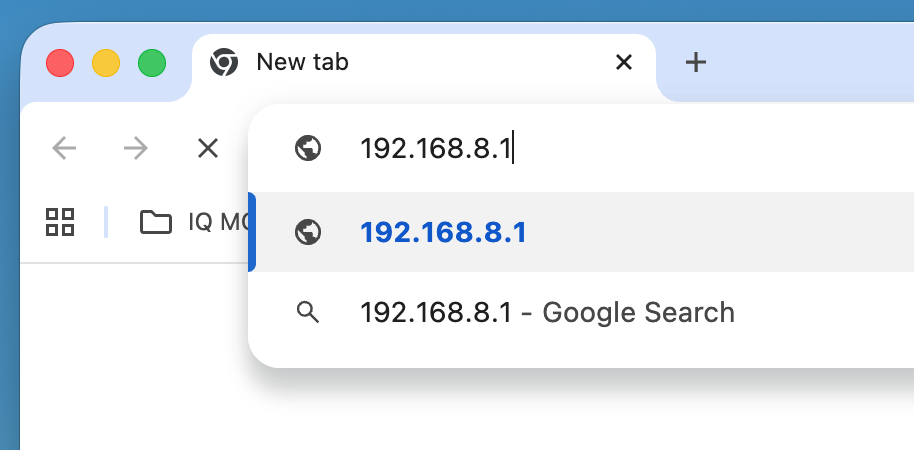
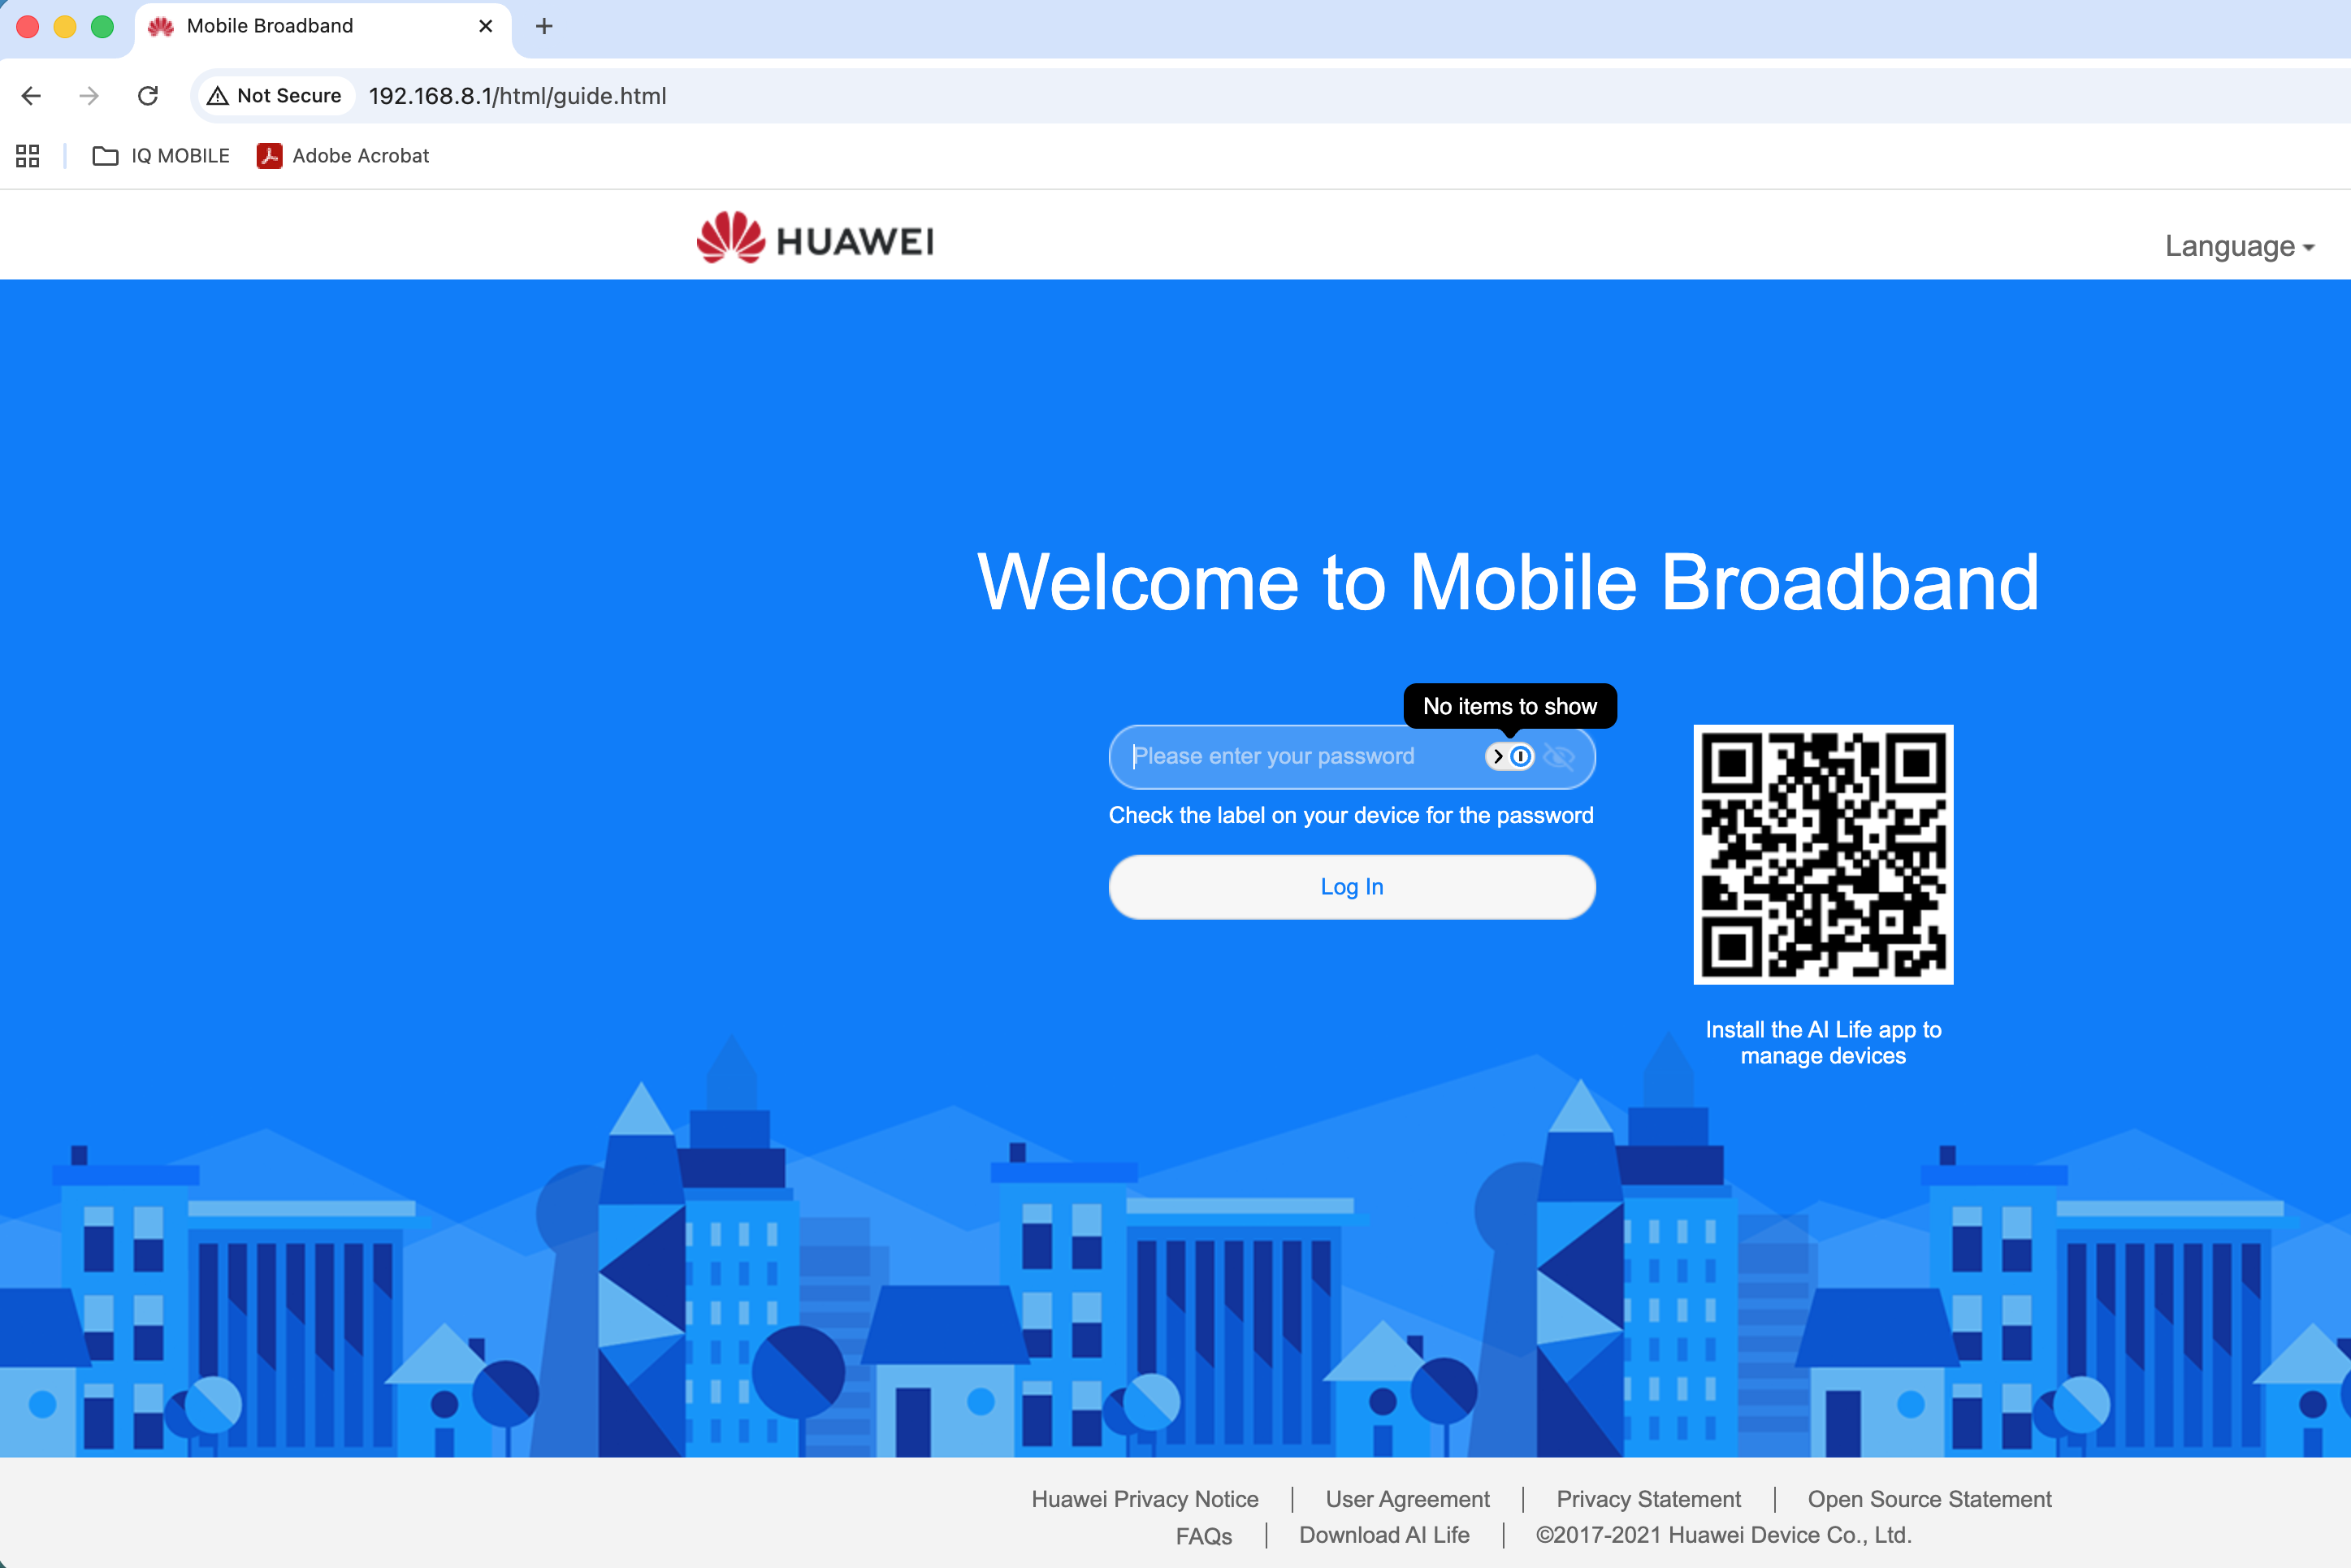
Step 4 — Log in to the router admin panel
Open a web browser and go to 192.168.8.1.
You will see the Huawei "Welcome to Mobile Broadband" login page. Enter the admin password from the sticker on the back of the router.
First-time setup
On first login the router will walk you through a short setup sequence.
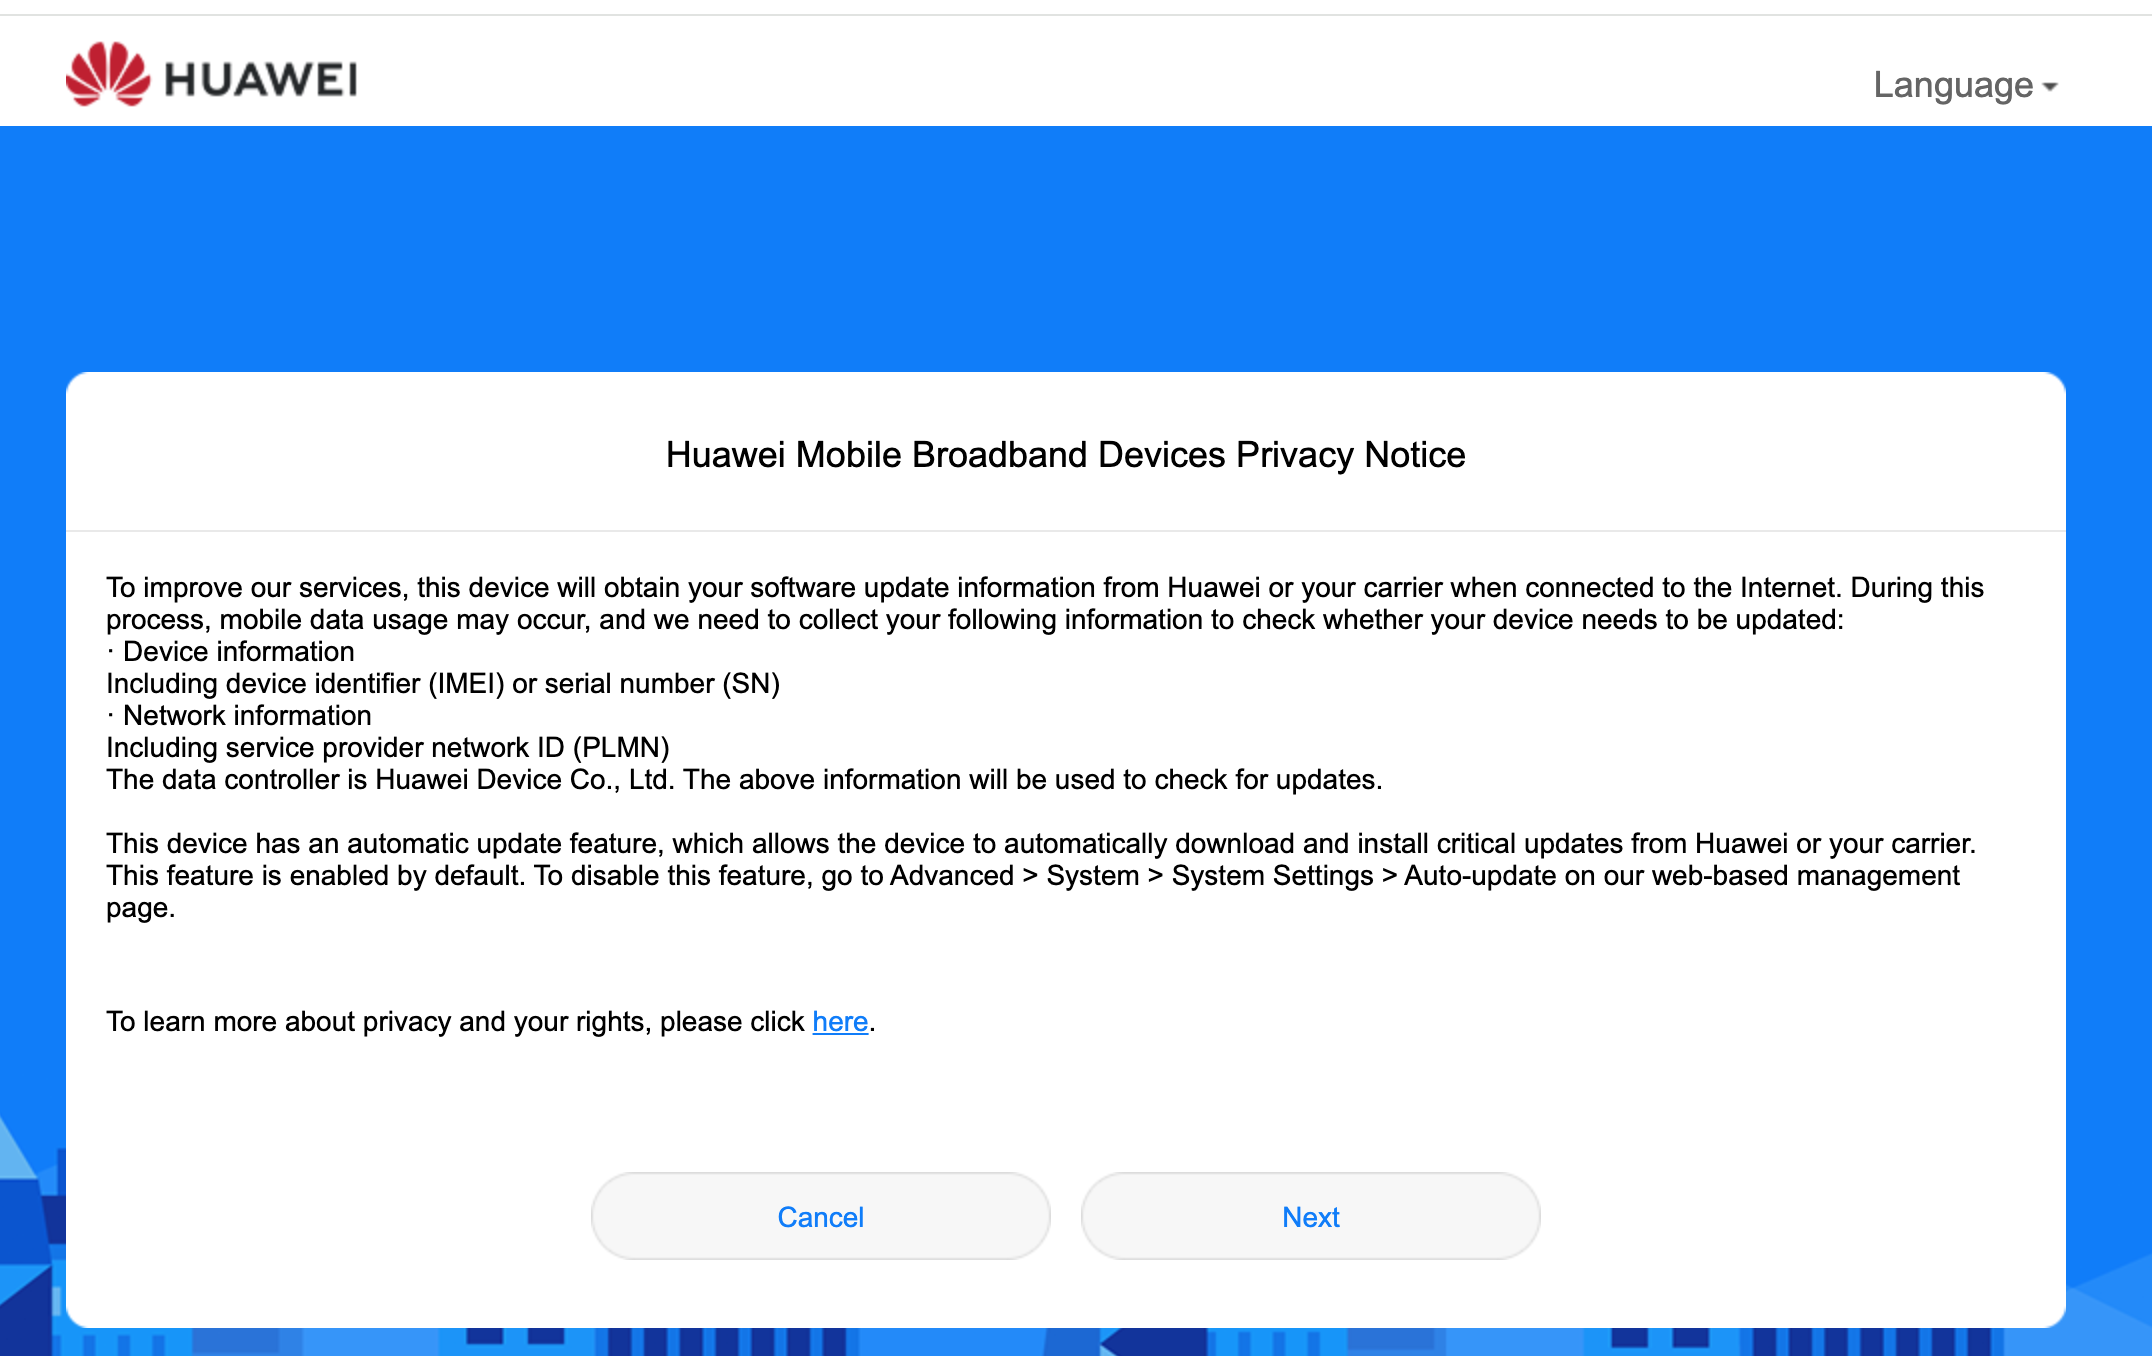
Privacy notice — click Next to continue.
User agreement — click Agree.

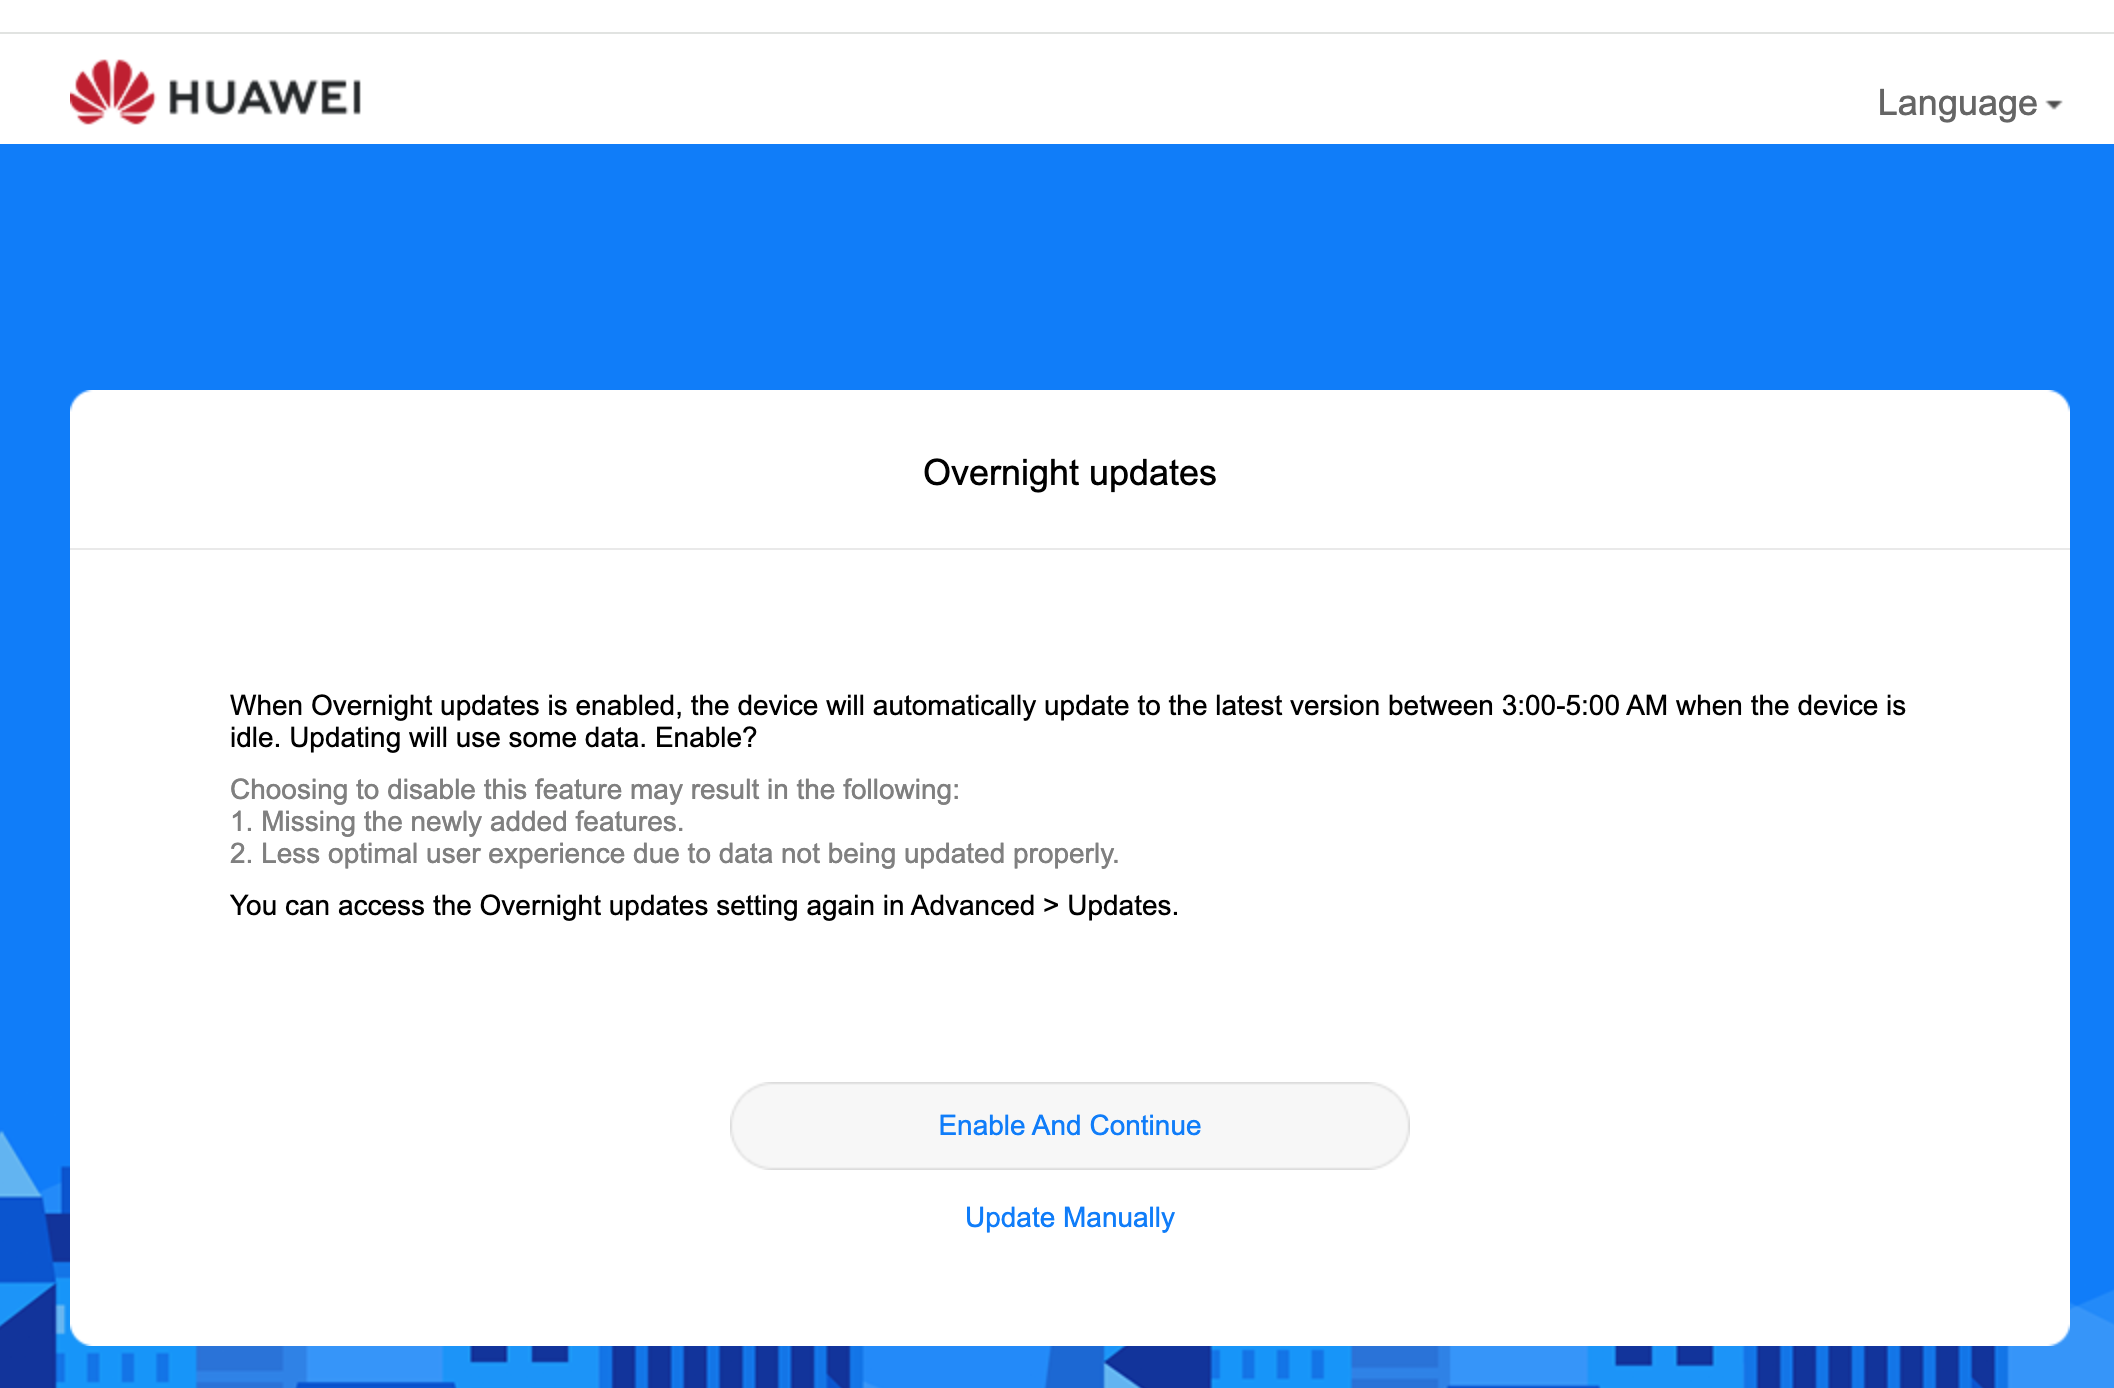
Overnight updates — the router can download firmware updates automatically between 3 am and 5 am. This uses mobile data. If you are on a limited data plan, you may want to decline.
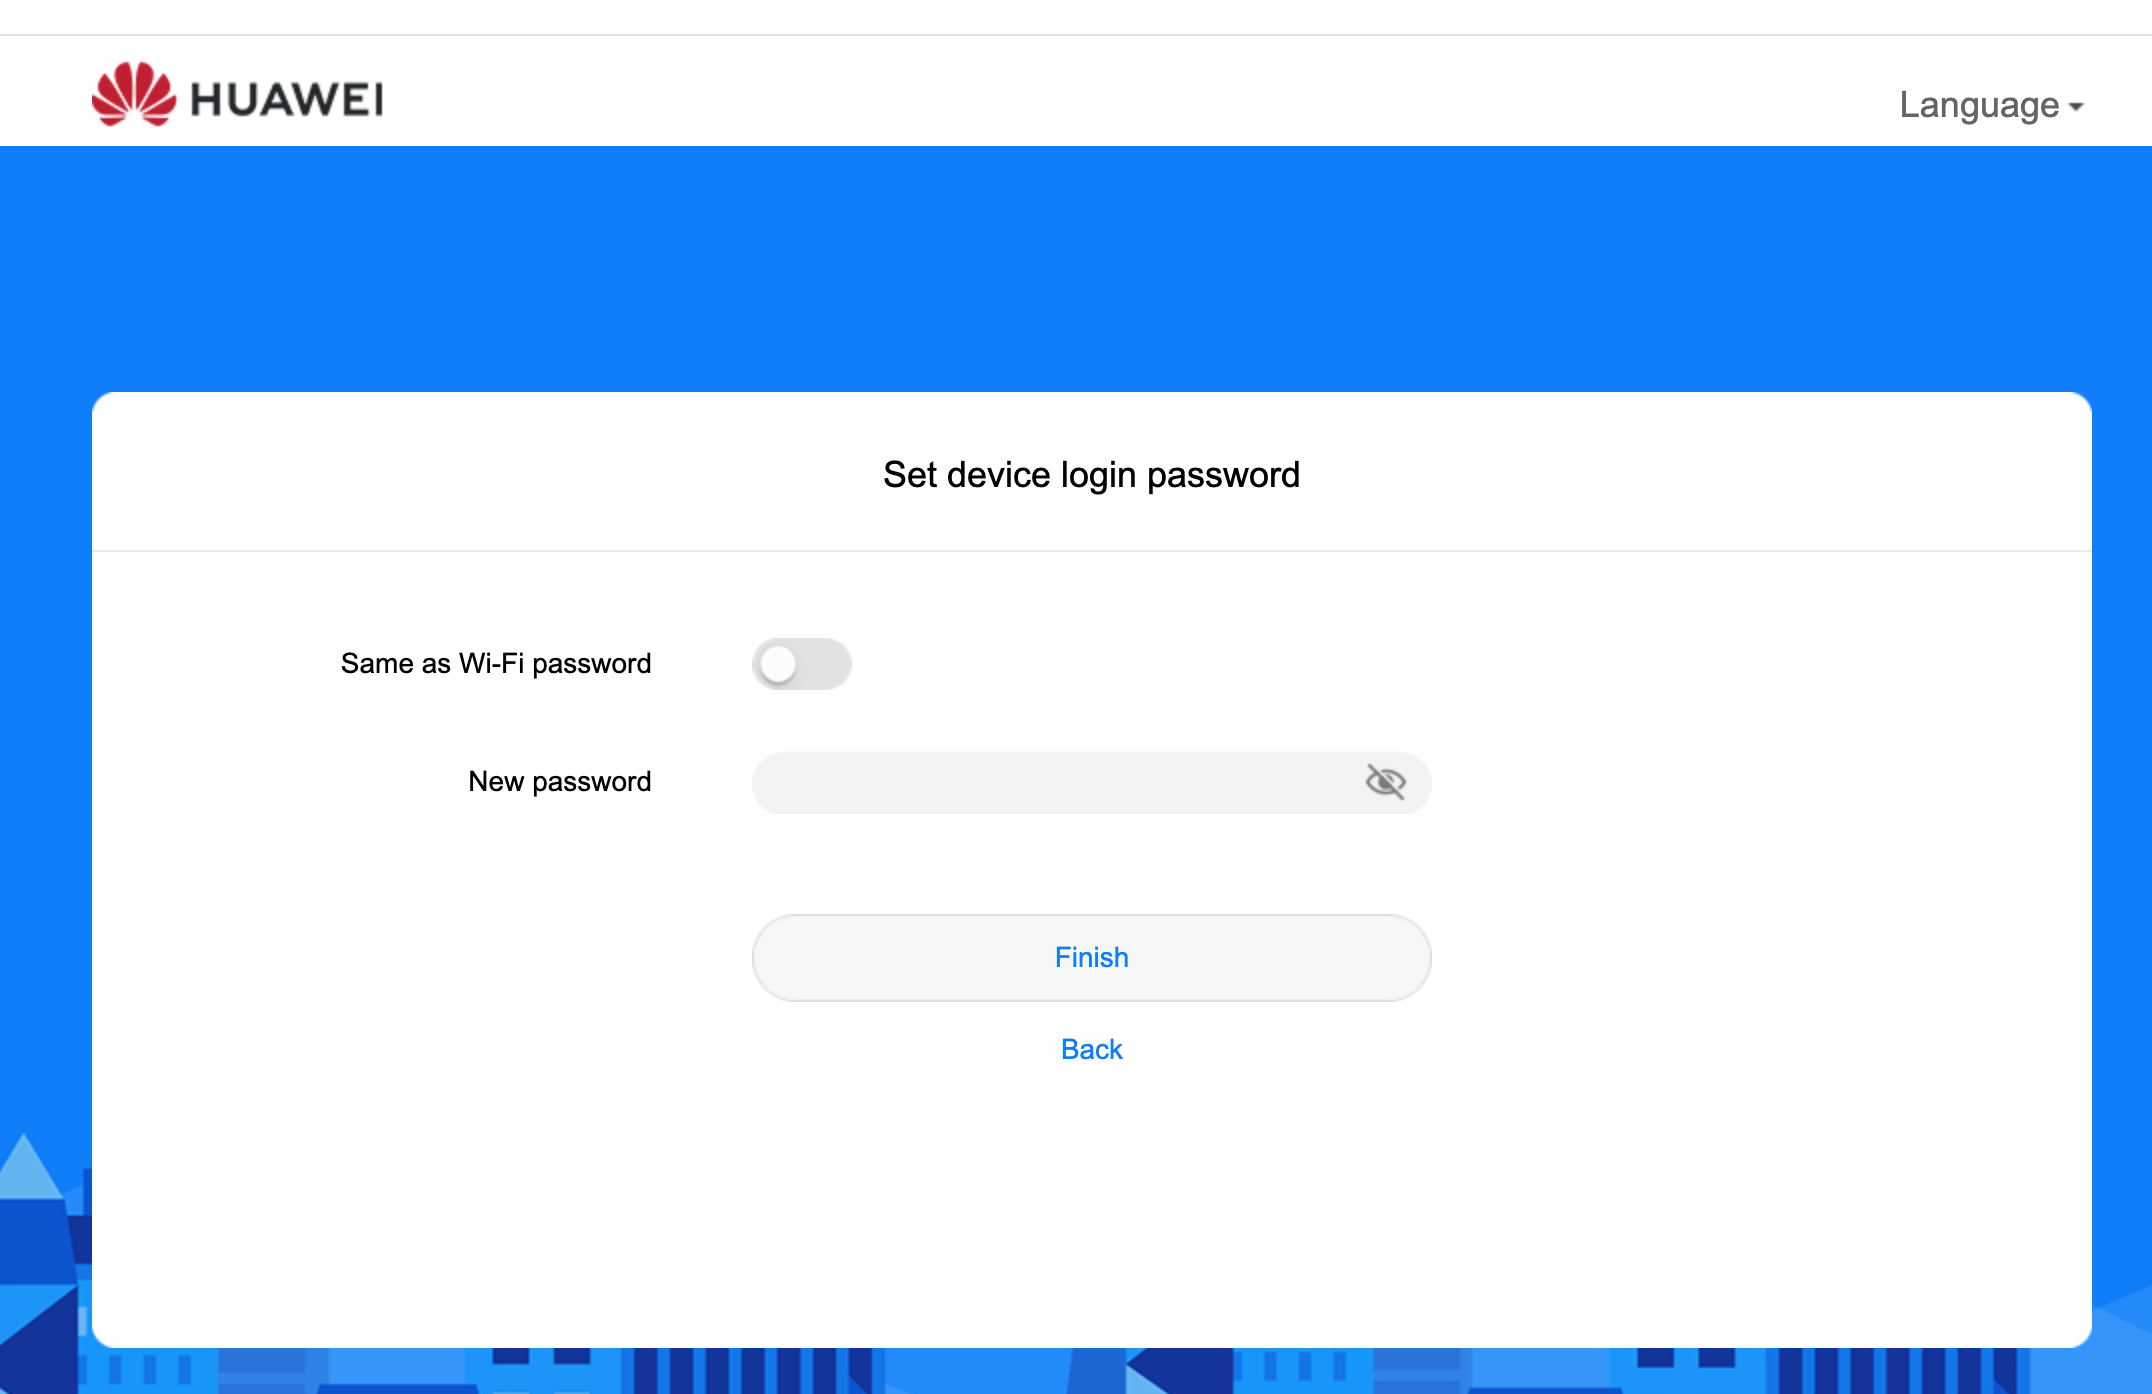
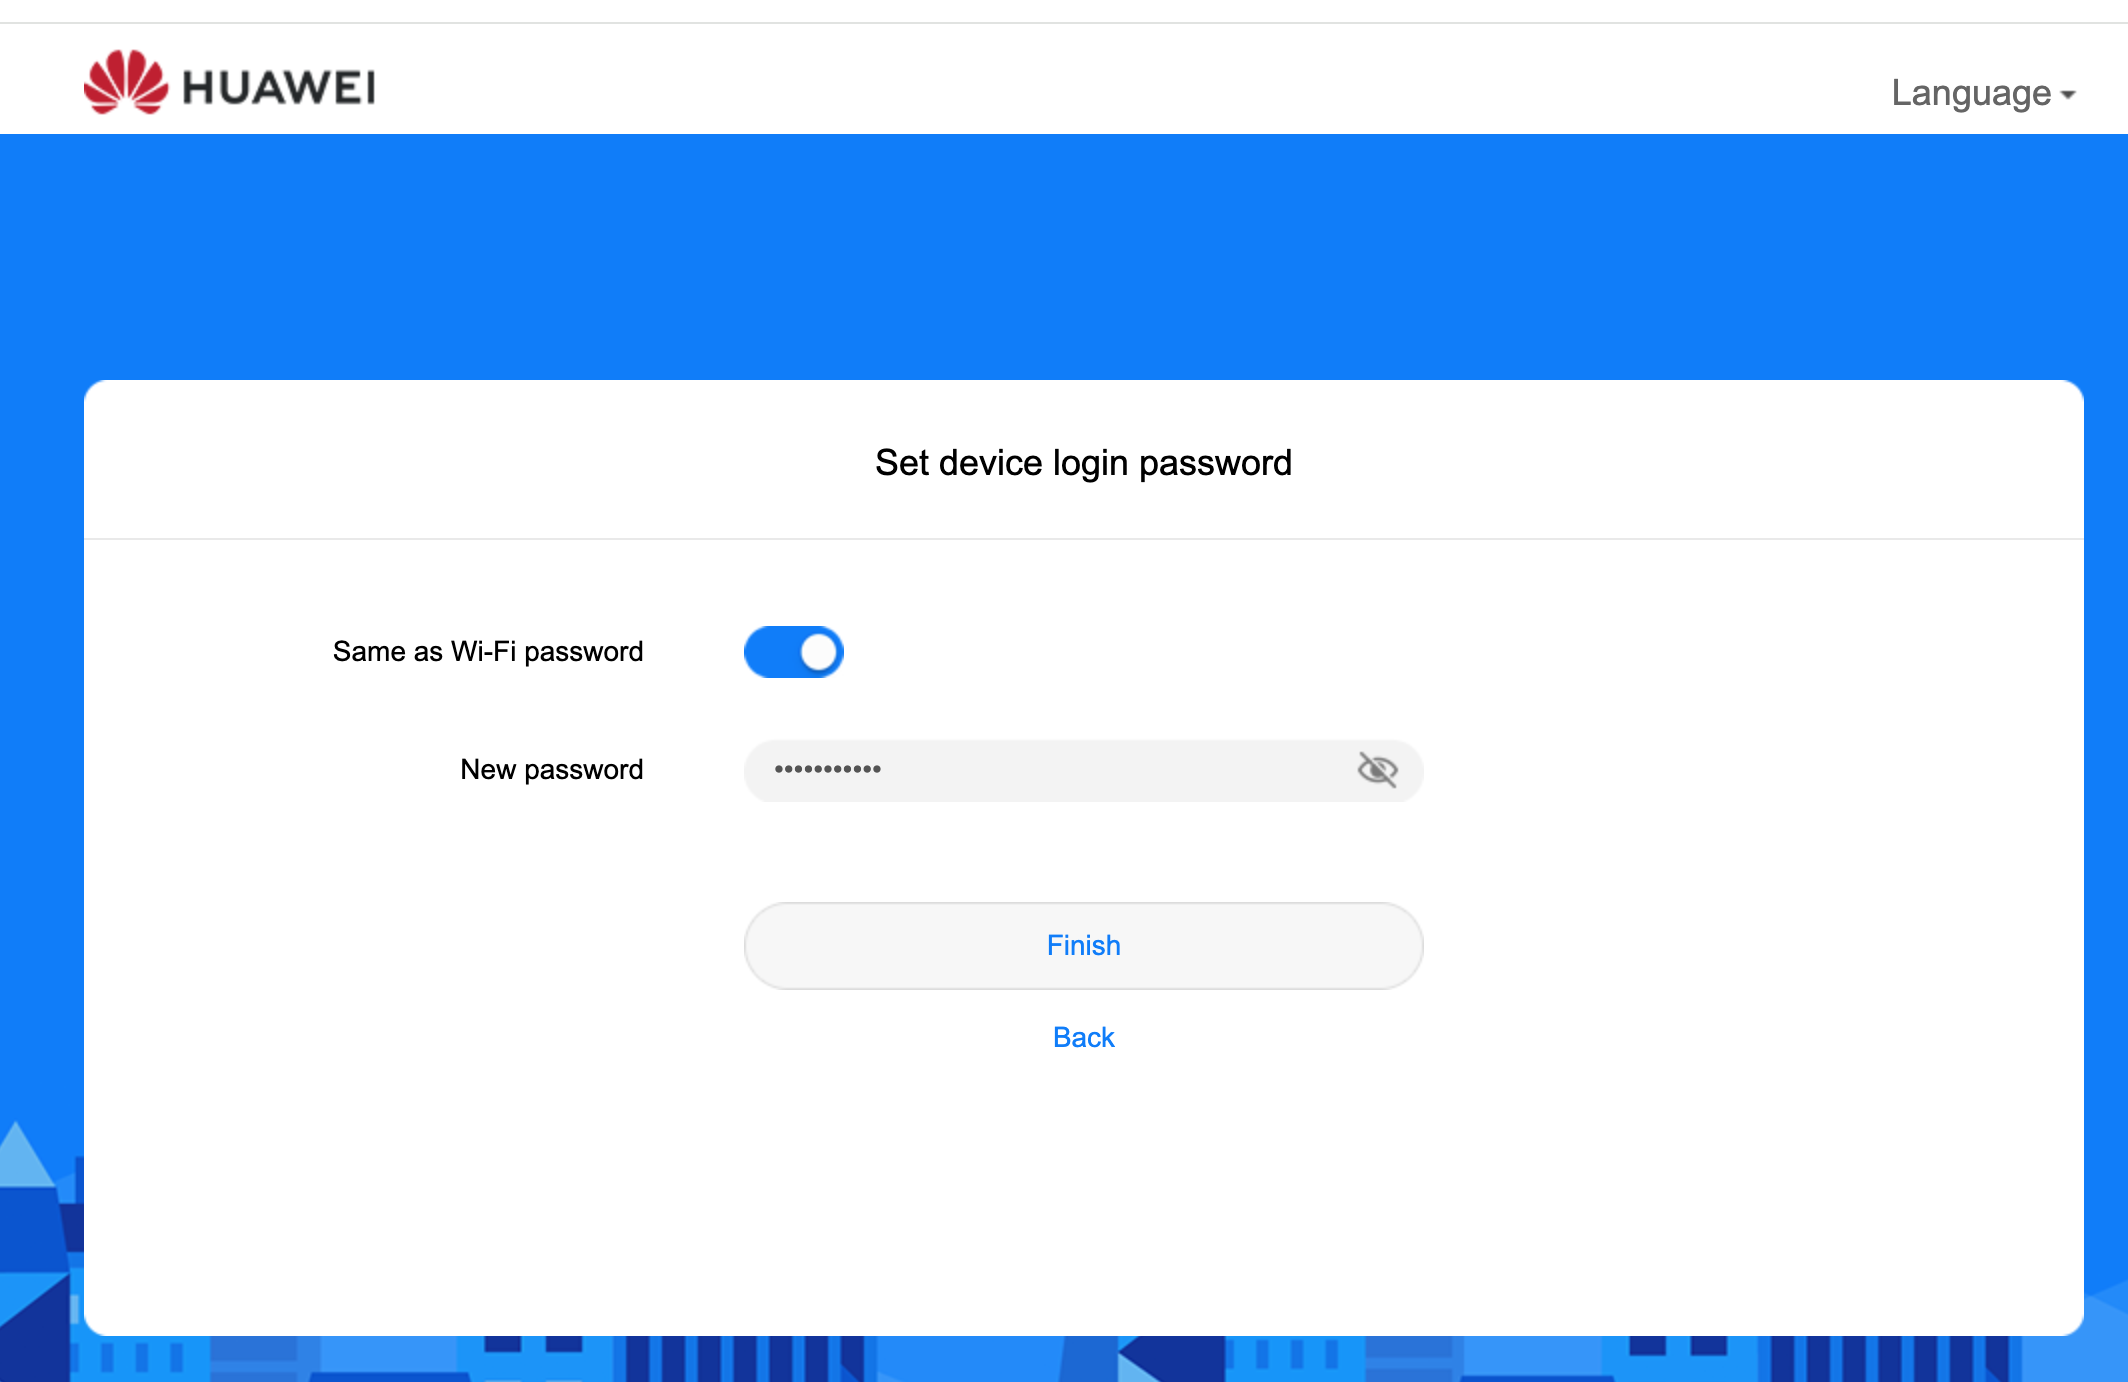
Set a new admin password — you must set a new password before you can proceed. We recommend using the same password as your WiFi to keep things simple. Enable the Same as Wi-Fi password toggle, then click Finish.
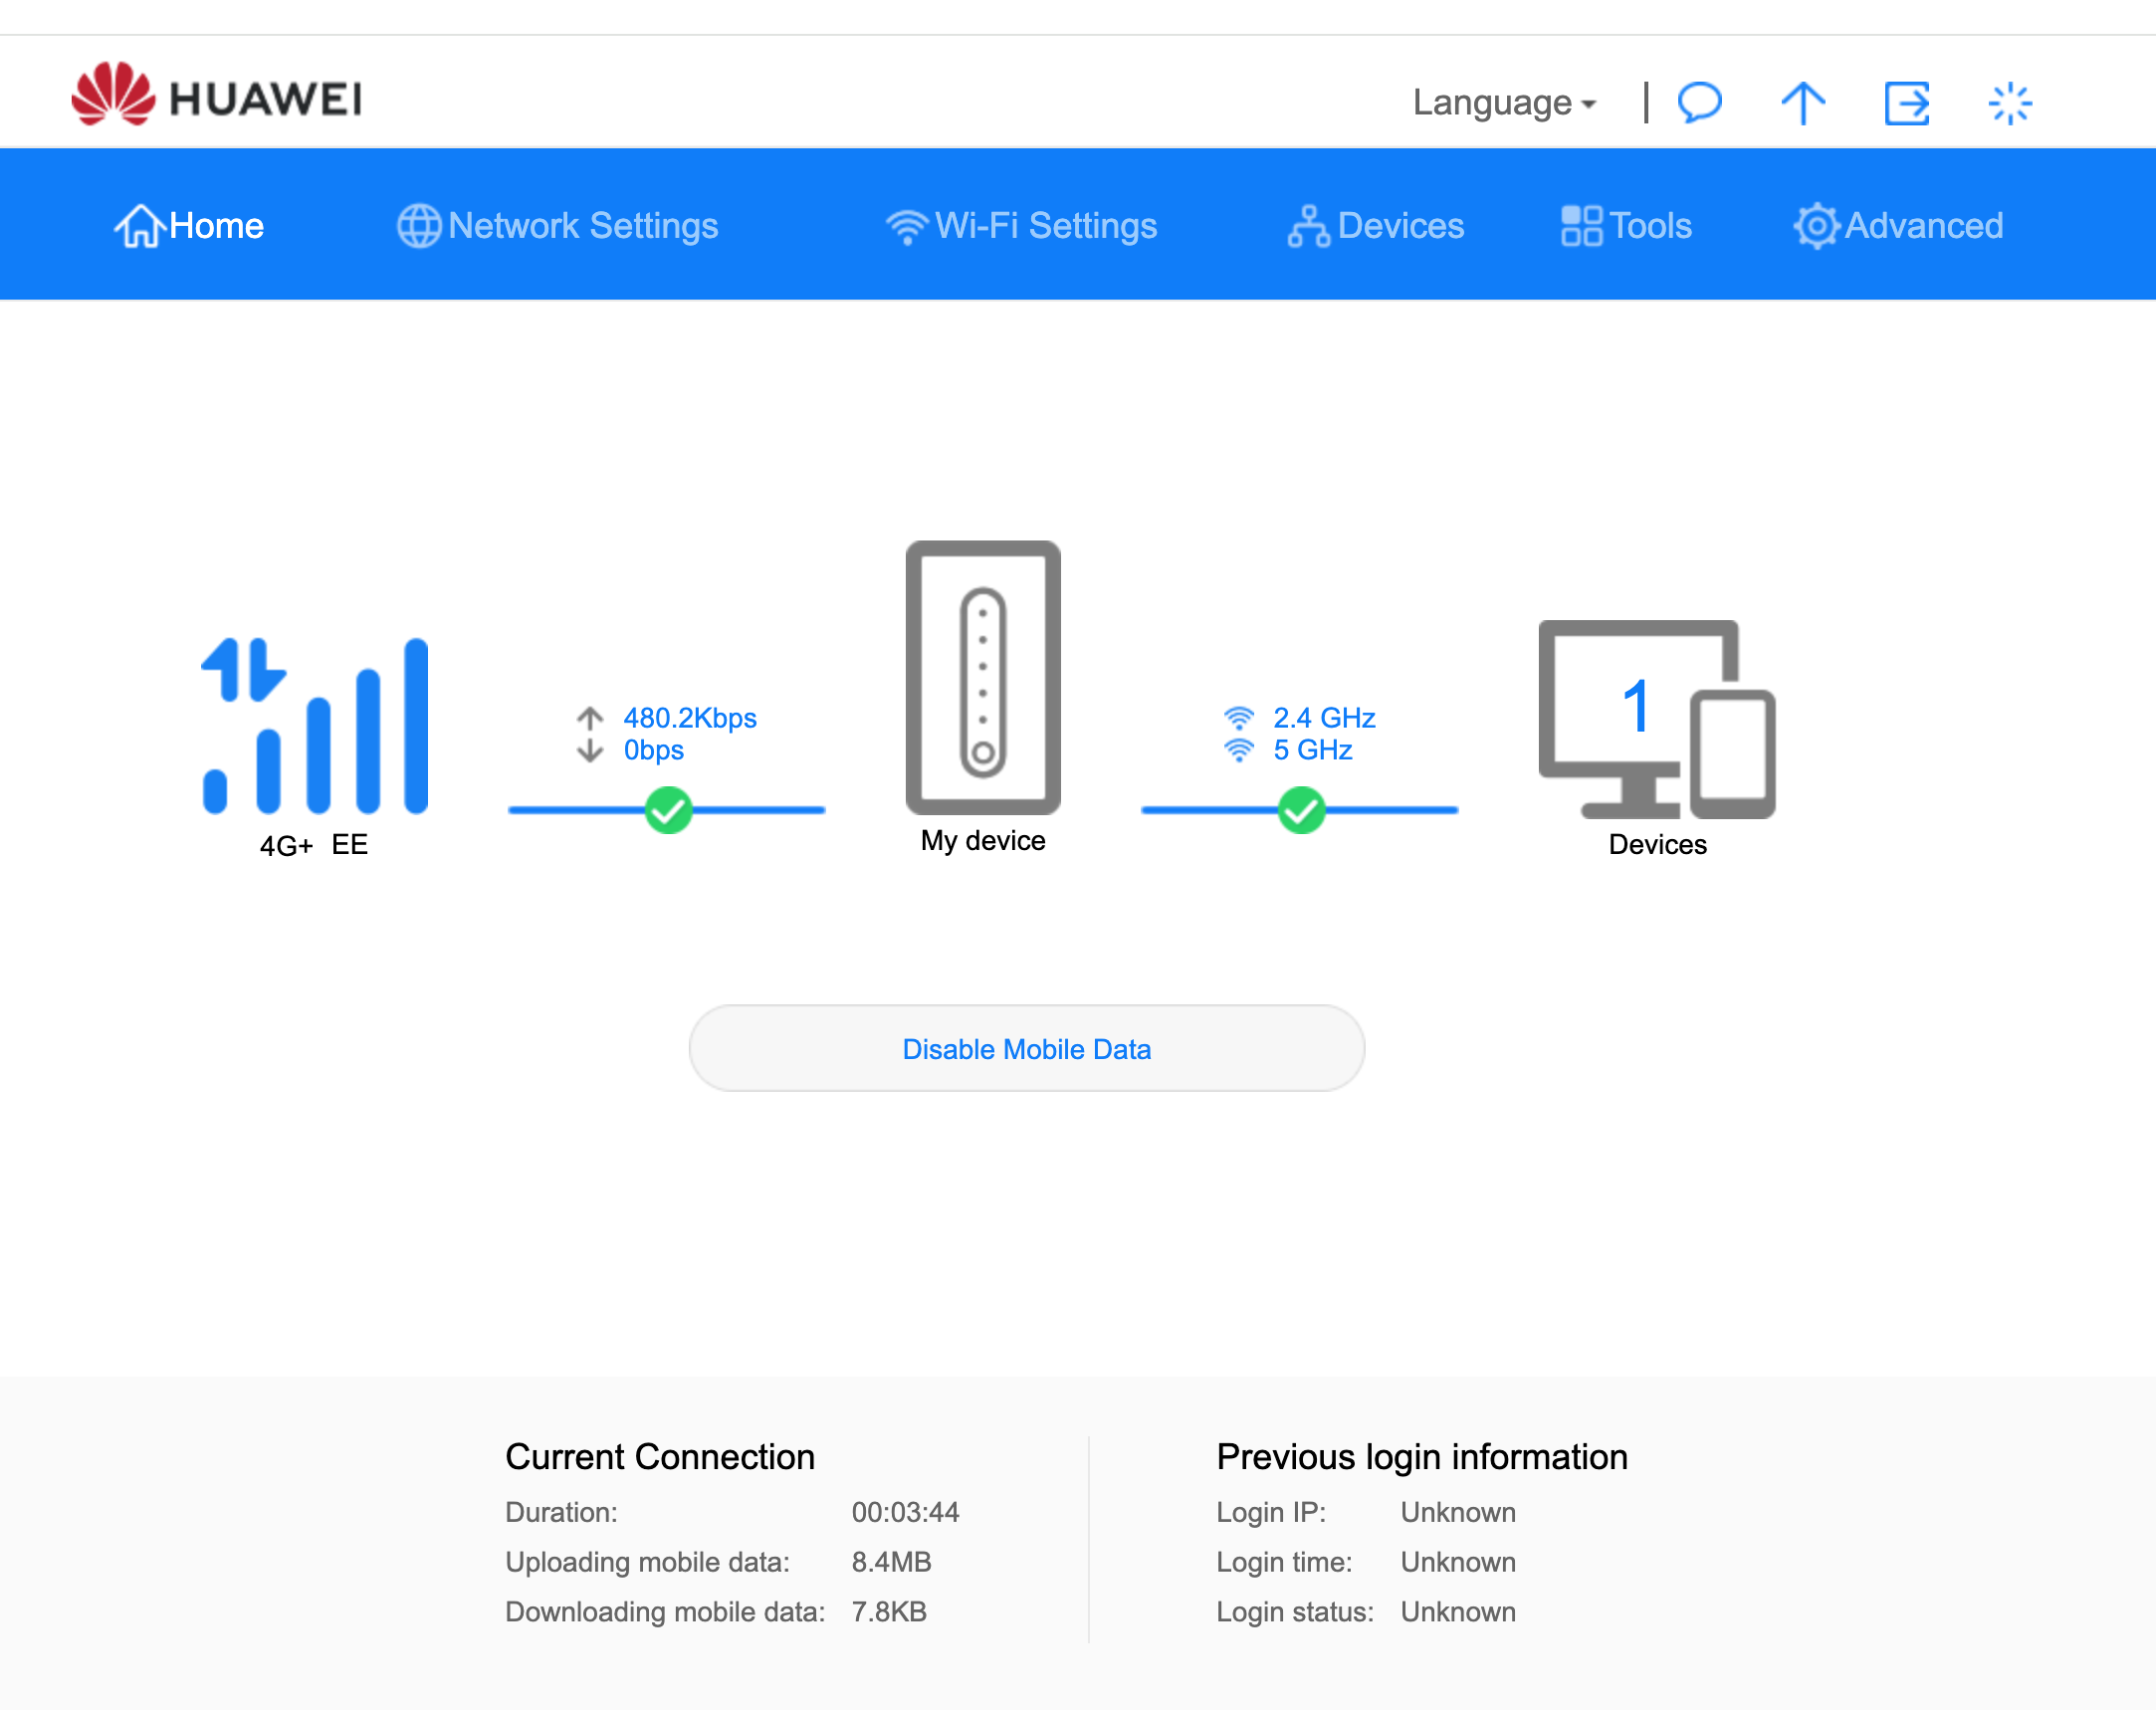
Once setup is complete you will land on the router home screen. If the router has already picked up signal you may see a 4G or 4G+ connection shown here — but internet access will not work until the correct APN is configured in Step 5.
Step 5 — Configure the IQ Mobile APN
Go to Settings → Mobile Network → Internet Connection.
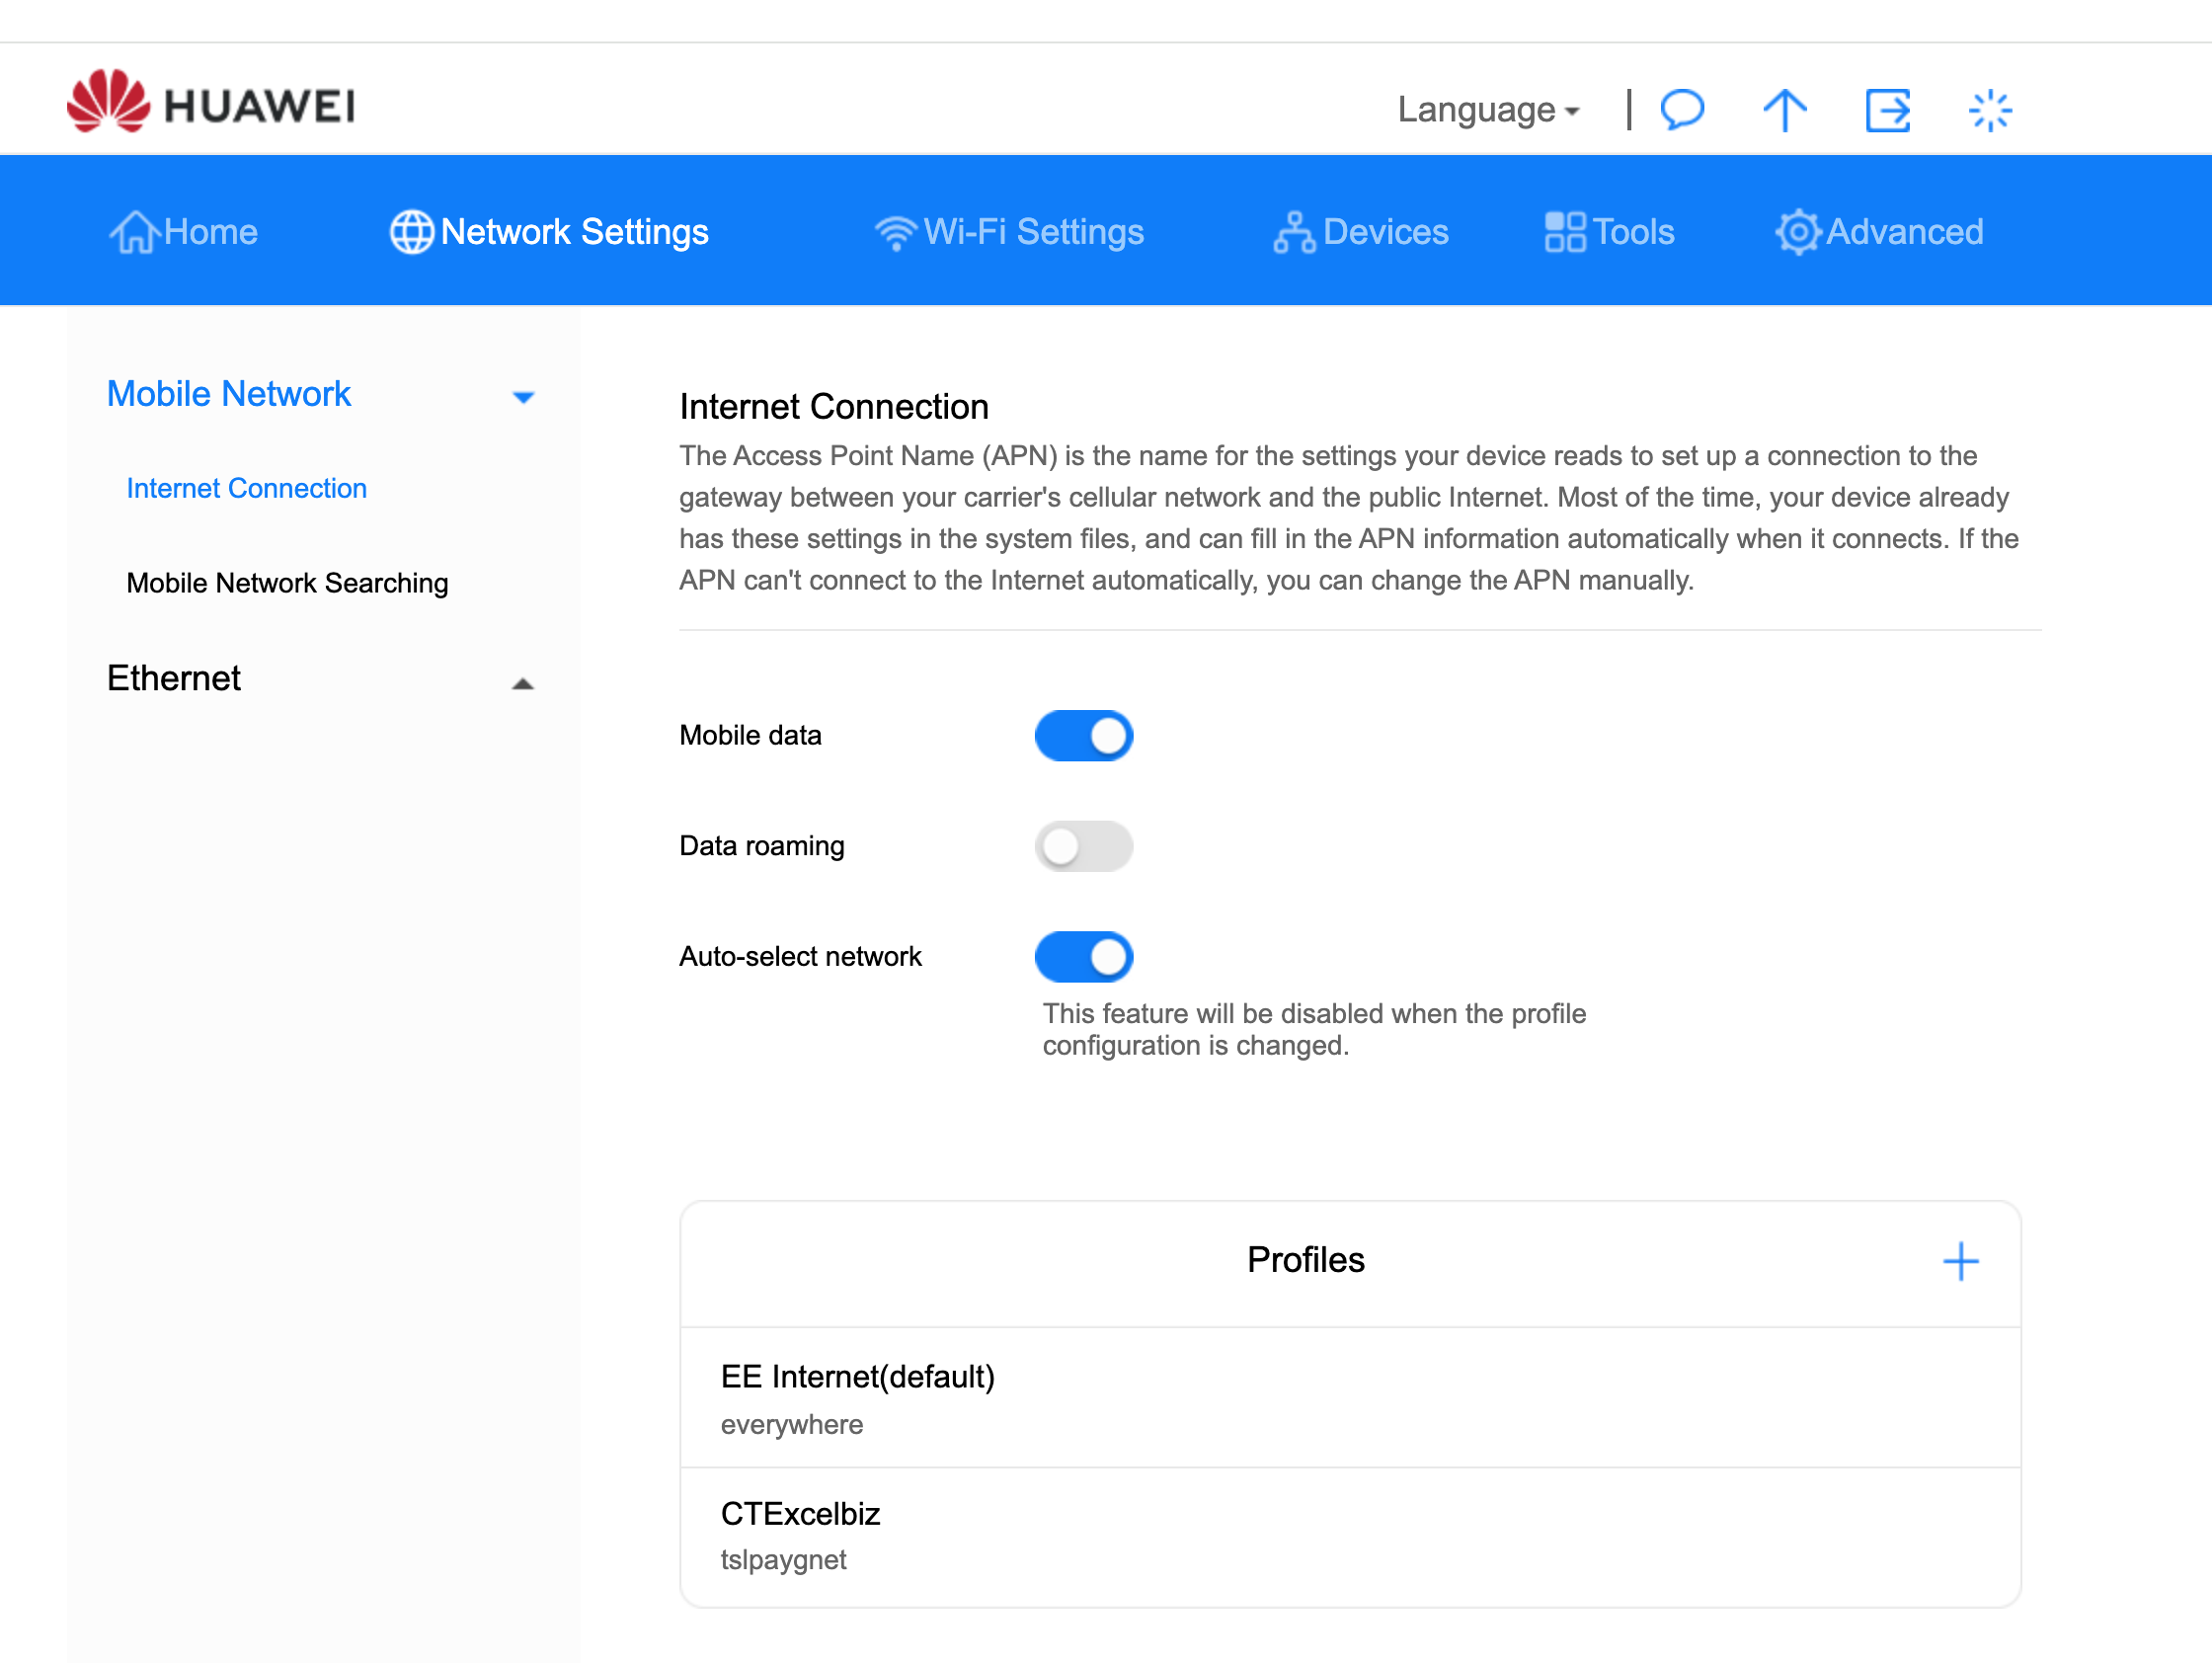
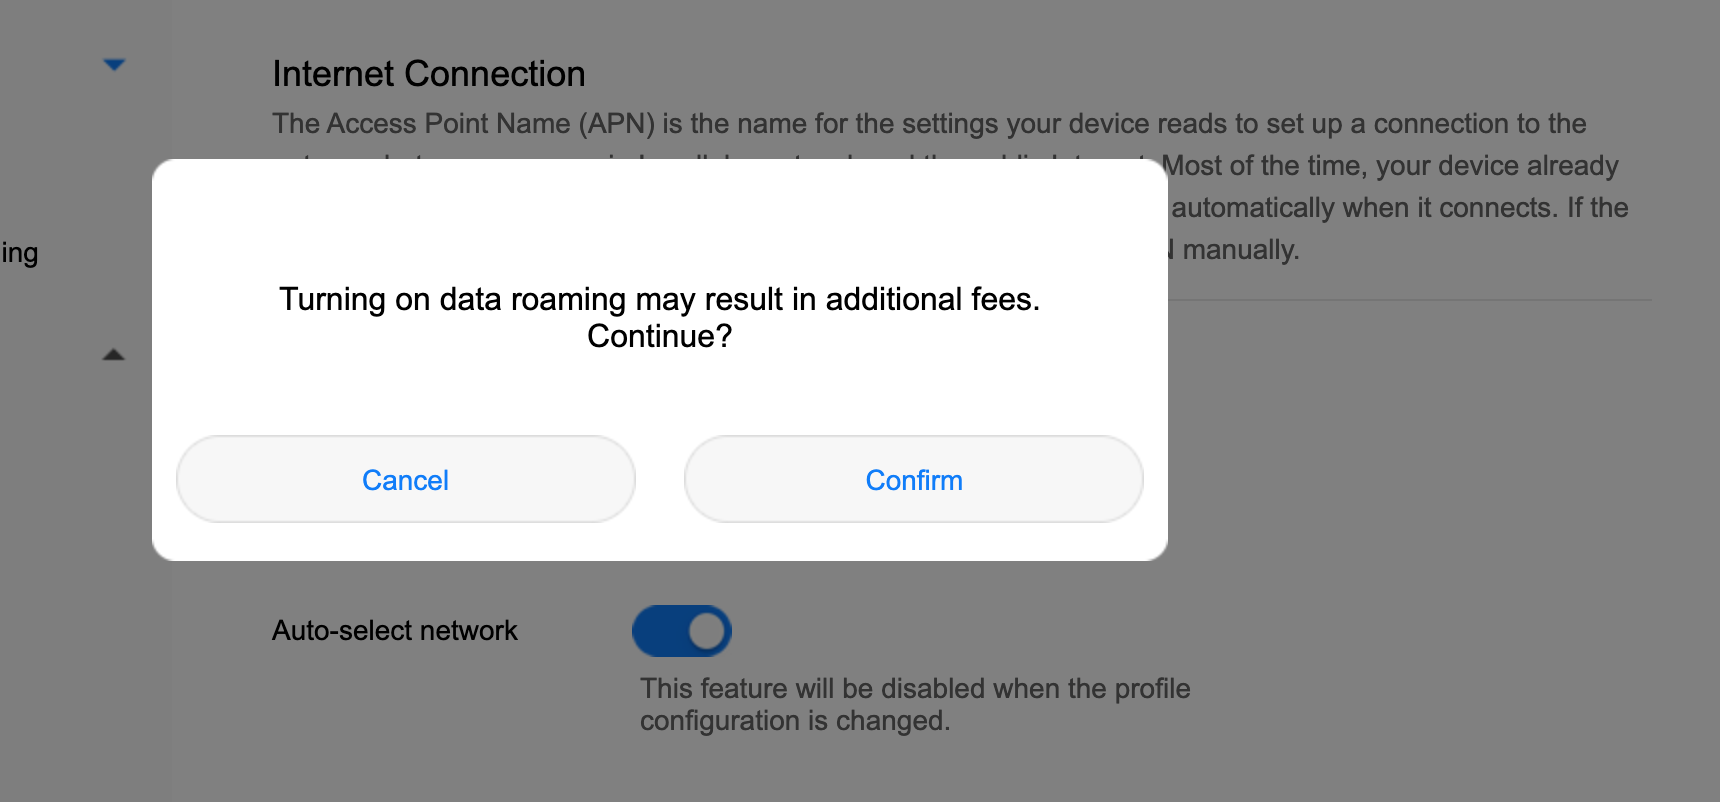
If Data roaming is turned off and you need it enabled, click the toggle. The router will show a warning — click Confirm.
Scroll down to the Profile Management section and click New Profile to add the IQ Mobile APN.
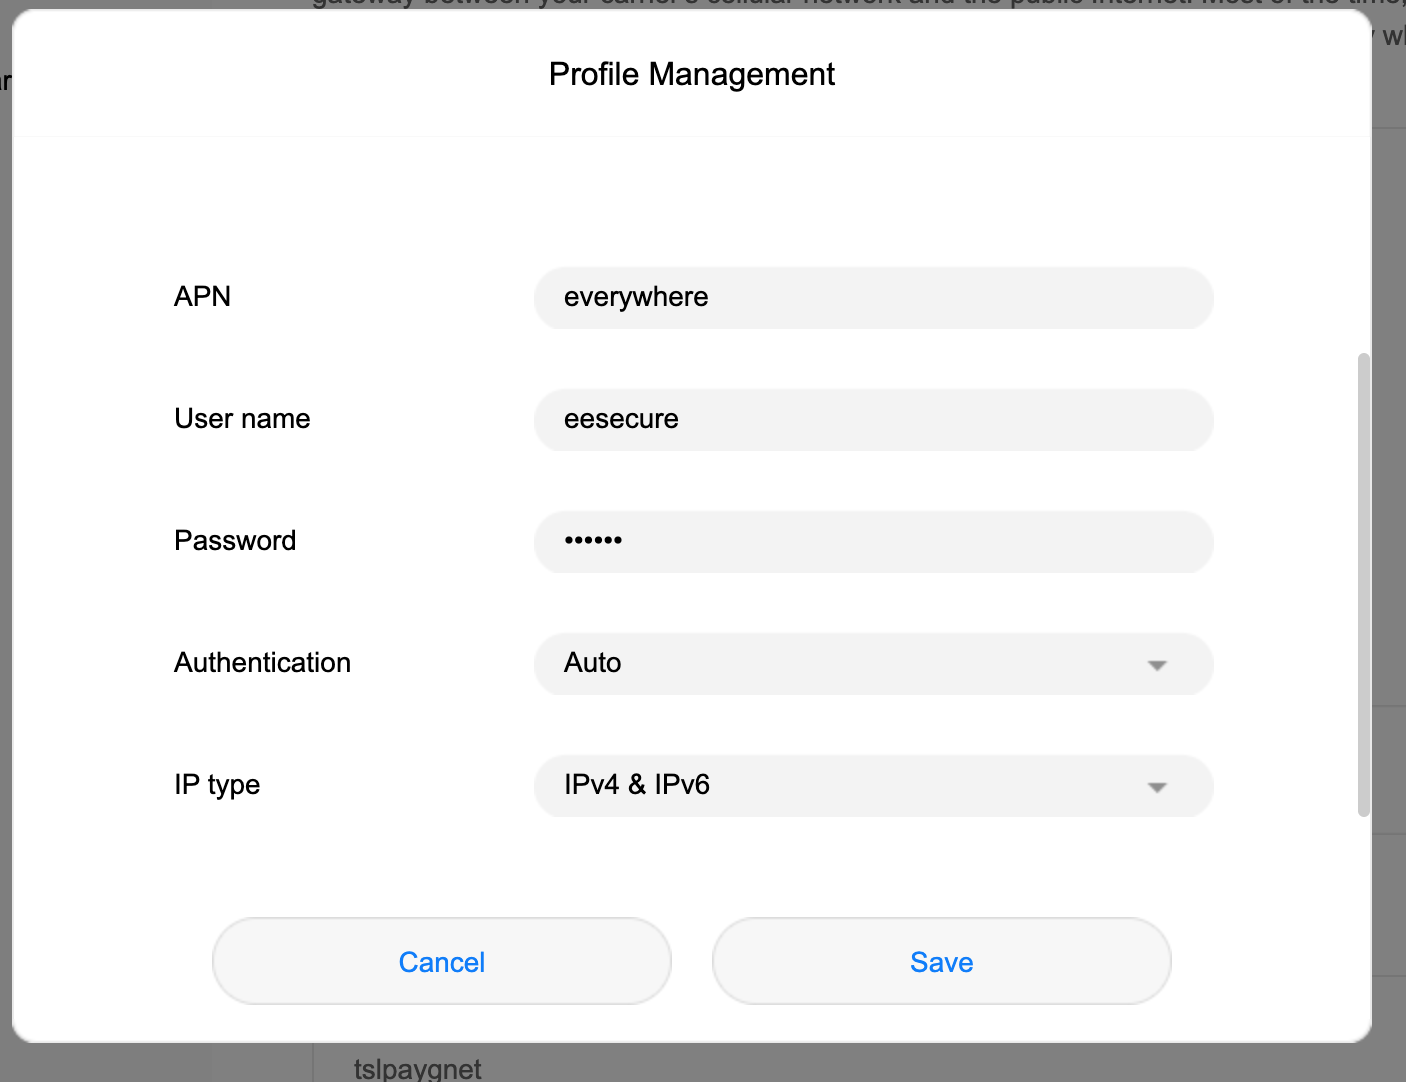
Fill in the profile as follows:
| Field | Value |
|---|---|
| Profile name | IQ Mobile |
| APN | everywhere |
| User name | eesecure |
| Password | secure |
| Authentication | Auto |
| IP type | IPv4 & IPv6 |
Tick Set as Default Profile, then save.

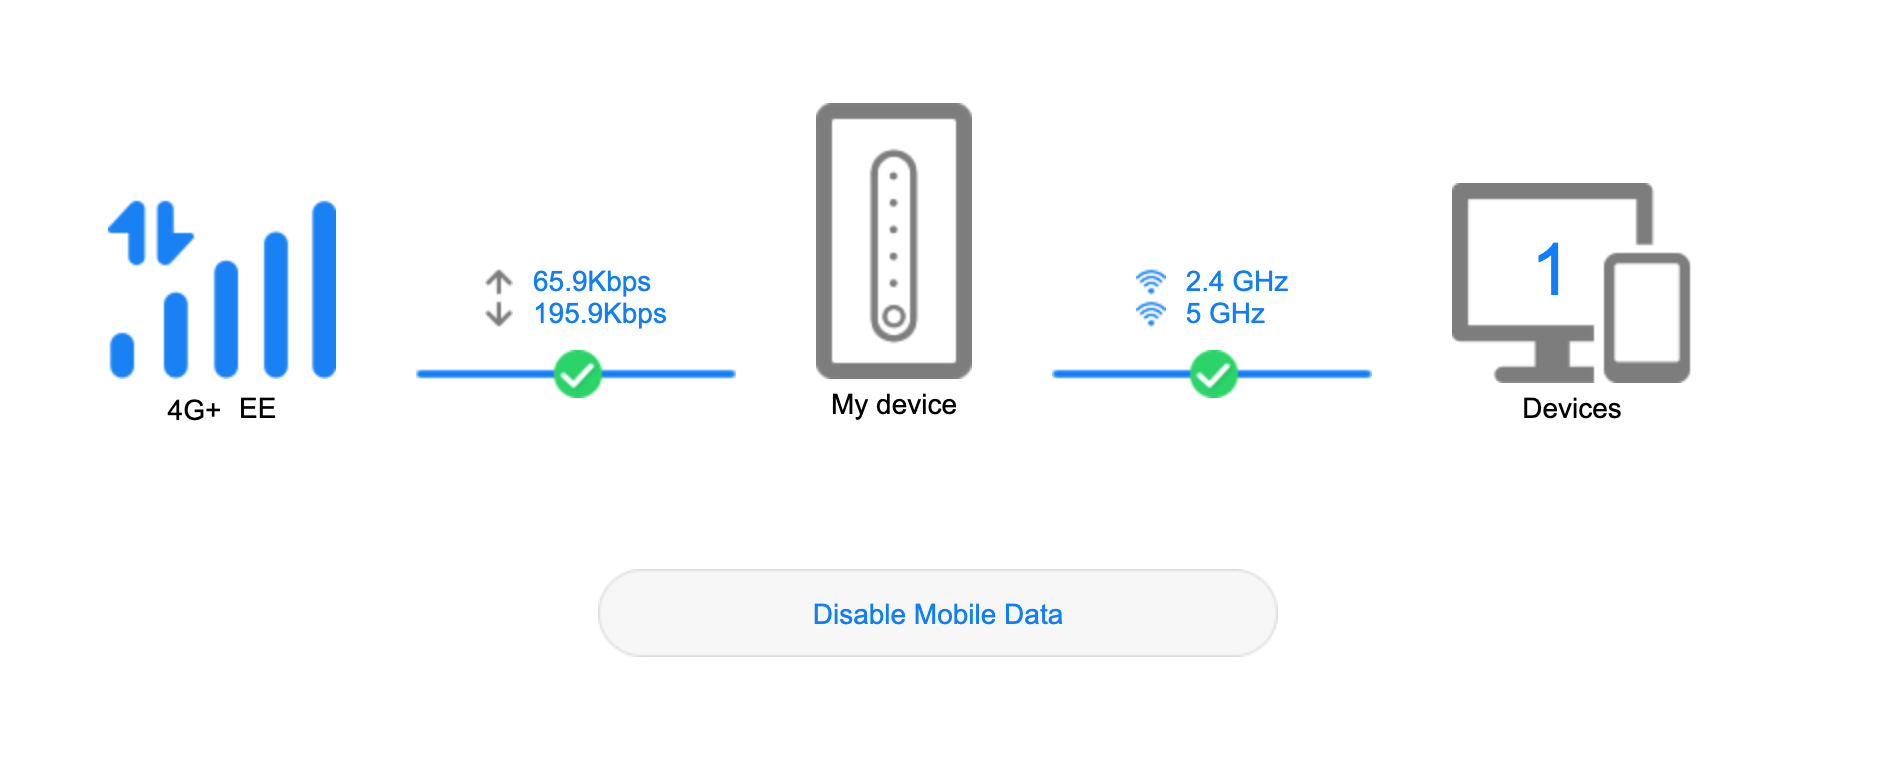
The router will reconnect using the new APN. Return to the home screen — you should now see an active internet connection.
Step 6 — Select the EE network manually (if needed)
If the router connects to a different network or shows no signal, you can force it to use EE.
Go to Settings → Mobile Network → Network Search and set Network search mode to Manual.
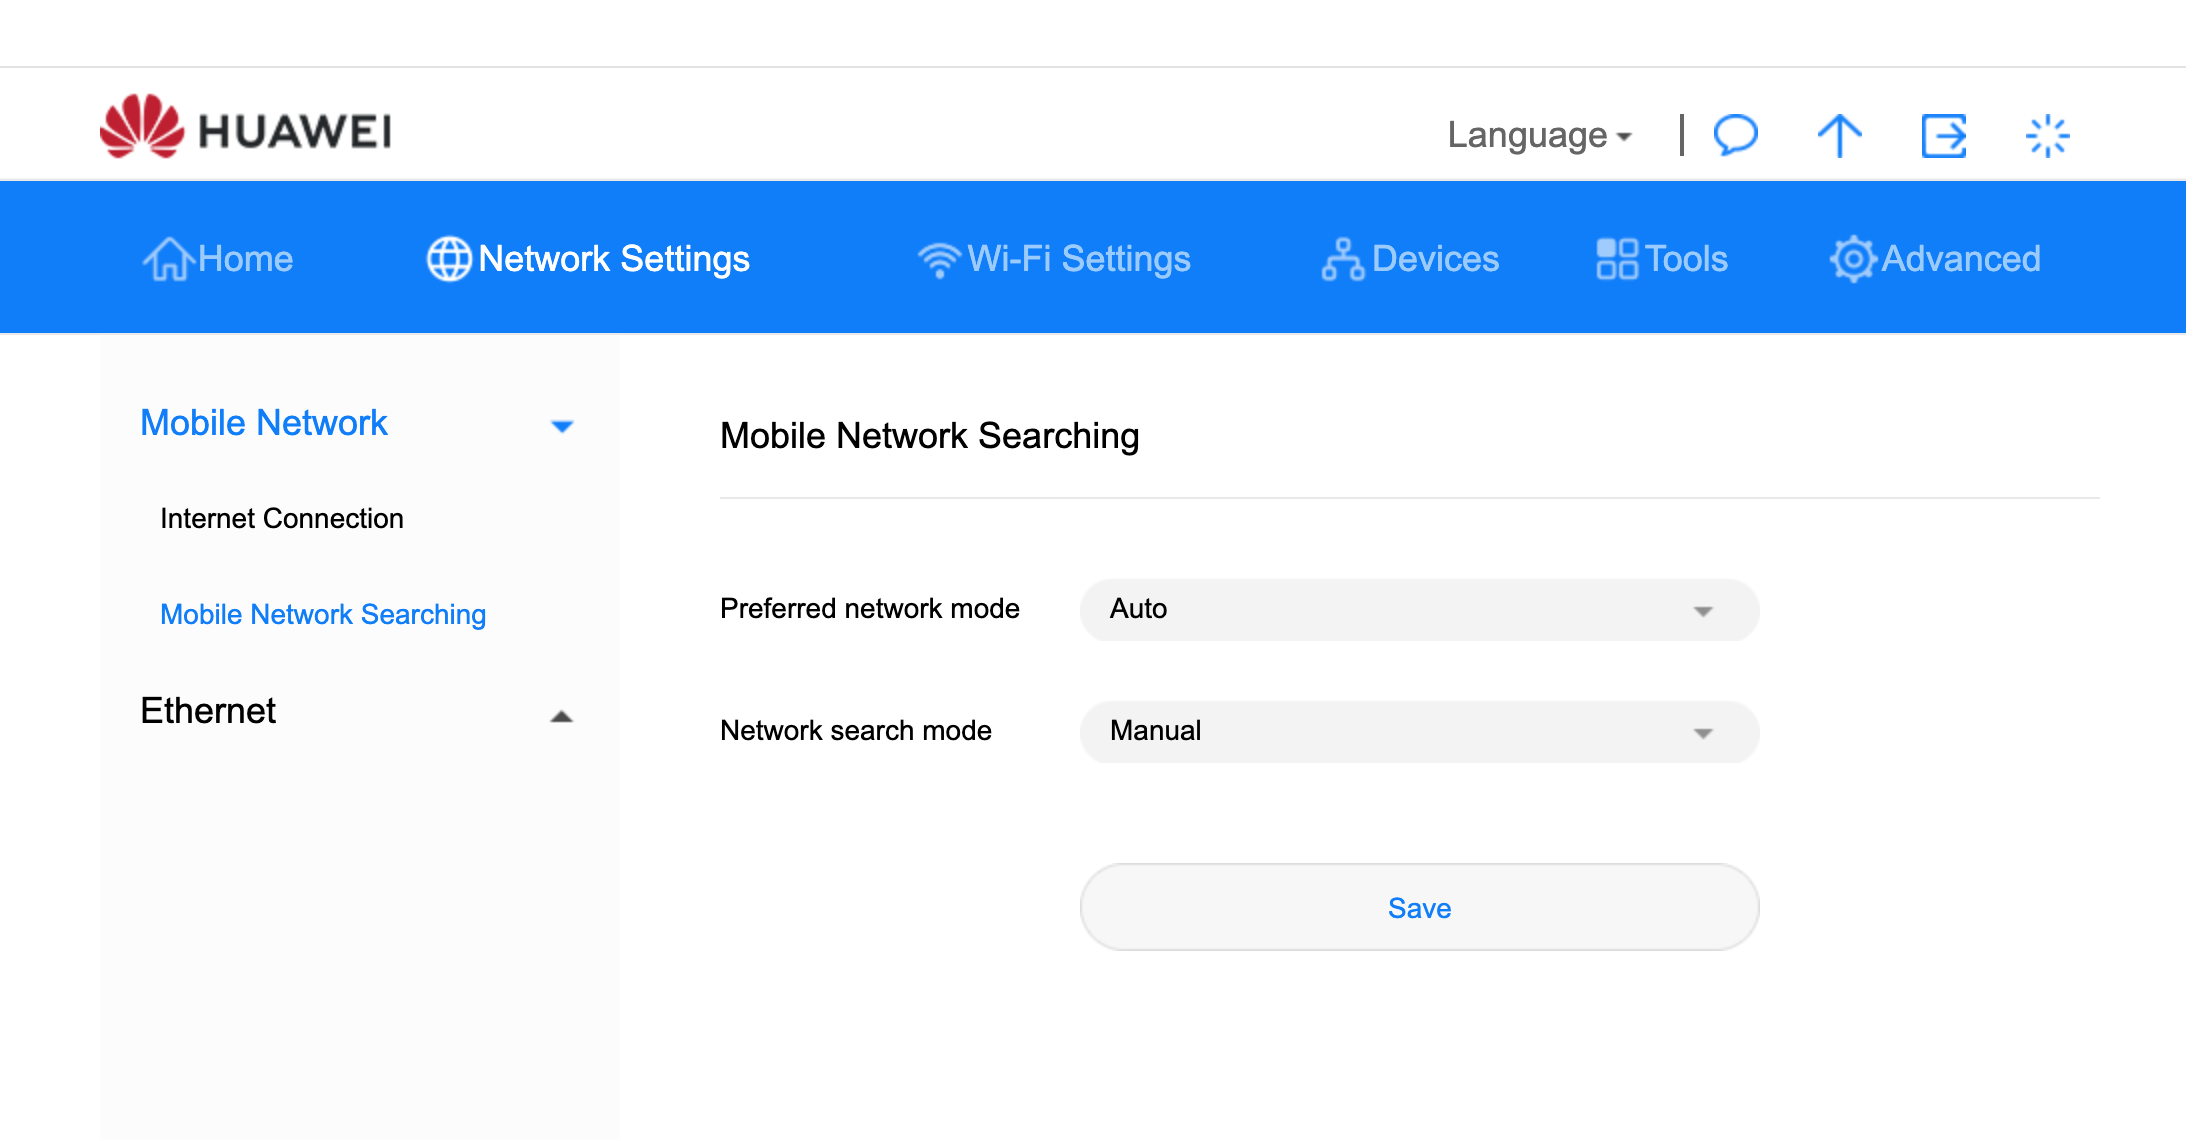

Wait for the router to scan for available networks, then select EE from the list. The router will reconnect on EE.
Once connected, return to the home screen. You should see live upload and download activity, confirming the router is online.
Troubleshooting
No signal after inserting the SIM — check the SIM is seated correctly in the slot and that the router has been powered off and back on since insertion.
"No internet access" despite a 4G signal — the APN is likely incorrect. Return to Step 5 and verify every field matches exactly, including the correct capitalisation of everywhere, eesecure, and secure.
Forgotten the admin password — if you set it to match your WiFi password, try that first. If locked out, hold the reset button (small pinhole on the back) for 10 seconds to restore factory defaults, then repeat this guide from Step 4.
Still need help?
Our UK-based team is here for you